What is it and why should I use it
Seed lists are a predefined set of values. You can use them to mask data using reference data, that will allow you to have consistent and repeatable values in your masked data.
This manual will take you through the steps to use seed lists in your masking activity. In the example we will use a seed list of first names.
Create or choose a seed list
Here we are reviewing the list of available seed lists, to decide which one will be used.
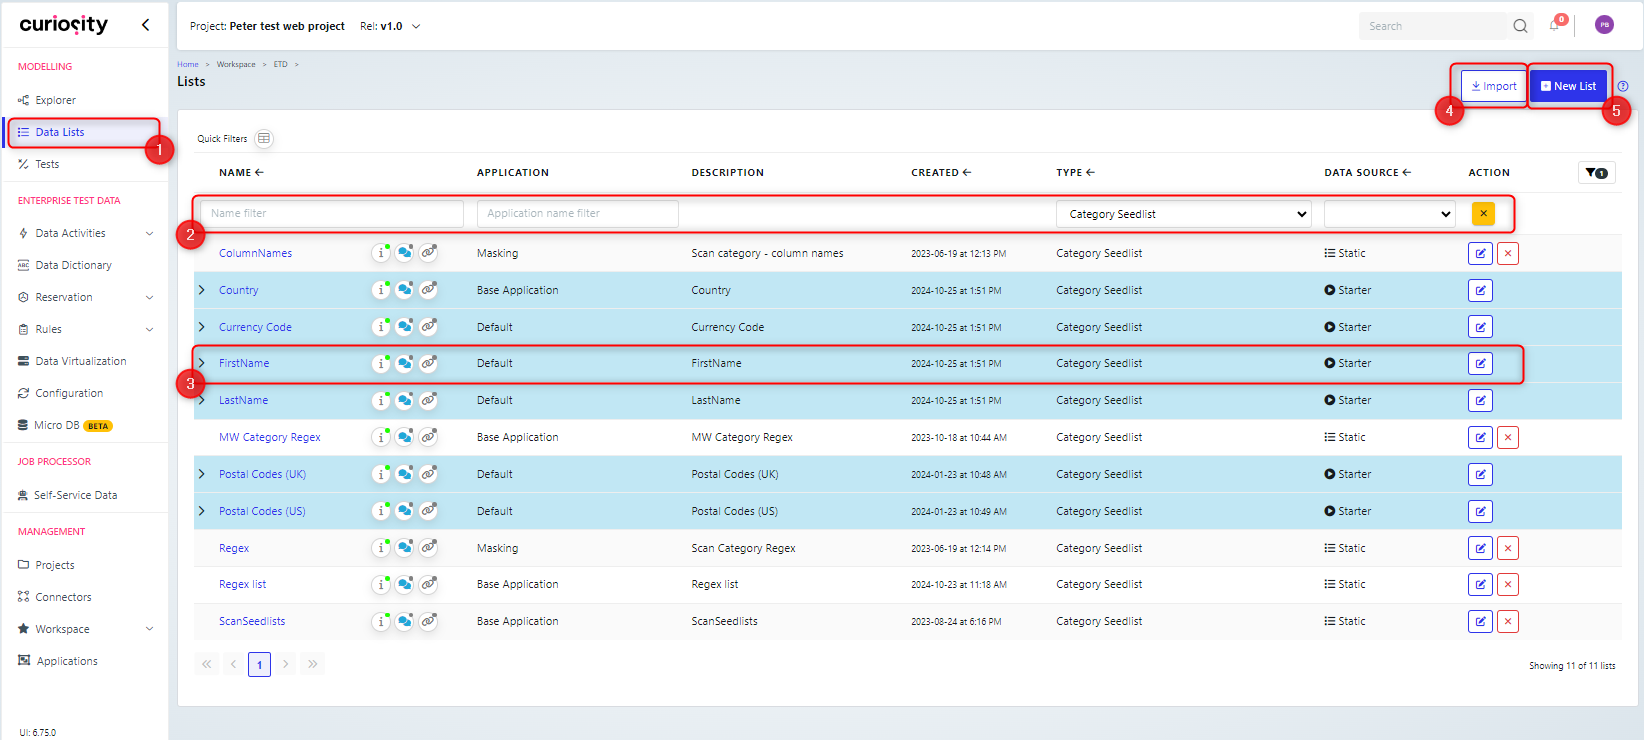
On the Curiosity Platform, select Data Lists (1)
As there is a very long list of datalists, we have filtered for type being ‘Category Seedlist (2)
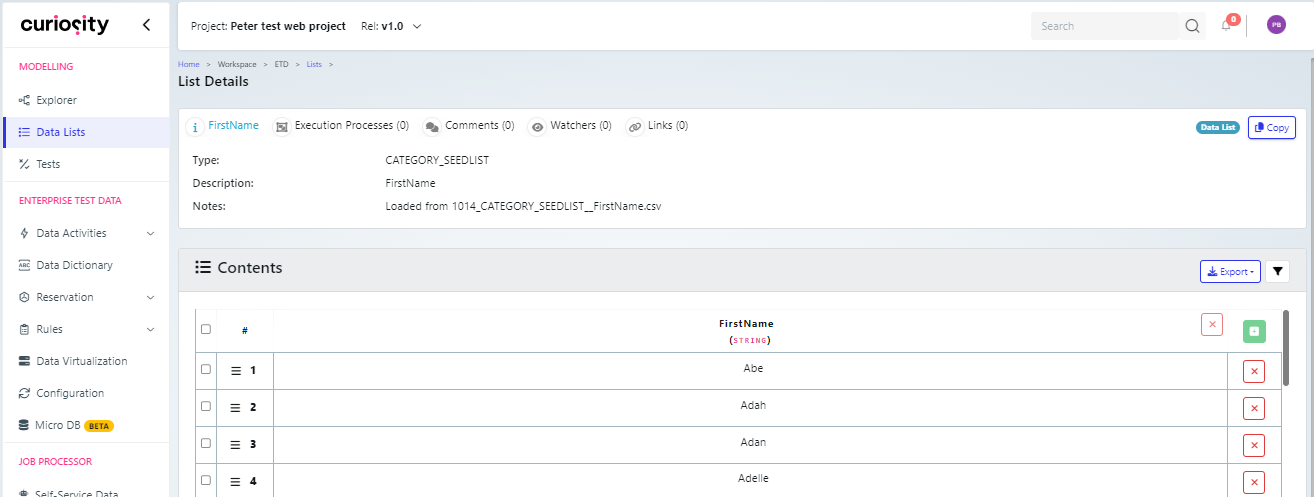
If we open the FirstName list (3) then we can confirm it is a list of first names that we could use.
Note that we could either import (4) or generate (5) a new list.
If you import a list, you cannot set the type on import, but you can subsequently edit the list to set the type to ‘Category Seedlist’.
If you create a list then you can set the type to ‘Category Seedlist’ on creation.
Importing a Seed List
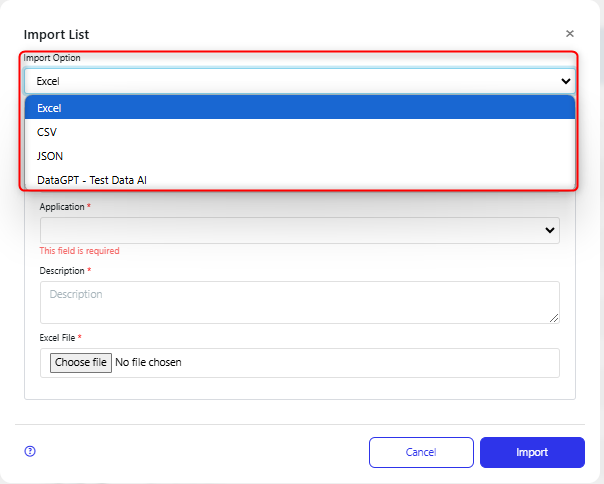
When you import a data list, there are a few options for the import. There are three files types you can import from: Excel, CSV, JSON.
Excel and CSV files
When importing an Excel or CSV file, you need to:
Name the list (1)
Choose the application to run the import (2)
Give a description (3)
Select the Excel or CSV file (4)
If an Excel file is being imported, then choose the sheet to be imported from (5)
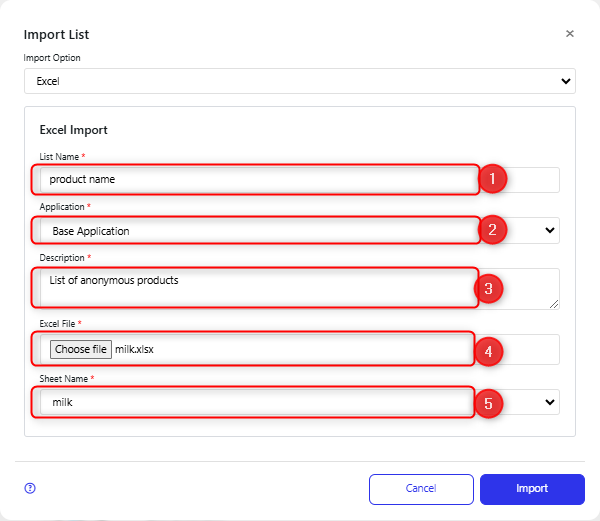
On clicking import, the data list will be imported and available in the list.
JSON file
When importing a JSON file, you need to:
Name the list (1)
Select the JSON file (2)
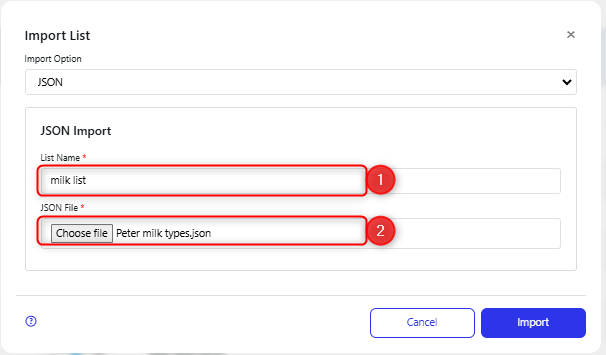
On clicking import, the data list will be imported and available in the list.
You can also generate a list using AI, which is covered in the section creating a seed list using AI.
Creating a Seed List
When you click New List, the New List dialog will be presented for you to:
Name for the list (1).
Choose the type of list (2).
Choose the application to create the list (3).
Give a description of the list (4).
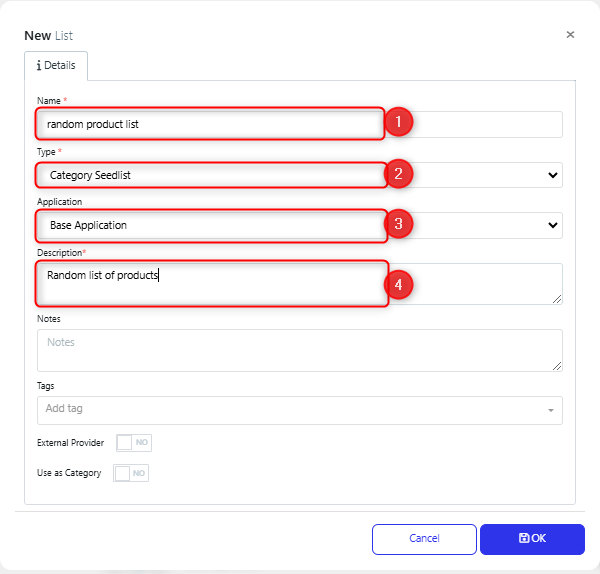
You can then open your new data list.
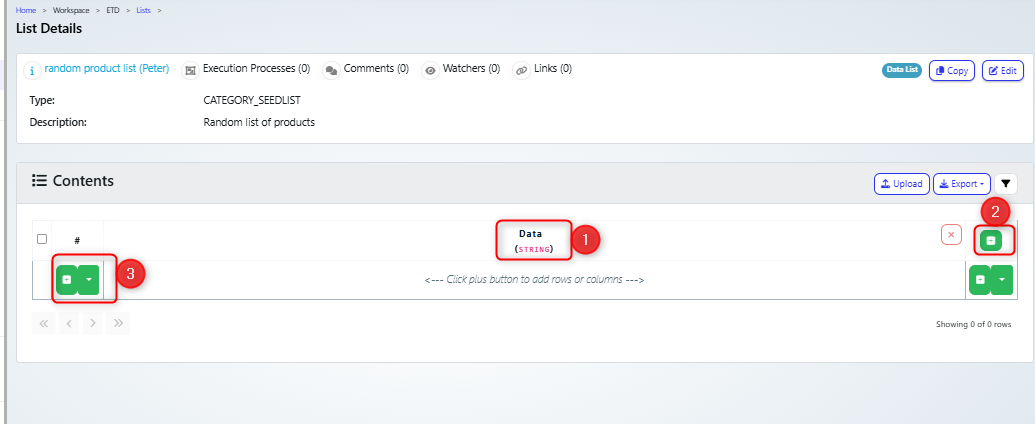
Initially the data list is empty, with only one column (1), named Data. You can edit that column name. You can also add new columns (2) and some rows of data (3).
Creating a Seed List using AI
When you import a seed list, then one option is to generate a list using AI
In the Import List Dialog box:
Choose ‘DataGPT - Test Data AI’ as the Import Option (1). The other fields on the dialog box will then update.
You can directly enter the prompt for the list you need to generate. (2)
Alternatively, you can choose and example prompt (3), that you can then edit as needed.
Finally you can set the number of rows that you require.
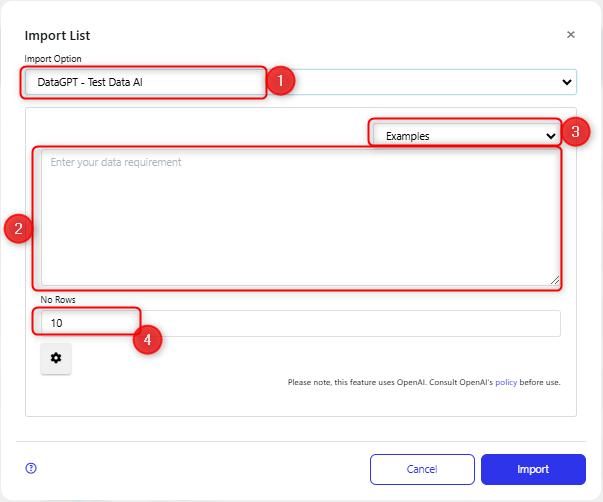
When you click import, a job will be started to create and import the list. An example job details is below:
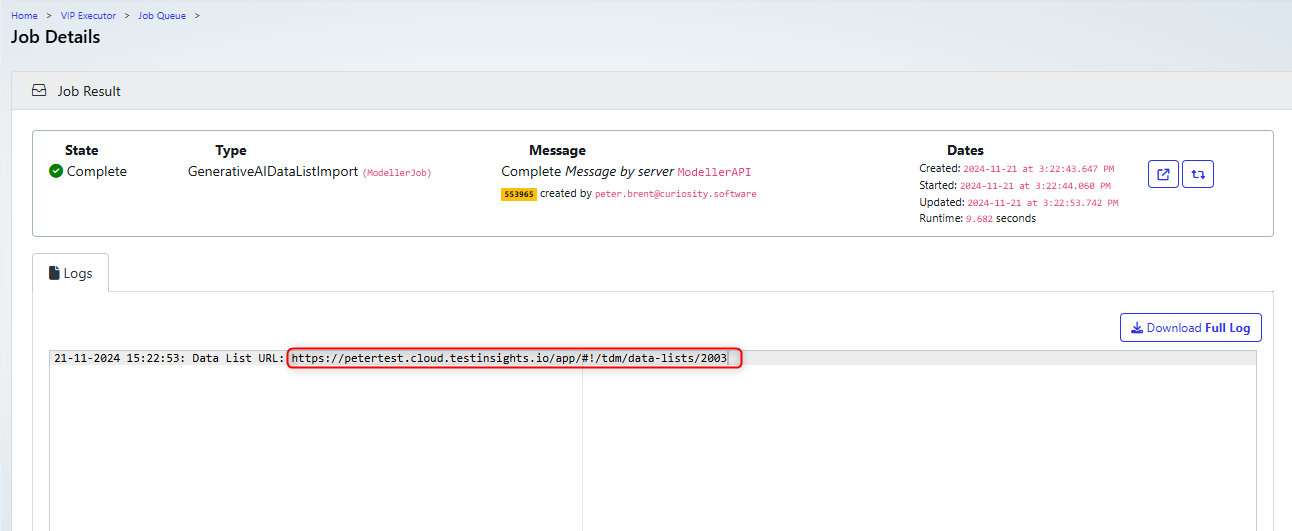
Note that the URL for the new list is listed in the log for the job, so you can copy/paste this.
Open and configure the Mask Database Activity
You need to select the column in the ruleset for the Mask Database activity that you will update.
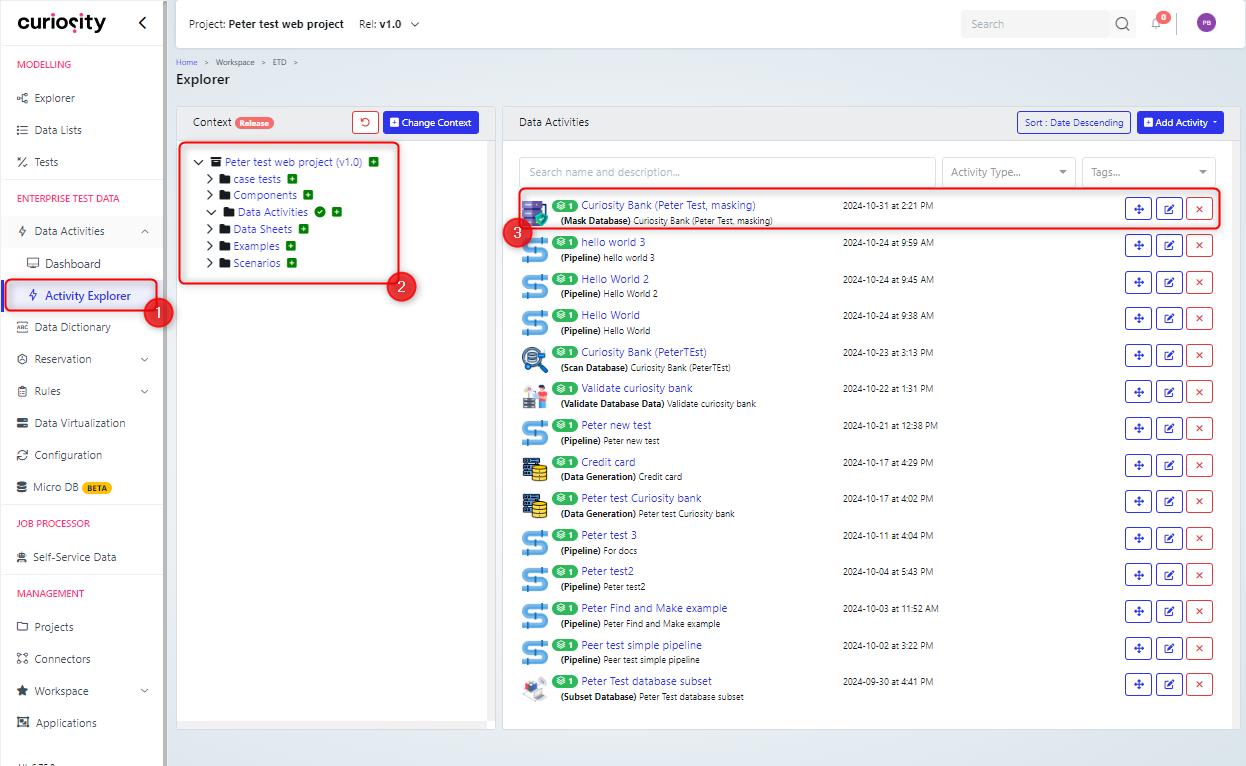
In the Curiosity Platform, navigate to Activity Explorer (1), choose the appropriate folder (2) and open the data masking activity (3) that the function will be used in.
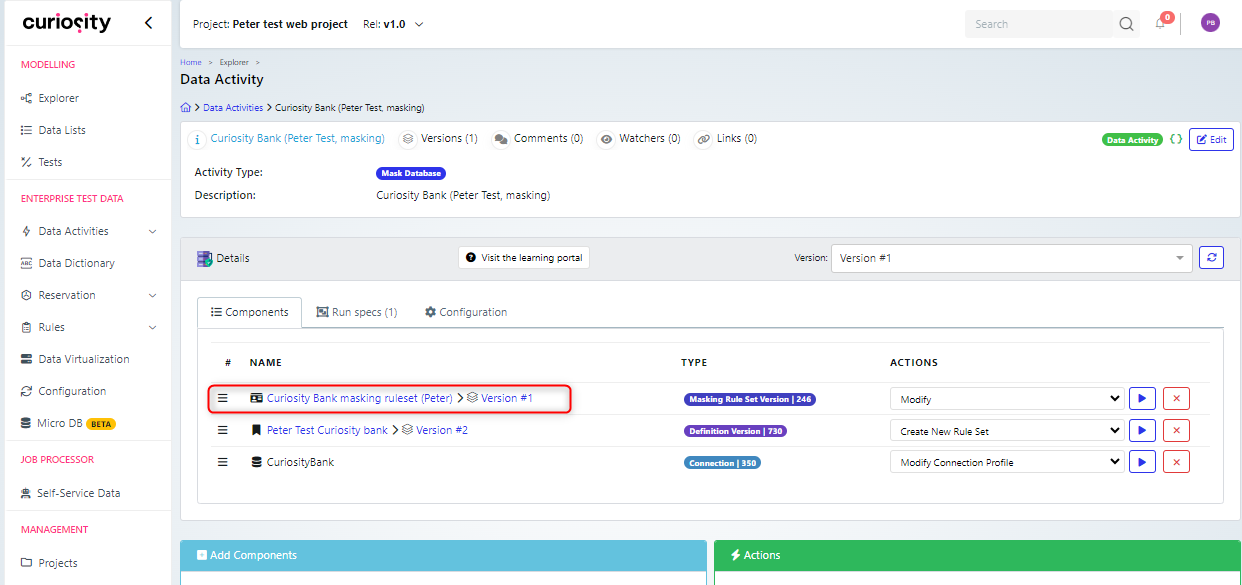
Open the ruleset for the data activity.
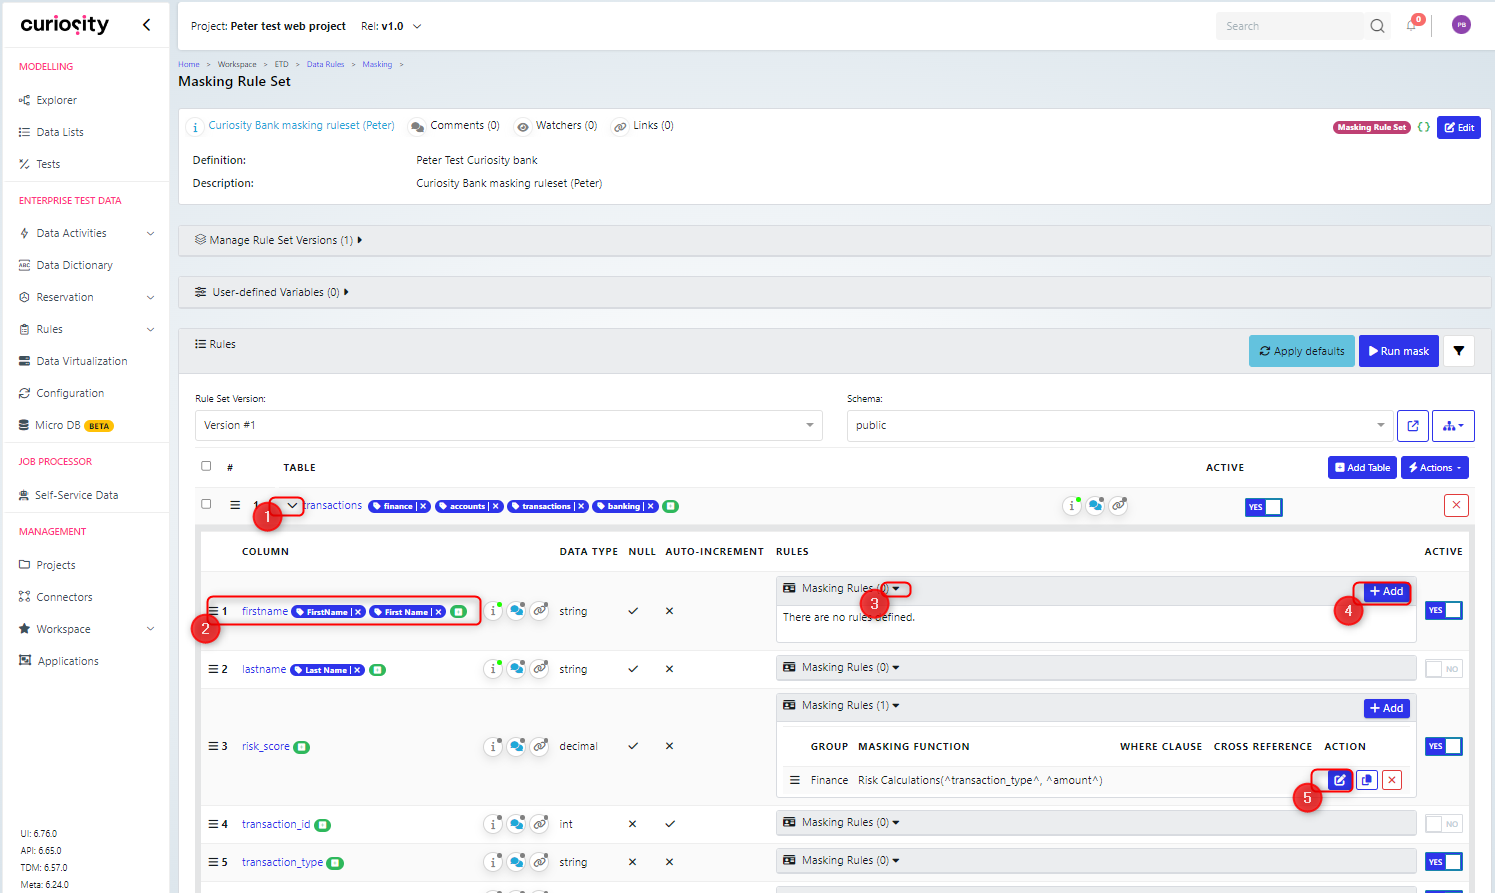
Expand the list of columns for the table that you need to use the function in (1). Then expand the rules area for the column (2) that you will add the seedlist to (3) and click ‘Add’ (4) to add a new rule.
Note that if there is already a rule present, then you can click the edit button beside the rule (5) to edit it.
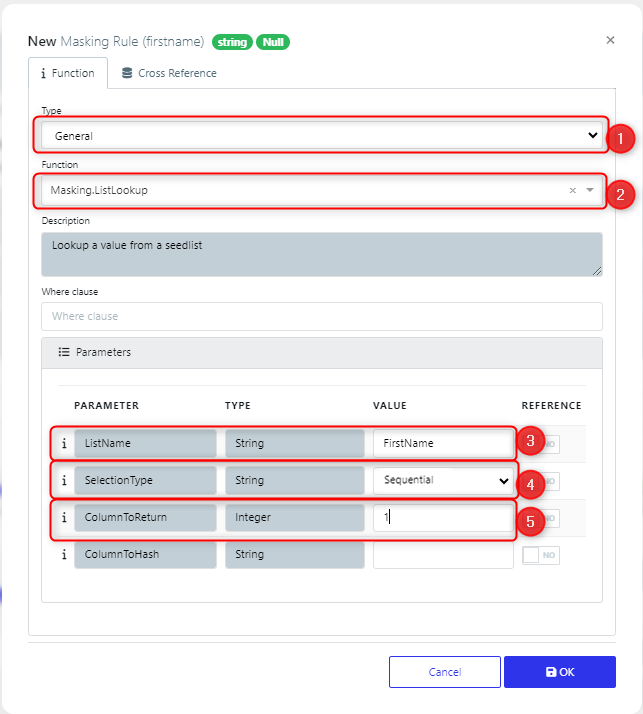
On the Add or Edit Masking rule dialog, you need to fill in the following fields (Note that the dialog view will change as the Type and Function are set)
Type (1): This needs to be set to General from the drop-down list.
Function (2): This should be set to Masking.ListLookup, which will get the value from a seed list.
ListName parameter (3): This should be set to the name of the seedlist. In our example, that is ‘FirstName’.
SelectionType parameter (4): This drop-down list specifies how the data will be used to mask. Random - a random value will be pulled from the list. Sequential - the values are used in order, Hash - the value is hashed against the column listed in the ColumnToHash parameter.
ColumnToReturn parameter (5): This is the column for the values that will be used.
Click ‘ok’ to save the rule and it will be saved into the ruleset.

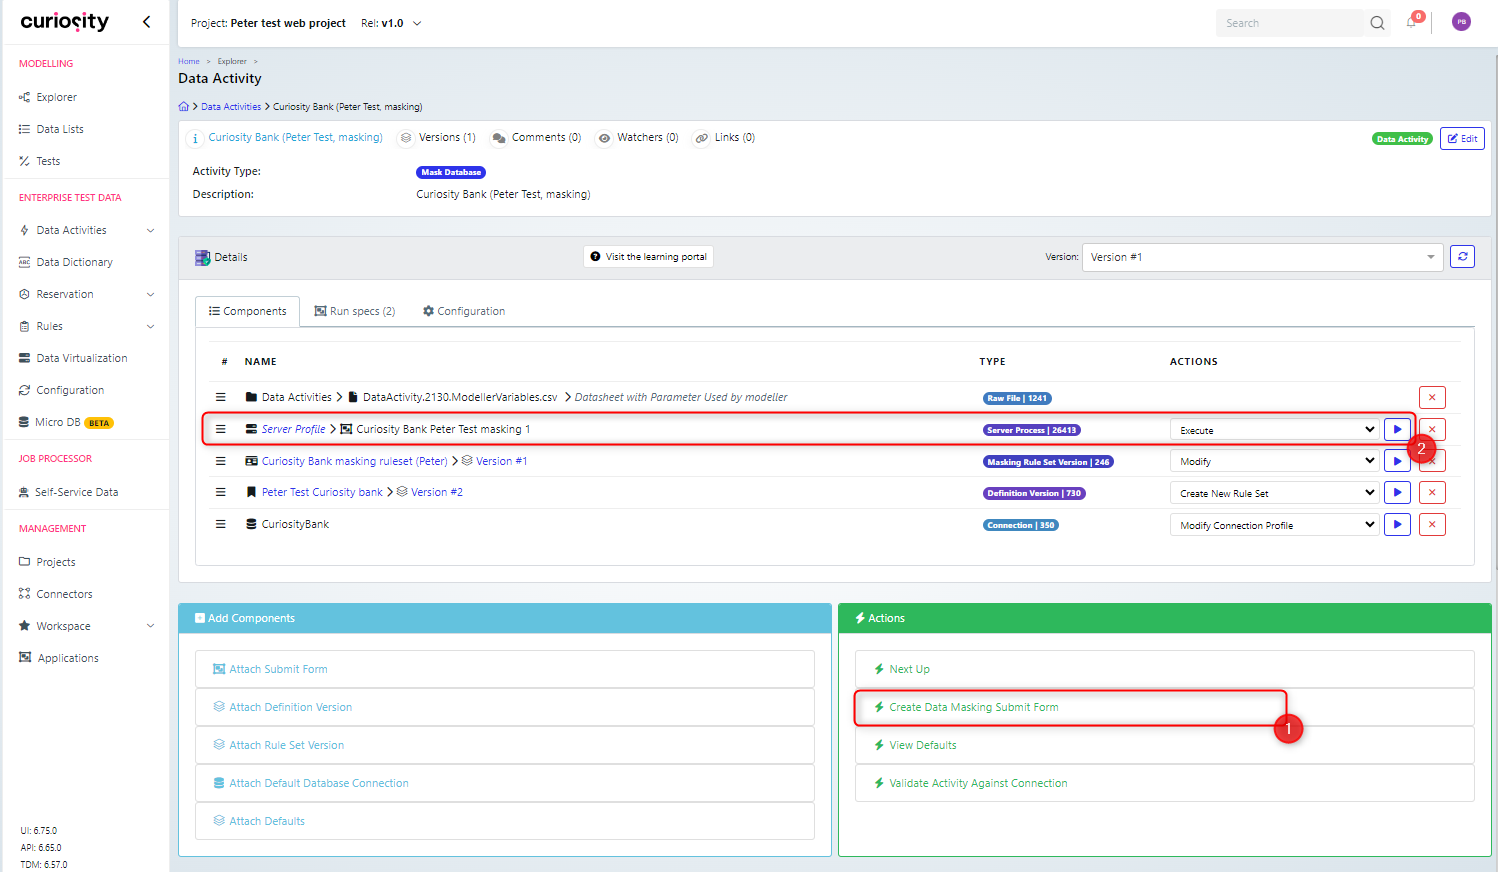
Now when we regenerate the submit form for the masking activity (1) and then execute it (2)
The names in the database will be updated with the list from the FirstName list.
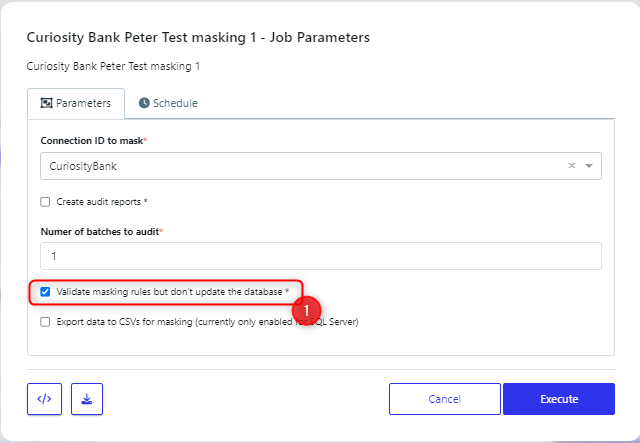
Note that you can run the mask without updating the database to view the results by checking the Validate Masking rules box (1).
