This page shows the Test Data Activity for Creating Messages and Files. In this tutorial, you’ll learn how to set-up and configurate the Create Messages and Files Activity.
About
The process of creating messages and files, particularly in formats like XML, JSON, and CSV, plays a crucial role in the development and testing of software systems, particularly those handling financial transactions (ISO20022) or other data-intensive operations. This utility can handle any structured message, with repeater loops, embedded structures, conditional statements, and more. The resulting messages or files can also be modelled to generate covered sets of messages for specific use-cases such as testing or virtualization. These covered sets ensure that all possible data combinations and scenarios are accounted, thus providing comprehensive and thorough testing of business rules or simulation environments.
Tutorial
Follow along with the video tutorial, or read the written tutorial below where each of the steps is broken down and explained.
Part one of the tutorial configures the message management data activity in the portal.
Part two walks you through creating a sample and template, before covering generating files and messages through a submit form.
Part three, generating files and messages through a data model.
Prerequisites
- A File Definition - defining the schema of the data files to generate data.
Step 1 - Create Message Management Data Activity
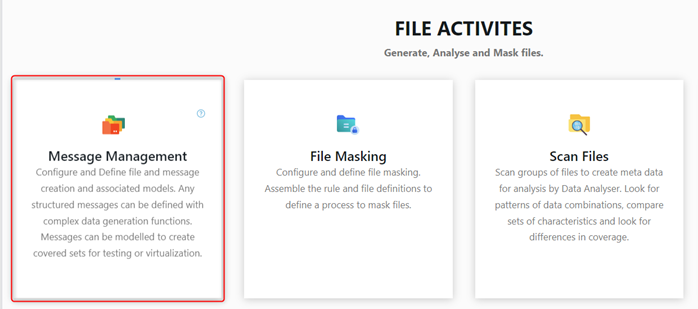
The first step to masking your data, is to create a new message management activity. Firstly, navigate to the Data Activities dashboard, then select the Message Management’ activity.
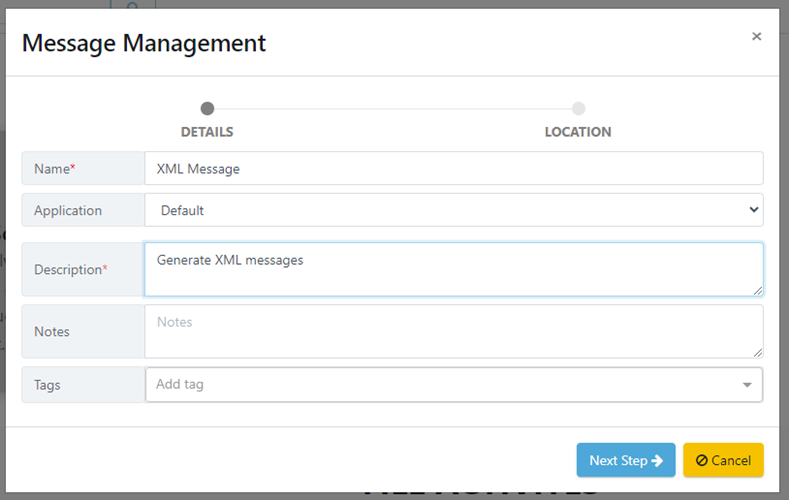
This will launch the wizard for creating data activities. In this section, you are required to provide specific details about the activity, including a mandatory name and description. After filling out the necessary information, click on the 'Next' button to proceed.
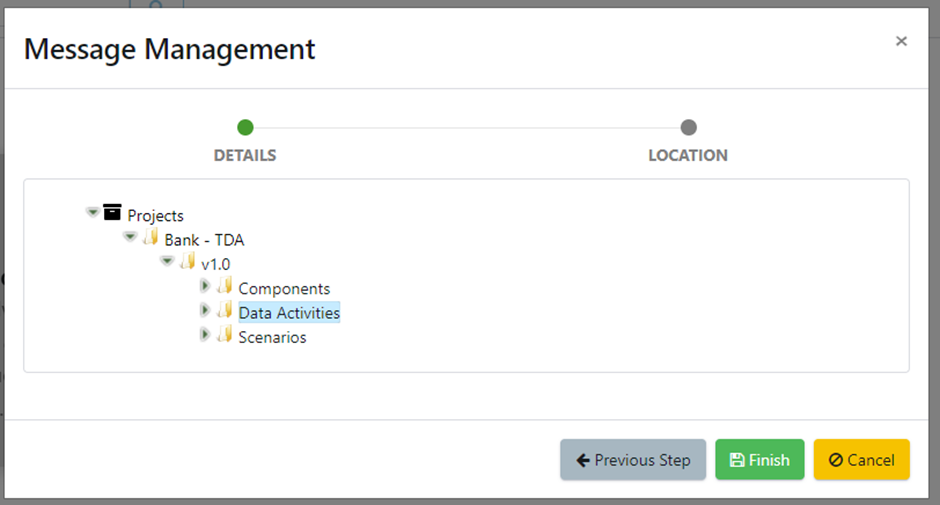
In the next tab, we will navigate to the desired location to save the activity. Once this is selected, click the Finish button.
Step 2 – Attach File Definition
Now we will attach our file definition to the activity.
Under Add Components, choose the Attach File Definition.
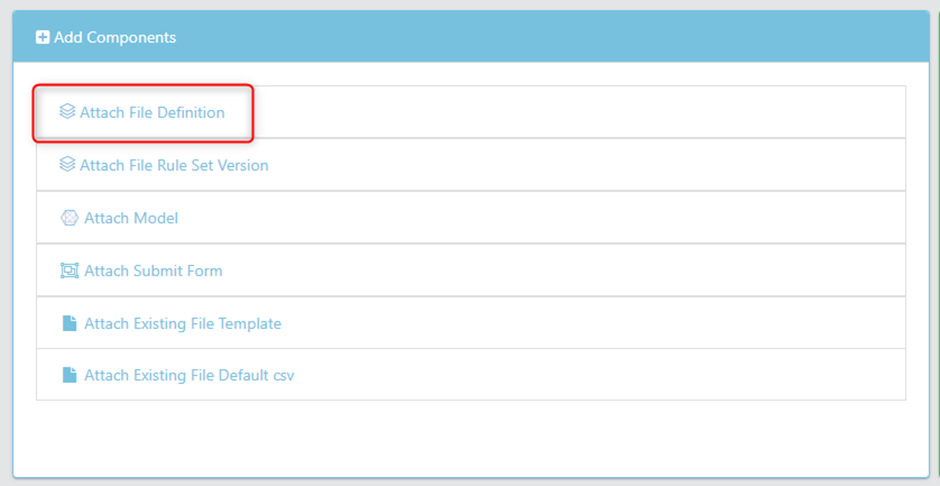
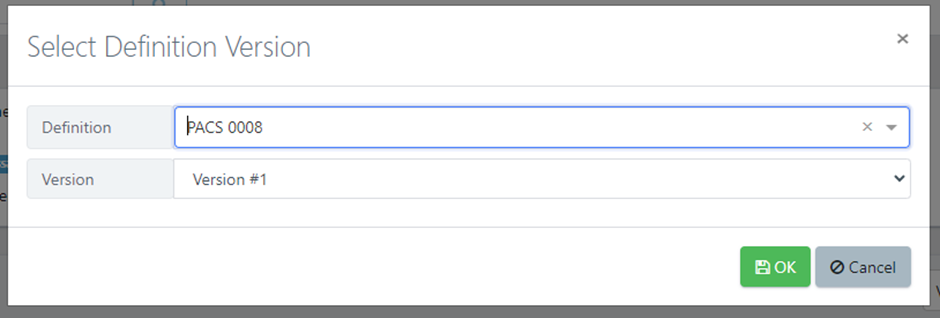
This will bring up a screen to select your File Definition.
Step 3 - Create Rule Set
A rule set specifies the data generation functions to be applied to each data attribute in the file we want to generate. Generation rules define the functions that will generate values, along with parameters, and calculations which, in the end, combine to create and formulate a data file.
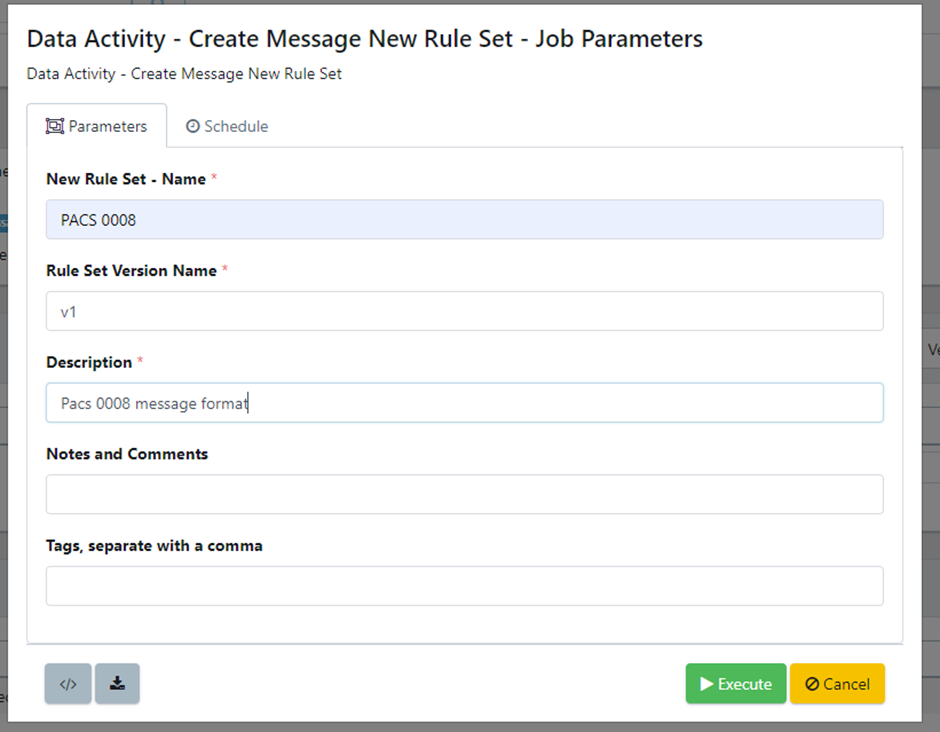
To create a new data rule, select ‘Create Message New Rule Set’ from the definition action and press the execute button.

You will be asked to provide a name, description, along with other information about the rule set to create. Once populated, press execute.
Once complete, in the components tab you will see the newly created data rule.
Step 4 - Modify Rule Set
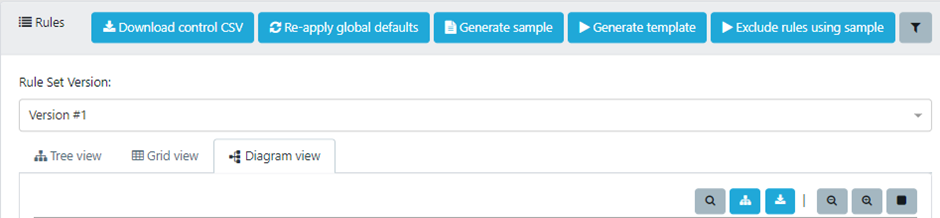
We will now modify the ruleset to specify how we want the message to be generated. Select modify on the rule set to bring up the rule set editor.

This view consists of three ways to preview the message. Either as a Tree/ Grid/ or Diagram view. This helps to navigate and quickly understand / edit a generation rule set.
Your rule set contains the structure and data attributes from the file definition previously associated with the activity.
For each attribute in our rule set, we can specify:
- The values it should have (static or synthetic),
- The conditions under which it appears,
- The parameters that can change during run-time,
- Whether it should be omitted from our message creation.
- User defined variables which allow us to globally set a value across different attributes in a centrally managed location.
We will now define each of these in turn and how to use them.
4.1 Generation Rules
Generation rules allow us to specify for each attribute – data values, repeaters, and conditions under which the data attribute will be present.
To set a Generation Rule click the spanner icon for a data attribute, then Edit the Action.
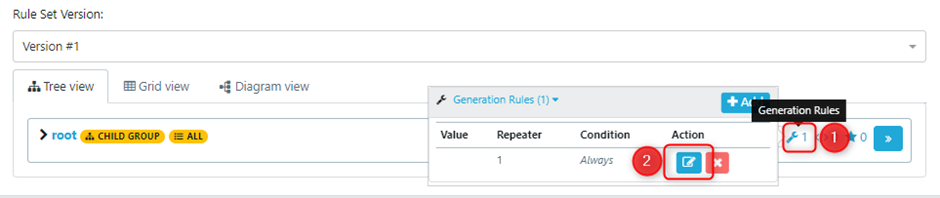
Generation rules allow you to set a value, repeater, and condition for a data attribute. You’ll notice default functions have been applied to all data attributes based off their type and schema information. The ‘Re-apply global defaults’ button allows users to assign defined defaults to all data attributes within a Rule Set. This is a very useful tool for accelerating the creation of rule sets, especially when there are shared Data attributes for different generations.
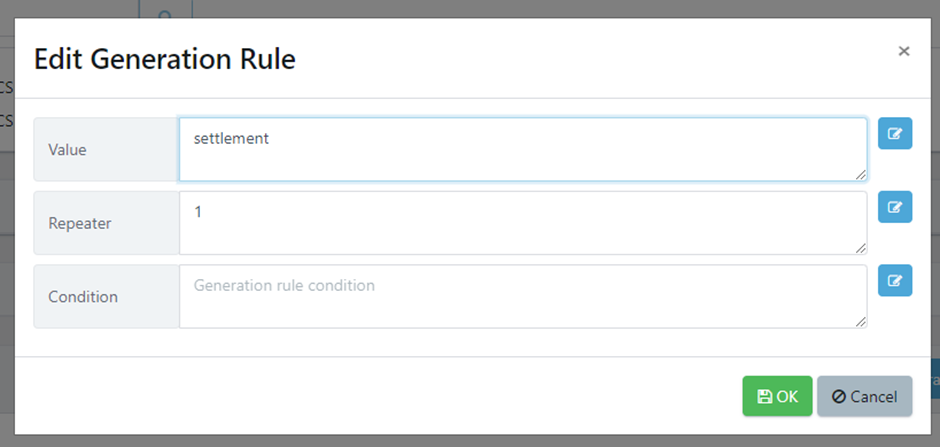
4.1.1 Setting Values
When setting the value of a data attribute you specify a static value by typing literal text into the field. An example below shows a static value of “settlement” being set.
The value can also be set to utilise a generation functions. A function synthetically generates a random value based on the function chosen, and parameters set. An example would be to generate a random date and time.
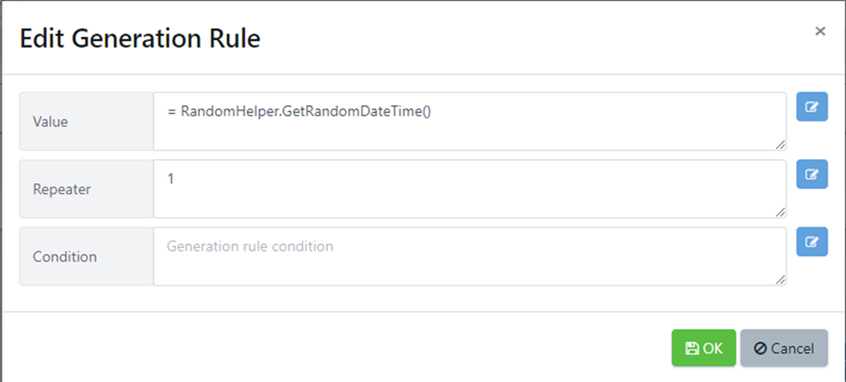
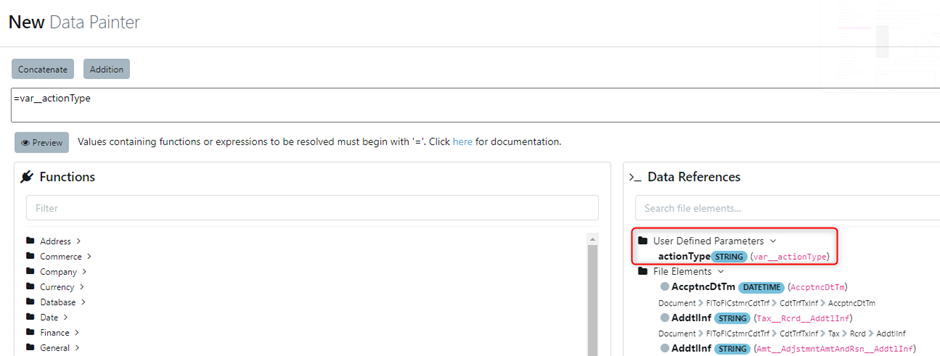
You can press the edit button to open the data editor dialog which features all the functions available categorised by type. The Data References section of data editor allows you to reference other file data attributes inside your generation function along with any User Defined Parameters.

4.1.2 Configuring Repeaters
The repeater allows you to define how many times this tag should occur in your file generation. Note that if it’s validation rules has a ‘Maximum Occurrences’ you cannot repeat a data attribute or section more times than this without breaking the files business rules. In the example below we specify the tag to be repeated 3 times. Note: you can also apply data generation functions, and calculations in this field.
4.1.3 Conditions
Conditions allow you to set conditions under when a generation function is utilised. This means you can assign multiple different generation values to a single data attribute. If the condition is met, then the linked generation values will be applied.
4.2 Excluding Elements
We can also choose to exclude an element inside a generation rule set. To do this we toggle the Exclude Element.

4.3 Parameterising Elements
Parameters help in exposing attribute values to be set at the time of execution, either through a user-friendly form or via modelling (which we'll discuss in the next tutorial). You can make a data attribute adjustable using the 'Expose in Template' option.

Parameters are an extremely useful concept:
- If we initiate the final generation via a submission form, the parameters we defined will be accessible in that form. This allows the person requesting the data to choose specific values or functions to assign to each parameter.
- On the other hand, if we employ a Data model to guide our file generation, we can design the vital edge cases and variations that we wish to examine for each parameter. We can then leverage the Quality Modeller's optimization features to produce a comprehensive set of coverage focused test files.
Remembering this concept while establishing your rule set can be beneficial, helping you to consider your system and the diverse data needed for thorough testing.
4.4 User Defined Variables
You can also create global variables directly in the 'User Defined Variables' section within our Data Rule. These variables allows us to set a value in a central location which can be used as values in multiple data attributes, or used to formulate calculations.
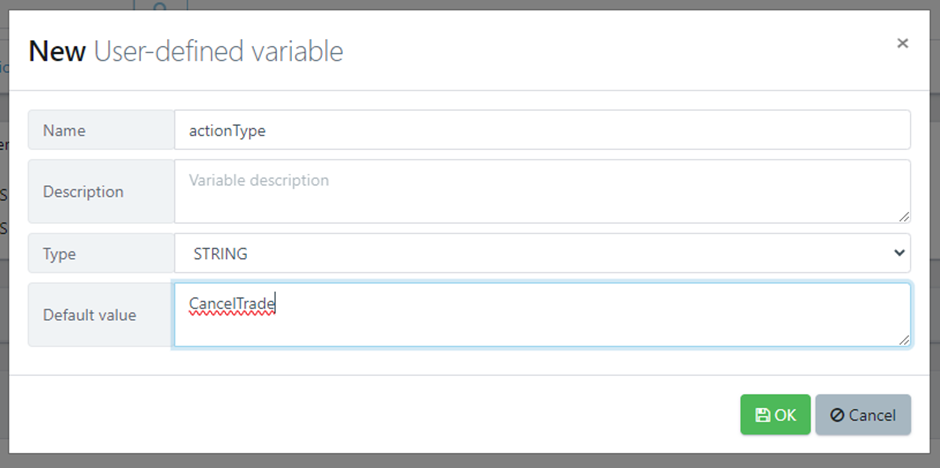
To add a variable, click the Add button in the user-defined variables section.

Specify a name, description, data type, and default value for the variable.
Once a variable has been added, it is accessible in the data editor screen under the user defined parameters section.
Step 5 - Generate Sample & Template
Now that you’ve configured the rule set for your generation you can Generate a sample message. This is useful to ensure that you’ve fully and correctly configured your generation to suit your requirements. To do this click the ‘ Generate Sample’ and review your generated message.

If you’re happy with the sample generation, it’s now time to generate the template. Navigate back to the data activity and select to Generate Template from the rule set.

Once the job is complete, download the template from the Job result. You will be attaching this template to our data activity. Templates are created based off our Data Rule configuration and the scanned definition version of our file. They’re written in C# Scriban and you can be edited manually.
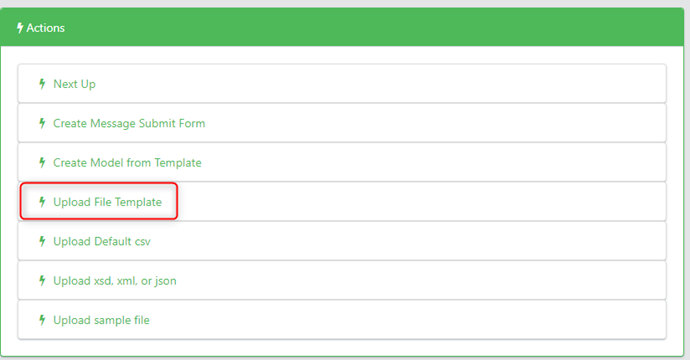
Step 6 – Upload File Template
Return to your data activity and upload the file template for the generation. To do this simple click ‘Upload File Template’. Specify the newly created file template.
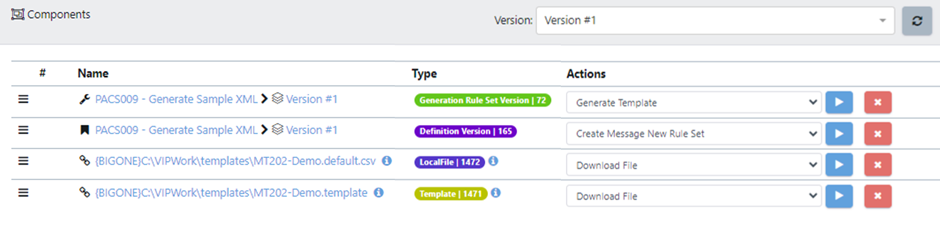
You now have all the required Components required to build a Generation ‘Submit Form’. Your data activity should look like this, with a Definition Version, Generation Rule Set, Template, and Local File attached.
Step 7 – Creating the Submit Form
A submit form is a reusable form which can be embedded into the self-service portal for future use. Whenever any user wants to create messages, they can do so using the created form.
To do this simple select the Action ‘ Create Message Submit Form’.

A dialog will appear to define the submit form.
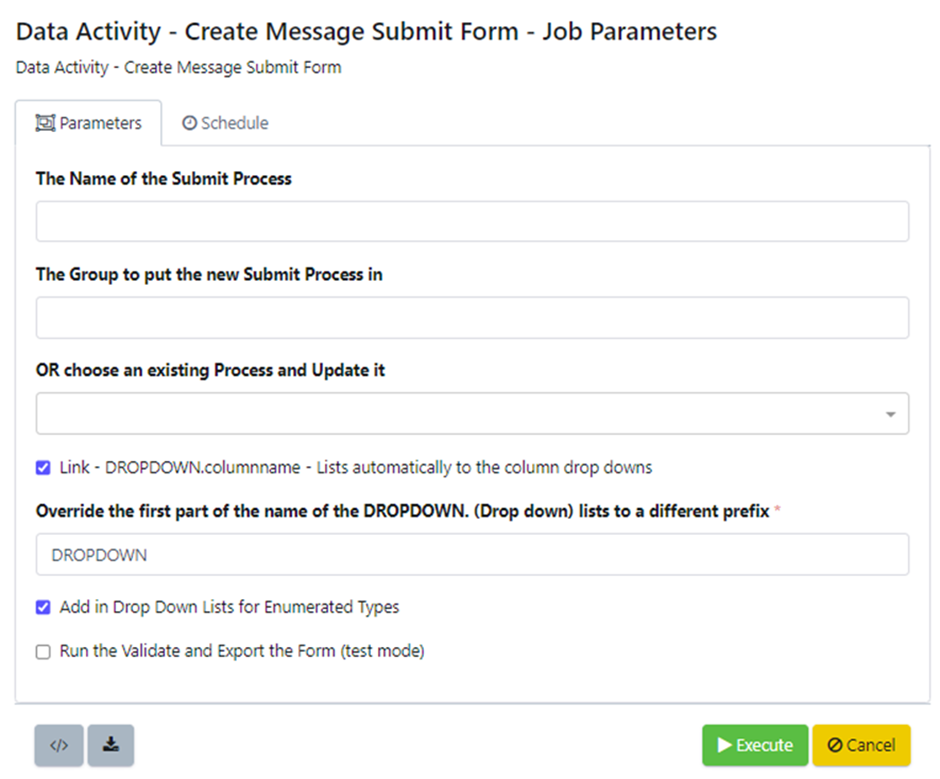
- You must set a Name and Group for the process you’re creating, or choose an existing process on your Server to replace.
- Link - DROPDOWN.columnname. This list automatically to the column drop downs. There are 2 different ways it can happen: The LIST has to be called DROPDOWN.*BusinessName* or DROPDOWN.*ColumnName. Although this prefix DROPDOWN you can choose to overwrite it.#
- Add in Drop Down Lists for Enumerated Types. This picks up list of values from validation set of possible values.
- Run the Validate and Export the Form (test mode). If you want to see the submit form in Excel format before it's created in the VIP Executor run this.
Then we click ‘Execute’ and our submit from will be created and attached to our data activity.
Step 8 – Generating Files & Messages
Now we can execute our file generation job. From the top component, choose Execute as the Action, and press the play button.
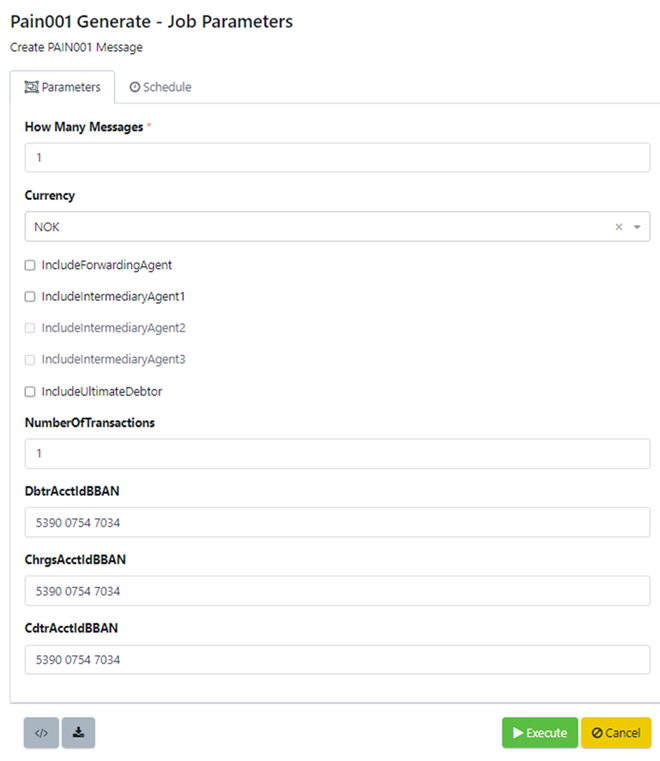
A form will appear to input our job details. To submit this job, you must set the values for your previously defined parameters, along with input over how many messages to create. Once you have populated the form, click run.
The form can be run from the data activity itself, or through the VIP Executor (Located in the defined task group), or through API/ Embedded IFrames, and more.
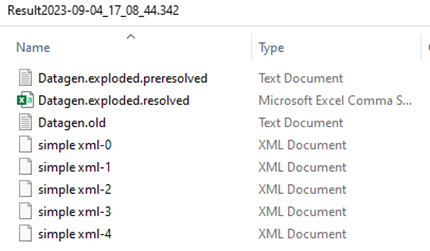
Once the task is complete, download the results file.

Within this archive, you will be able to access the generated messages.