This page shows the Test Data Activity for Data Pattern Generation AI, a technique for creating synthetic data which mirrors the statistical properties of an existing data set. In this tutorial, you'll learn how to set-up and configure the Data Pattern Generation AI activity.
About
In this tutorial, we will explore the process of using a data activity data pattern generation AI to create a synthetic data set based on an existing data set, including its associated metadata and statistical heuristics. This innovative technique allows us to manipulate and recreate data sets with precision, capturing the fundamental patterns and underlying structures of the original set. The tutorial will walk you through creating a data activity, uploading your base data set, running metadata analysis, generating new data, and finally, analysing the synthetic data set using the VIP data analyser.
Tutorial
Follow along with our video tutorial, or read the written tutorial below where each of the data generation AI activity steps is broken down and explained.
Prerequisites for Data Scanning
For this data activity, you will need a:
- A CSV file of the dataset to be analysed. We recommend exporting your data to CSV format.
Step 1 - Create Data Pattern Generation AI Activity
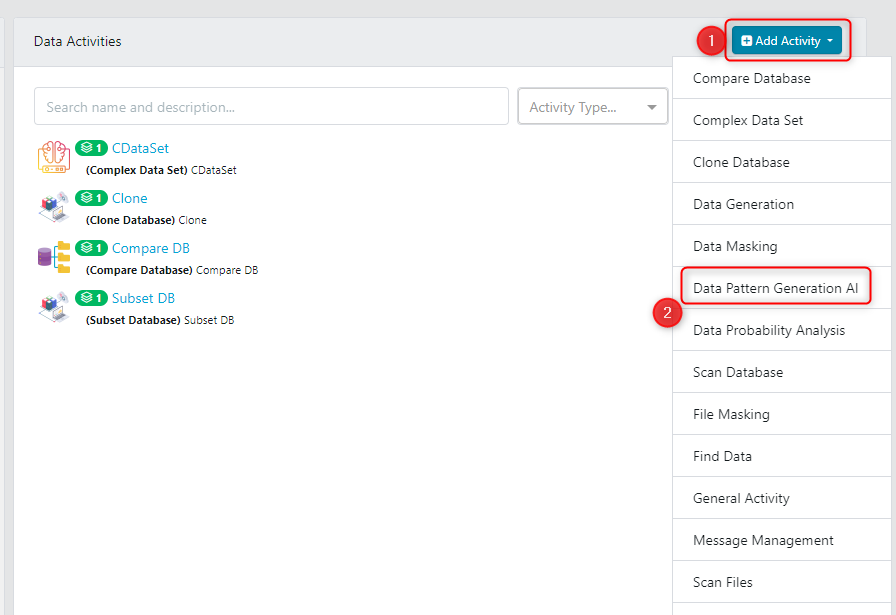
First, we need to create a new 'Data Pattern Generation AI' data activity in the Activity Explorer. Select the type of the activity as Data Pattern Generation AI.
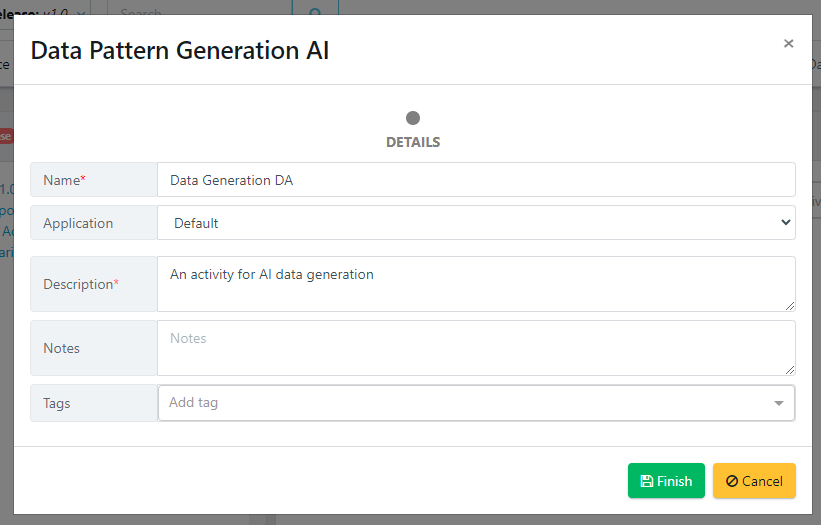
Then give it an appropriate name and description, then save it.
Step 2 - Activity Configuration
When a new activity is created, a default configuration will be set. These specify different settings within the data activity. You will want to edit these default configurations to suit your needs. To do this, click the edit button in the top right hand corner.

Here you can edit the number of rows to generate. The default is 3000.

Step 3 - Upload CSV file
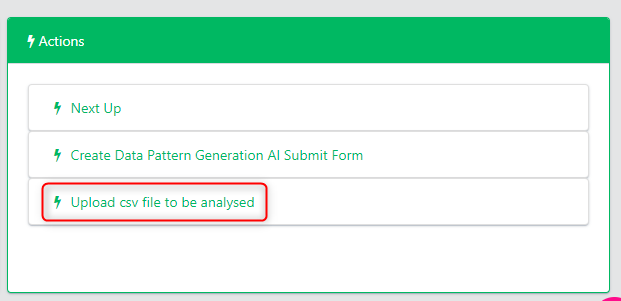
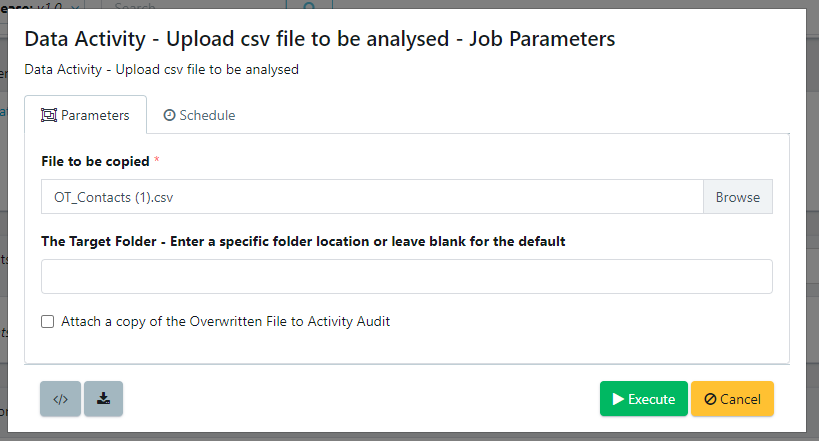
Next, we'll be uploading a CSV file of the current data set. Under the 'Actions' section, select 'Upload File' to choose your base CSV file for uploading into TDA.
Choose the appropriate server to upload your file.
Step 4 - Analyse CSV File
Once the CSV file is attached to our data activity, we need to analyse it. Execute the function 'Build Meta Data' located next to the uploaded CSV. This action initiates the analysis and creation of an additional attached file containing the Meta Data Analysis.

This will create a new attached file within our data activity which contains the Meta Data Analysis.

Step 5 - Generate Synthetic Data
Now that the metadata analysis is complete, we're ready to generate our synthetic data. Click on the 'Generate Data' option.

This prompts you to provide details for the generated file - the name, number of rows, and location. Click Execute once populated.
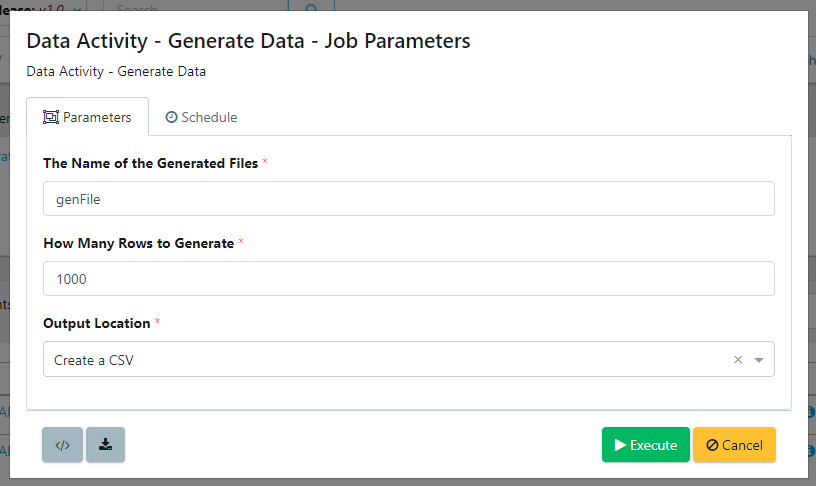
Once the resulting job is complete you can download the generated data files.
Remember, this generated data remains linked to your initial Data Activity. Additionally, you can also set up a 'Data Pattern Generation AI Submit Form' from this stage. This custom submit form can be executed any time you need to generate additional data from this activity.
The generated data can be found in either the job result folder or in the location defined during your form submission.
Step 6 - VIP Data Analyzer
The VIP Data Analyzer tool is useful for visualising statistical patterns and trends in your data. In this example, it is a useful tool to view and compare statistical metrics between your original data (from the uploaded CSV) and the newly generated synthetic data. Look for key statistical parameters like Mean, Median, Sum, Count, Skewness, Max/ Min, and note their similarities. This comparison ensures that the synthetic data maintains the statistical properties of your original data, thus providing a realistic set for your testing purposes.
Potential Issues:
Please ensure that if there is any antivirus other than Microsoft Defender on your server that you set - C:\VIPTDM\DataGenAI\App\VIP.Extension.SyntheticDataAIApp.exe as an exception.