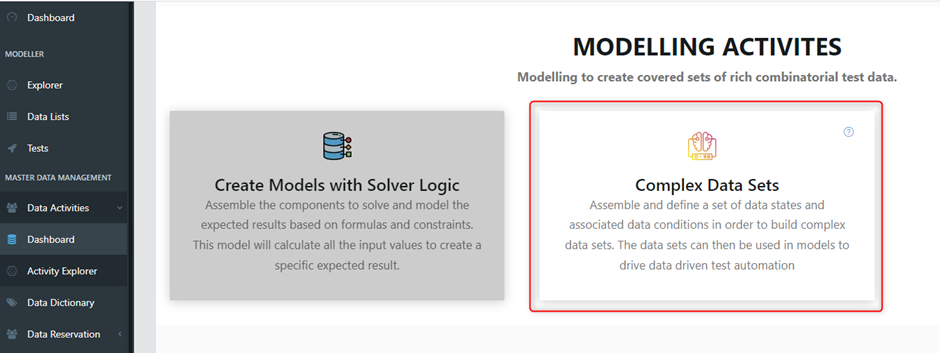
This page shows the Test Data Activity for Complex Datasets, a technique for creating covered sets of data which contain specific rules. In this tutorial, you'll learn how to set-up and configure the Complex Datasets Activity.
About
The complex dataset activity allows users to assemble and define a set of data values and associated data rules to build covered sets of data. The data sets can then be used for testing and development purposes. This is a quick and efficient method to generate flat data which conforms to business rules.
Tutorial
In this tutorial, you will learn how to create a set of coverage focused data combinations when provided with a set of sample data values. This activity uses pairwise (all-pairs) generation, a combinatorial data generation method, to ensure all desired combinations of data are covered in your generated dataset.
Follow along with the video tutorial or read the written tutorial below where each of the steps is broken down and explained.
Step 1 - Create a new Data Activity
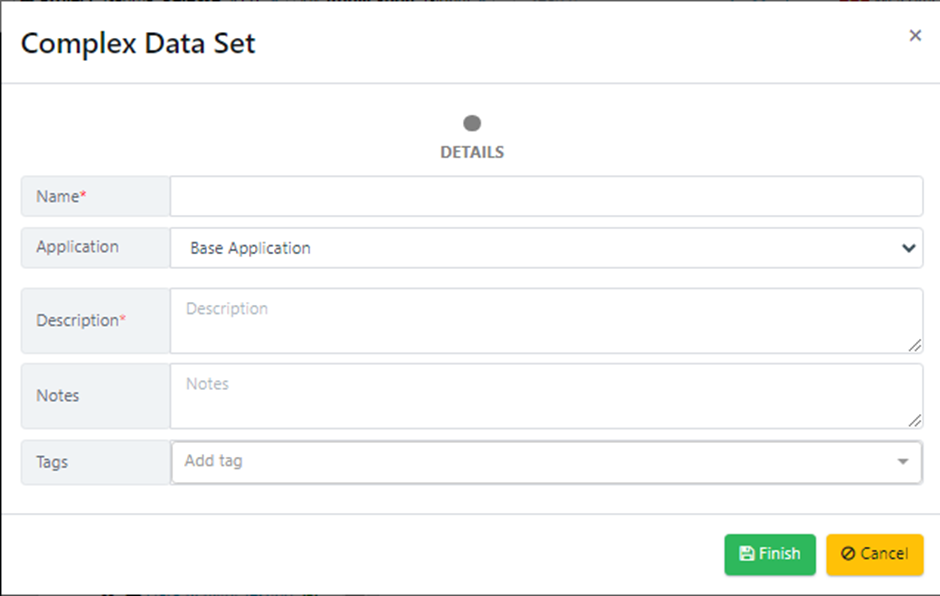
Navigate to the Data Activity dashboard and create a new activity for Complex Data Sets.
This will launch the wizard for creating data activities. In this section, you are required to provide specific details about the activity, including a mandatory name and description. After filling out the necessary information, click on the 'Next' button to proceed.
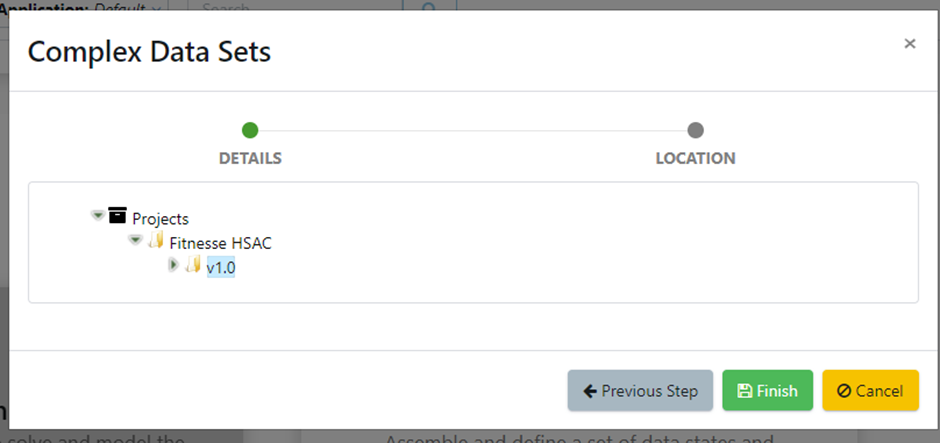
After entering the activity details, you must select a location to save the data activity. Once you have chosen a location, click the 'Finish' button to complete the wizard.
Step 2 - Download and Understand the Example Data States List
This is an optional step which helps you understand and download an example input format that is required for configuring the generation.
To download the example, navigate to the actions panel, then select to download the example data states list.
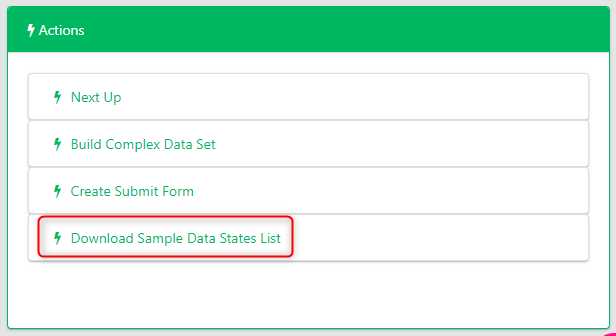
This will trigger a job, download the results and in that folder you will see a file called DiskCombinations.txt.
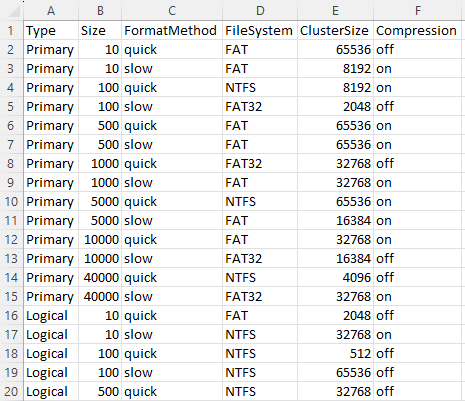
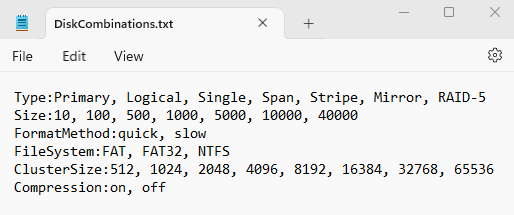 This is an example input which models different data conditions for data relating to computer hard disk drives. Here, you have six data attributes (Type, Size, FormatMethod, FileSystem, ClusterSize, Compression) with different values defined for each attribute. In this example you will generate a set of data covering different combinations of these data states using pairwise (all-pairs) generation.
Step 3 - Configure Data States
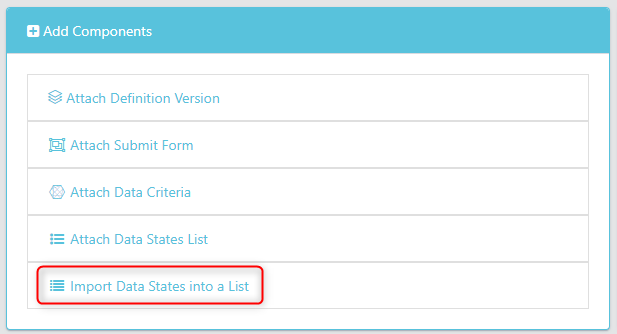
Now you have the data states configuration on your local machine, you need to add this to the Data Activity. The first step here is to navigate to the Components tab and select Import Data States into a List.
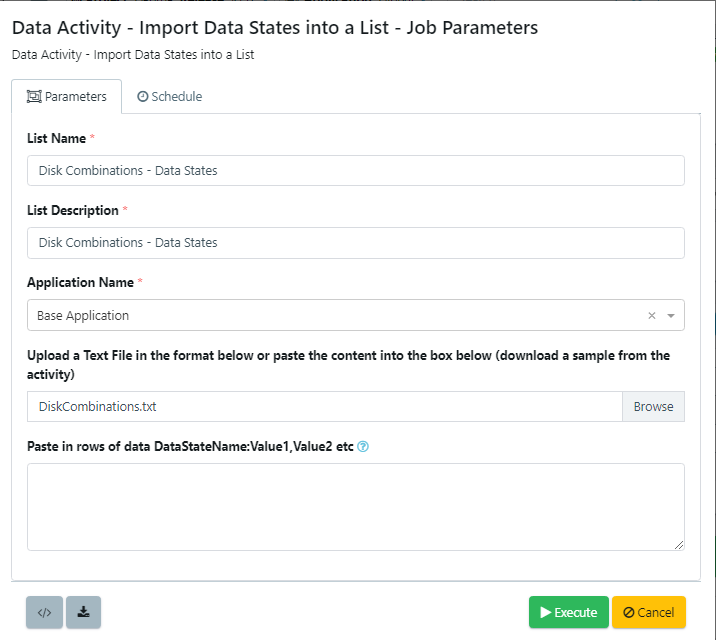
Give your list a name, description, and select an application. Then, you can either choose to upload the file, or paste the contents of the file into the last field. Note: The format the data states must take is always DataStateName:Value1,Value2. Where DataStateName is the column name, followed by the data values the column can take.
Once that job is complete, navigate back to your Data Activity and you will see that each data attribute and its states are uploaded to an individual list attached to your data activity.

If we open up one of the lists, for example Type, you will see that the data states have been mapped to the column name with each state as a separate row.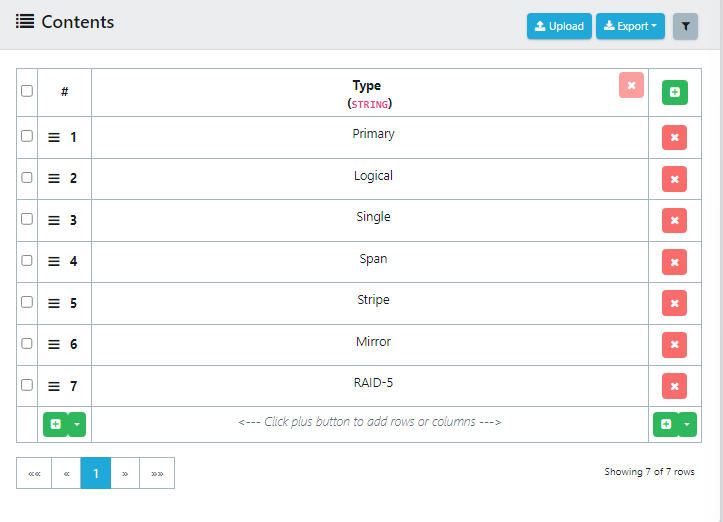
Step 4 - Configure the Generation Strategy
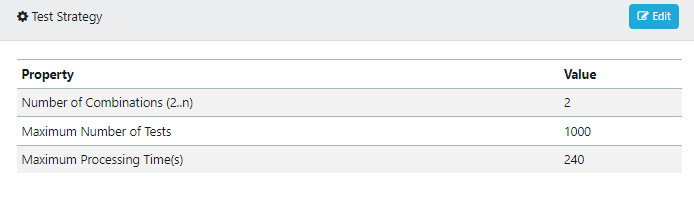
Next, you will configure the test strategy, there are three different configurable strategy settings here:
- Number of Combinations - This defines the number of combinations the all-pairs generation will use when generating the complex set of data. For more on all-pairs generation, read this article.
- Maximum Number of Tests - This prevents the activity creating more than the specified rows of data. If the number of combinations set above produces more rows than the specified maximum, the job will stop once that limit is reached.
- Maximum Processing Time (seconds) - This stops the activity after the specified number of seconds.
For this example, set these to the following by pressing edit on the test strategy panel.
Step 5 - Attach Data Criteria
Data Criteria can be used to specify rules and criteria for the data set to be generated. This is specified in the form of Boolean logic to formulate values of data which can or should not occur together in the generated data set.
To create a data criteria, you will need to have created a data definition for the CSV file to be created. This needs to at least contain the columns you wish to create a rule for. Below we have created a file definition which contains the attributes: Size, FileSystem, Type, FormatMethod, ClusterSize, and Compression.

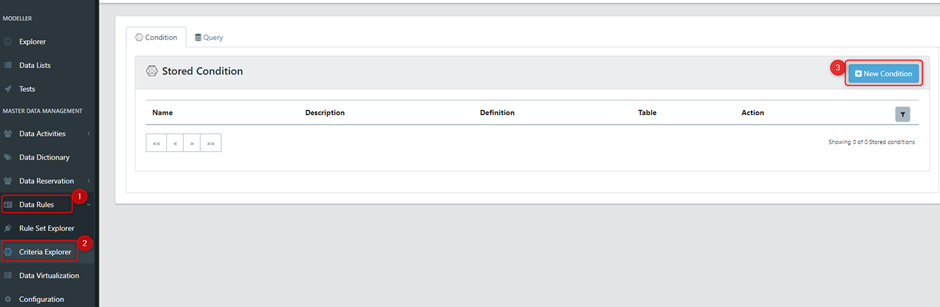
Next, we can create a new condition. To do this navigate to the Data Rules panel, and then select Criteria Explorer. Under the condition tab, you can select to add a ‘New Condition’.
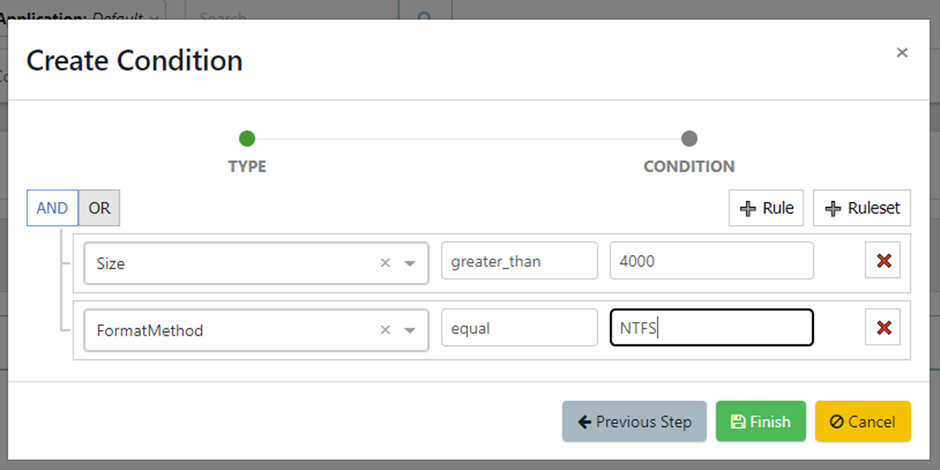
A condition is made up of Boolean logic to state the data conditions which need to hold true when performing the data generation. Below we create a condition which specifies that if the size of the hard drive is over 4000, then the FormatMethod must be equal to NTFS.
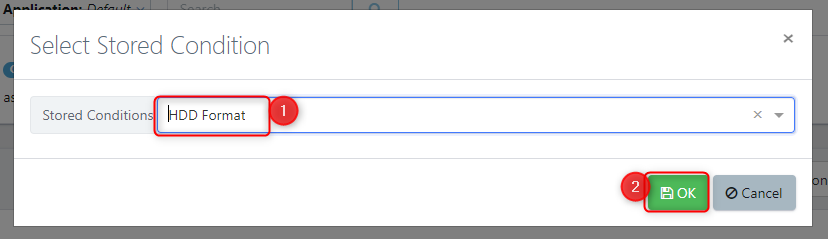
Once you have created a condition, in the data activity you can select to ‘Attach Data Criteria’ from the Add Components panel.

Select the condition then add it to the activity.
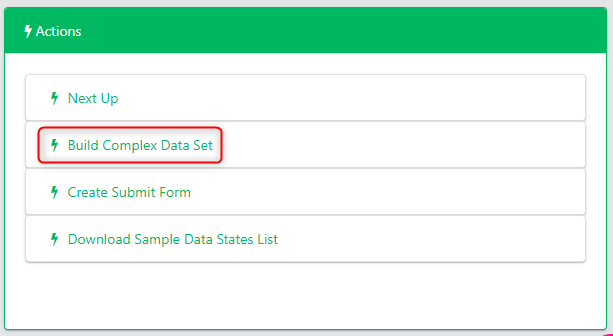
Step 6 - Build the Complex Data Set
Now the activity is fully configured you can build the complex data set. To do this, under the Actions tab, select Build Complex Data Set.
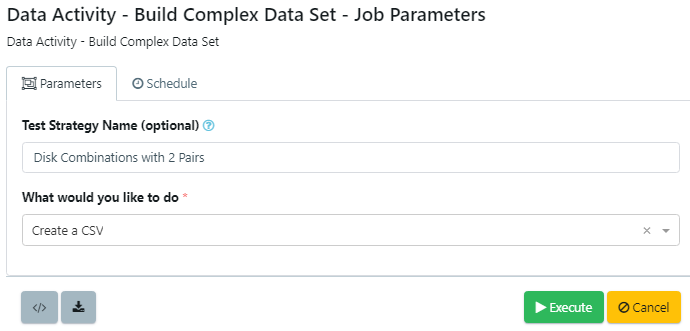
Give this data set a recognisable name and specify if you want to generate either a list in the portal, a downloadable CSV, or a CSV that is stored on the server where the VIP Server is located. For this example, we’ll create a CSV and run the job.
Step 6 - Download and Analyse the Results
Once the job completes, download the resulting CSV ({DataActivityName}.{TestName}.ComplexData.csv) and open it. You should have 98 rows of data in this spreadsheet.
Step 7 - Alter the Test Strategy
Now it's time to experiment with the Test Strategy. Try to increase the number of pairs considered from 2 to 3 and see what impact it has on the resulting data set.