A Workspace is used to create a work area for your organisation within Quality Modeller. It is private and isolated from other workspaces and other organisations. All assets (models or tests) are stored in the workspace and can only be accessed by users who have rights to have access to that workspace.
It has full administrative capabilities to invite, add and remove users and assign specific roles.
All Workspaces have an Owner. All Projects are hidden unless the user is explicitly given access to them by the Workspace Owner:
How to:
- Get a new person activated as a user in the workspace
- Workspace roles for giving access to Projects
- Setting up User Groups
Get a New User Activated as a User in The Workspace
First, colleagues need to be recognised in the Quality Modeller database. They do this themselves by heading over to on the sign up page of Quality Modeller. They do not get confirmation, but their email will be recognised quickly.
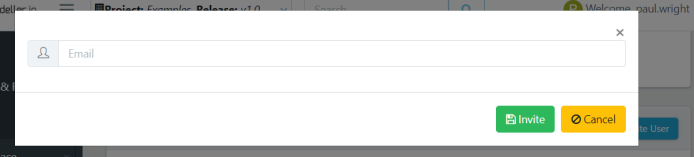
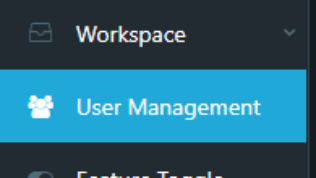
Now you’ll be able to start setting up colleagues as Users. So, in Quality Modeller, first go to Workspace > User Management > Invite User: Click Invite User. Input the emails of the people you want to have access to the Workspace:

The User management screen will appear. Click to 'Invite User'.
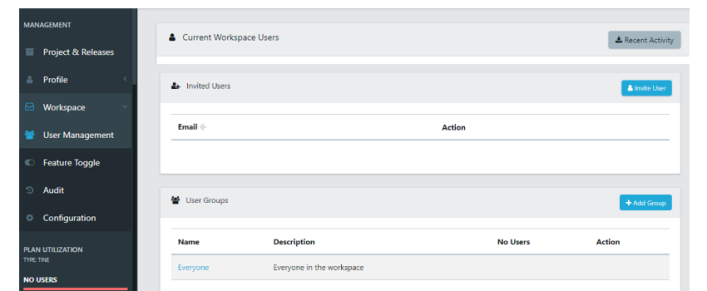
Here you can now enter the user's email you want to invite to the workspace.
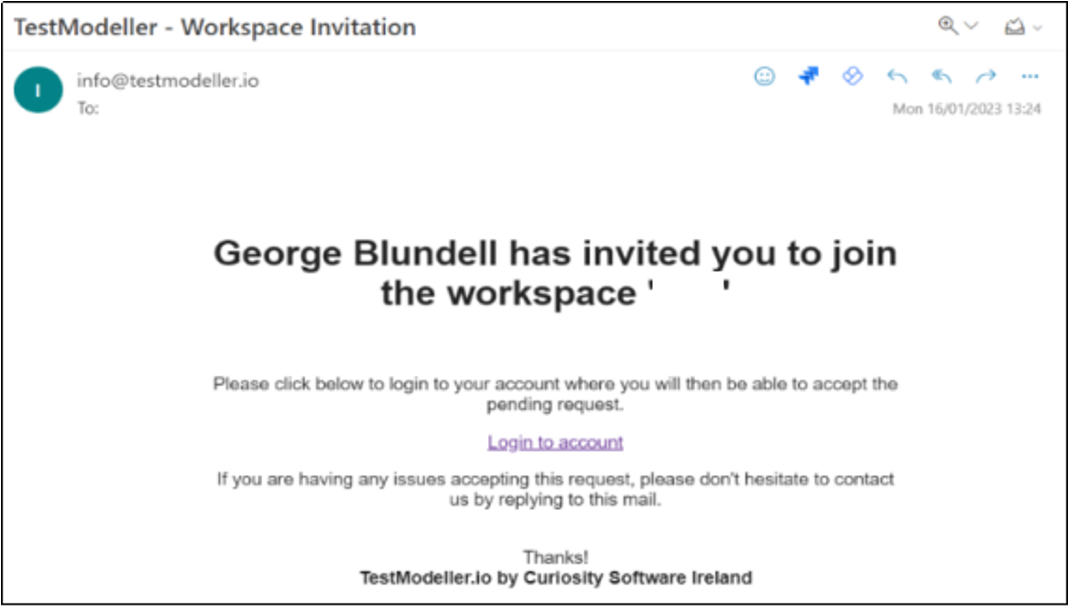
After the Invite button is clicked, the person receives an email inviting them to the Workspace. They click Login to account:
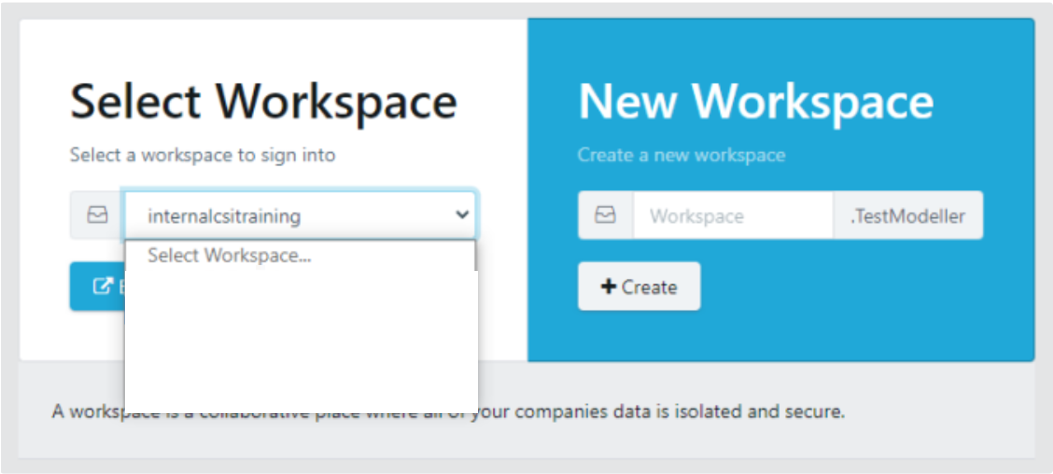
On login to Quality Modeller, the invitee must accept the Workspace invitation (blue tick), and choose the workspace they will be working in from the dropdown:
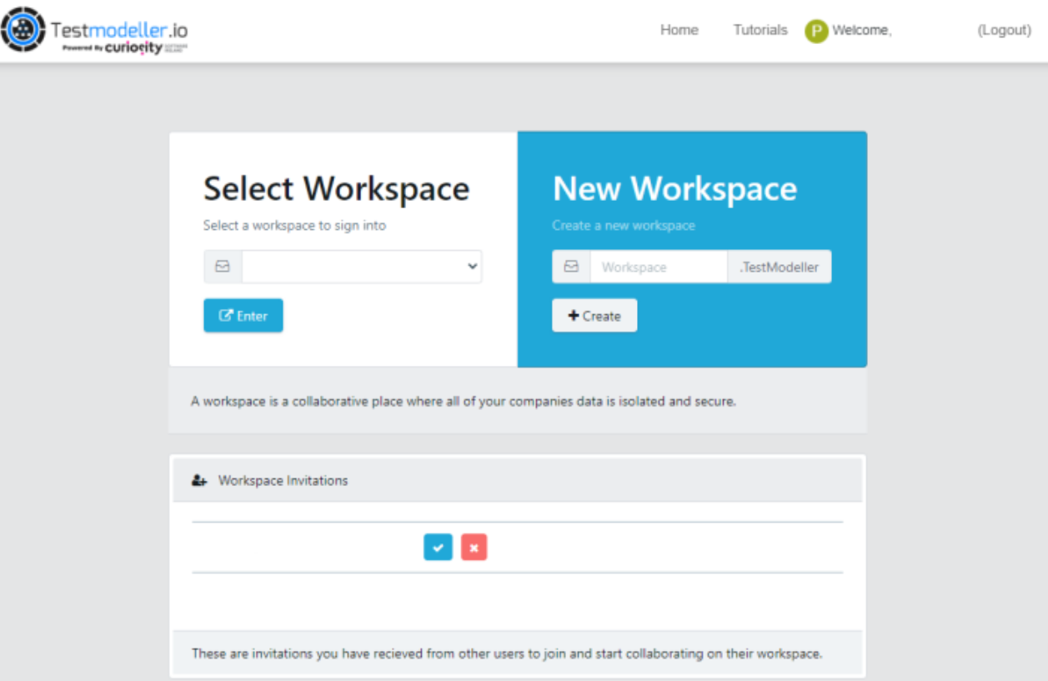
Once accepted, you'll see the workspace available in the 'Select Workspace' dropdown. Select it and enter the workspace.
The next step is to set the Users acces to Projects. The graphic below shows the level of access each Role gives to a User:
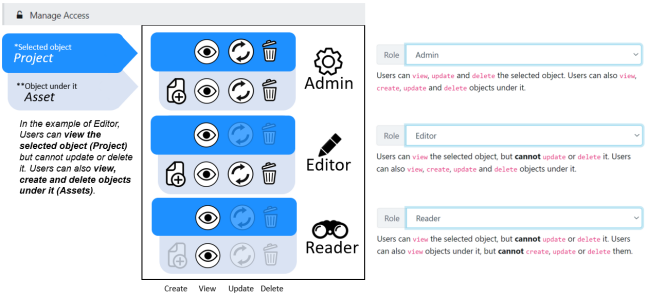
Workspace Roles for Giving Access to Projects
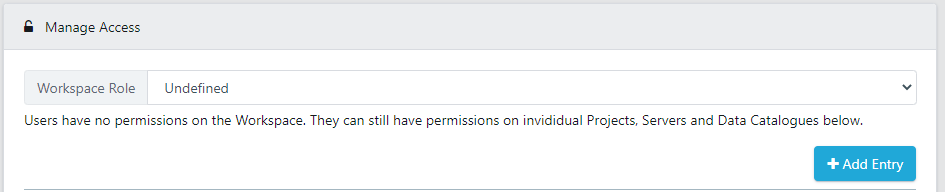
Workspace Roles for Users include Admin, Editor, and Reader (see graphic above) and allow granular oversight to modify an individual’s access to any of your Projects.
Note: Additional to setting Workspace Roles, User Groups are also a way to give access to Projects. In that case you don’t need to configure Workspace Roles and instead you’ll modify access to Projects in User Groups. (See setting up User Groups)
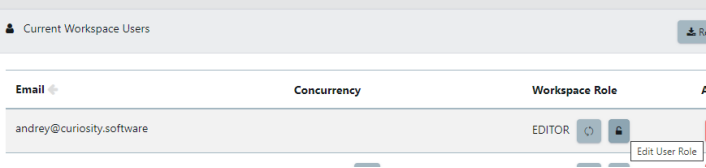
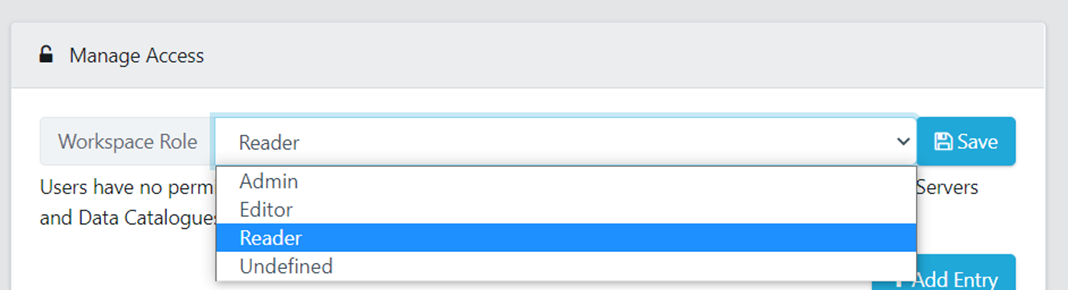
Define Workspace Roles - Go to Workspace > User Management: and in Current Workspace Users, in the example, andrey@ is listed.
To modify their Workspace Role click the padlock icon.

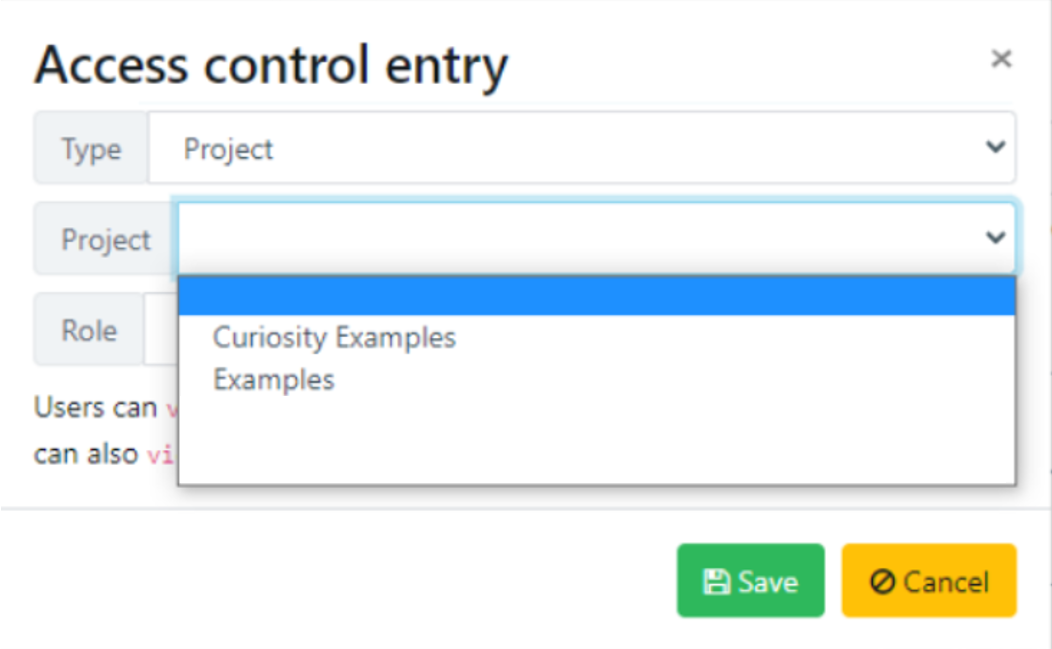
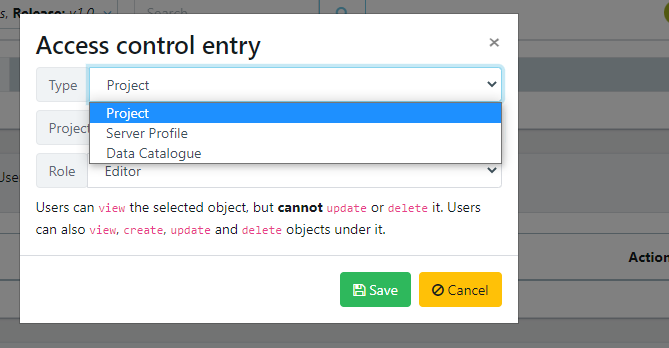
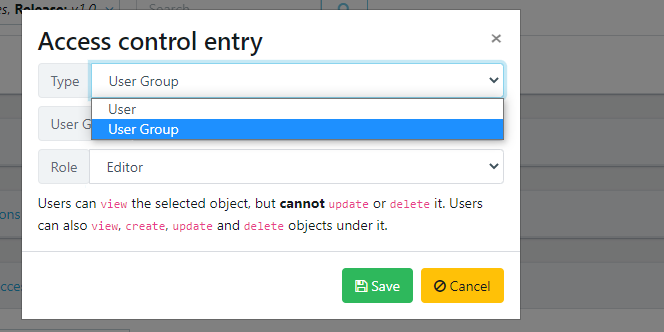
Finally, select any of your Projects they need access to. Click Add Entry.

In ‘Access control entry’ you’ll see a dropdown list of Projects. Repeat this for each Project.
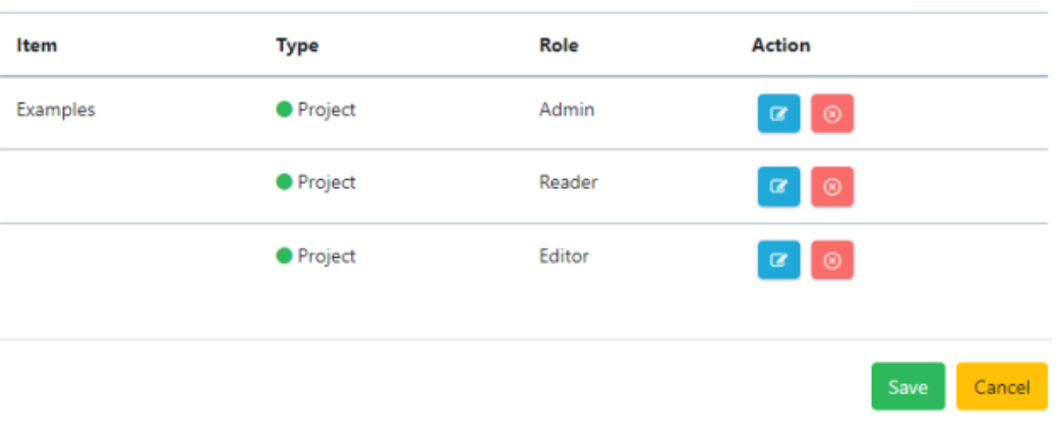
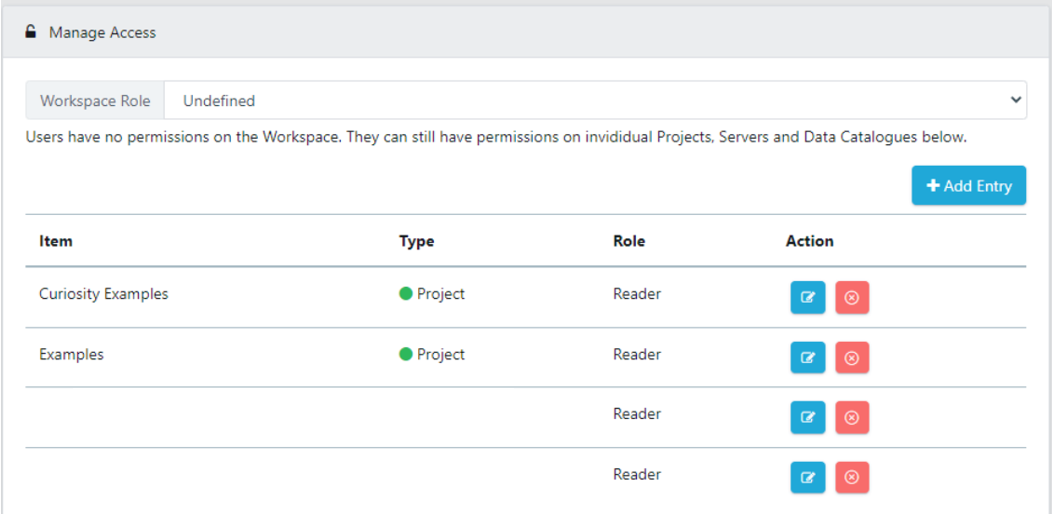
In the example, the andrey workspace user now shows access to 3 Projects each set with a specific Role:
To affect any Workspace User updates: Users should log-out then re-login to Quality Modeller and the Workspace.
Setting Up User Groups
Whereas above we describe setting access according to Workspace Roles, next we setup User Groups which can define roles for an entire group of users..
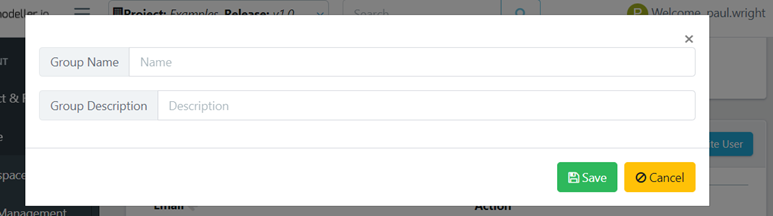
To define the User Role first click Add Group go to Workspace > User Management.

Scroll the page to User Groups sections and click 'Add Group'.

Here you'll be able to add a new user group.
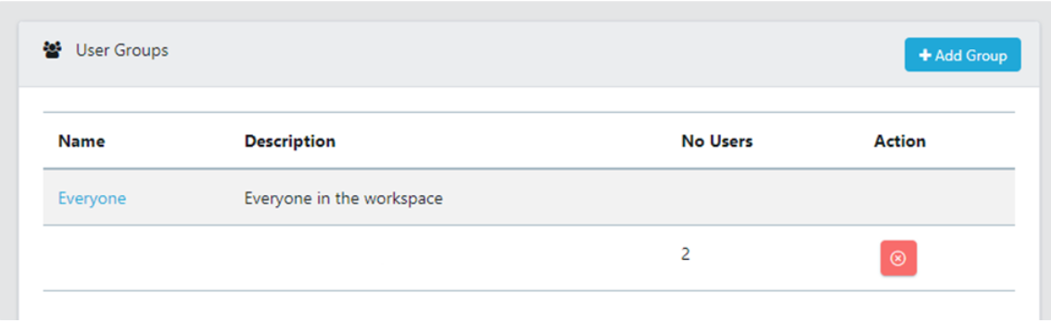
A default User Group appears automatically as ‘Everyone in the Workspace’. Names of the User Groups will appear in the list as you create them. So to create a User Group first click Add Group and specify its Role as Reader, Editor or Admin.
The next two steps set up the group. First to Add User to the group and then Add Entry. (Add Entry pulls in any of your Projects).
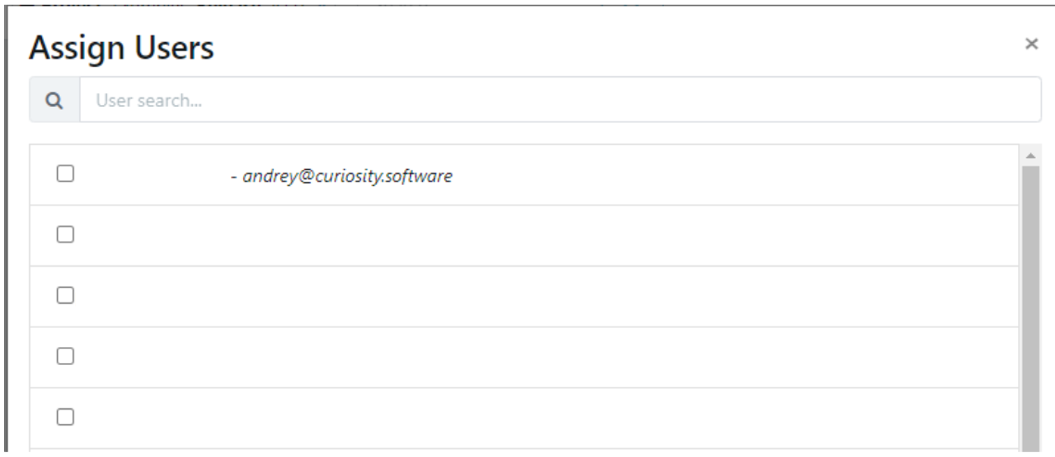
Click Add User and this open a list of people you can add to the User Group:

Next, assign the users you would like to give access to.
Now you can list the Projects which you want to grant access for the assigned User Group (or individuals) in the group. To do this, Add Entry:
Select the specified access control.
Below, you see that this User Group will get access 4 Projects, and the User Group Role is Reader.
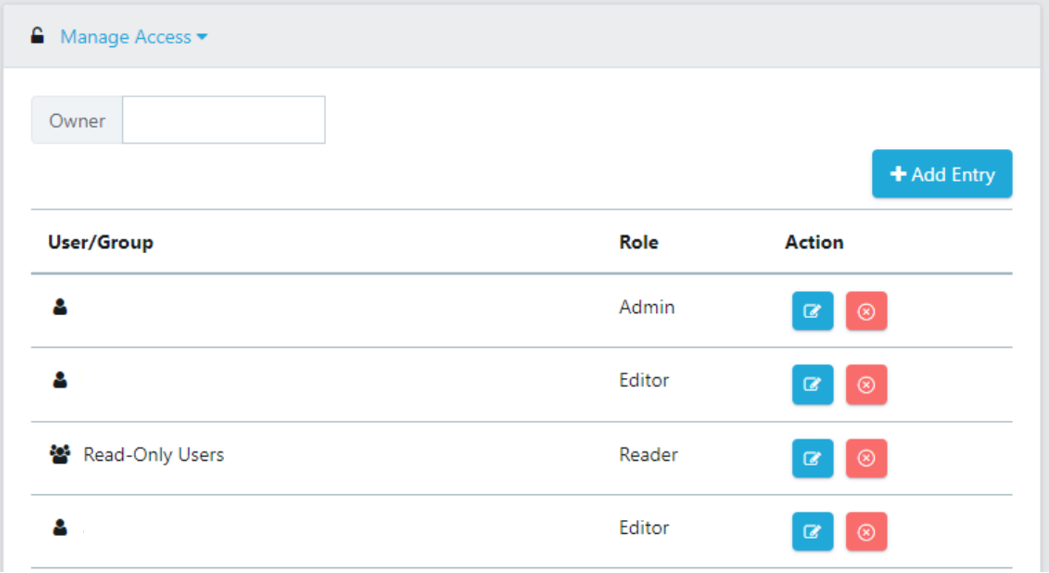
Finally, to connect a User Group to one of your Projects (or it can be one single User) navigate to Project and Releases and click your Project from the list.
Scroll the page to Manage Access and click Add Entry.
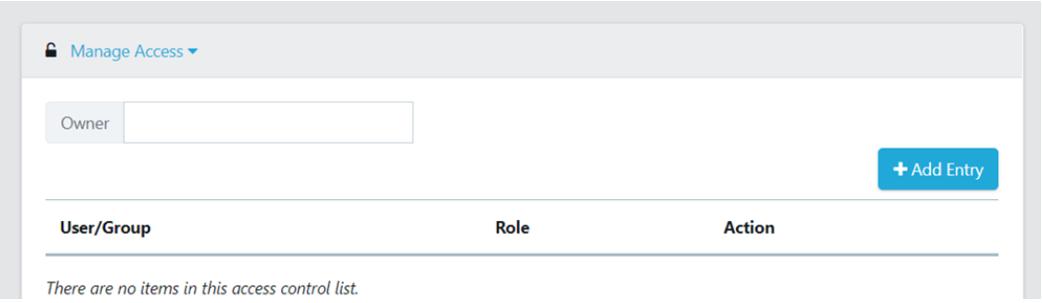
In the pop-up ‘Access control entry’ panel select the Project from the drop-down list:
In the Manage Access pane you can now see User Groups listed (but also individuals). Click the blue pencil icon to modify Roles, or you can also delete.
Manage access to Projects in the User Management menu tab  | Manage Access to User Groups (also individuals) in the Projects & Releases menu tab  |
Admin Portal
Site Admins in Quality Modeller have a unique menu option which allows them to manage passwords, users, and workspaces.
You can find the admin portal in the settings menu on the top right Quality Modeller screen.
