In this article, we'll cover configuring the JIRA Xray Cloud connector with Quality Modeller.
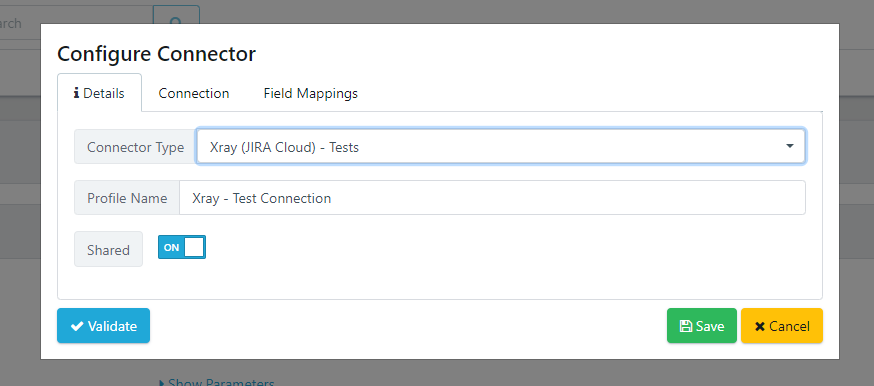
1. Details Tab
Select the connector Type as Xray (JIRA Cloud) - Tests
Give your new connector profile a name:
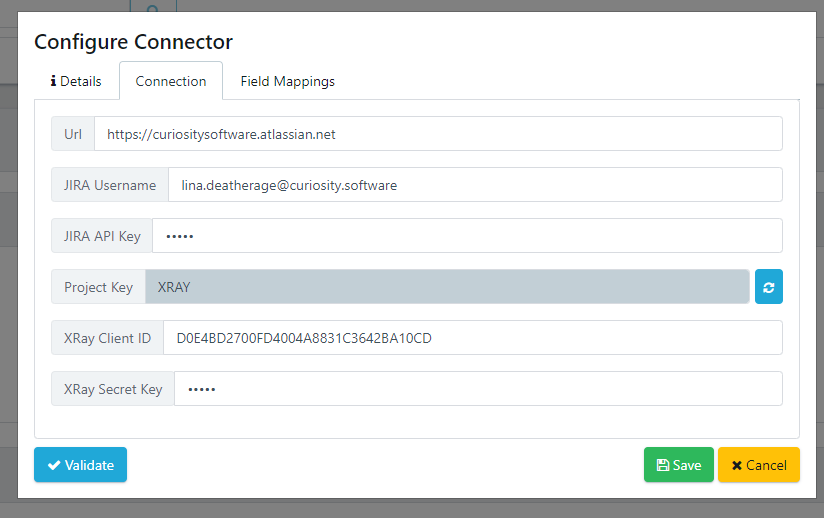
2. Connection Tab
Provide the following connection information:
- URL: The URL for your Jira Instance
- JIRA Username: Must be an admin user in Jira
- JIRA API Key: This can be generated by an admin user in your Jira instance. Please see instructions available here.
- Project Key: Select the XRay project you would like to export test cases into. To unlock the list of available projects, click the blue reload button.
- XRay Client ID and XRay Secret Key: Please see instructions available here.
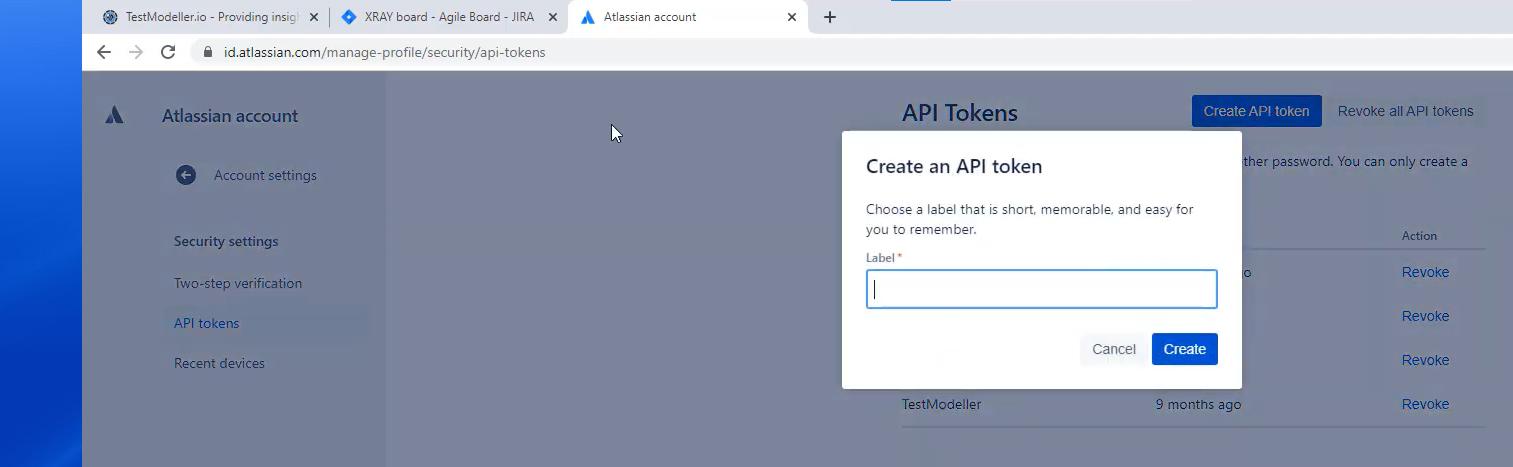
2.1 Create a Jira API Key
Inside of Jira, navigate to your Profile and Account Settings.

Then navigate to Security and Create and Manage API Tokens.
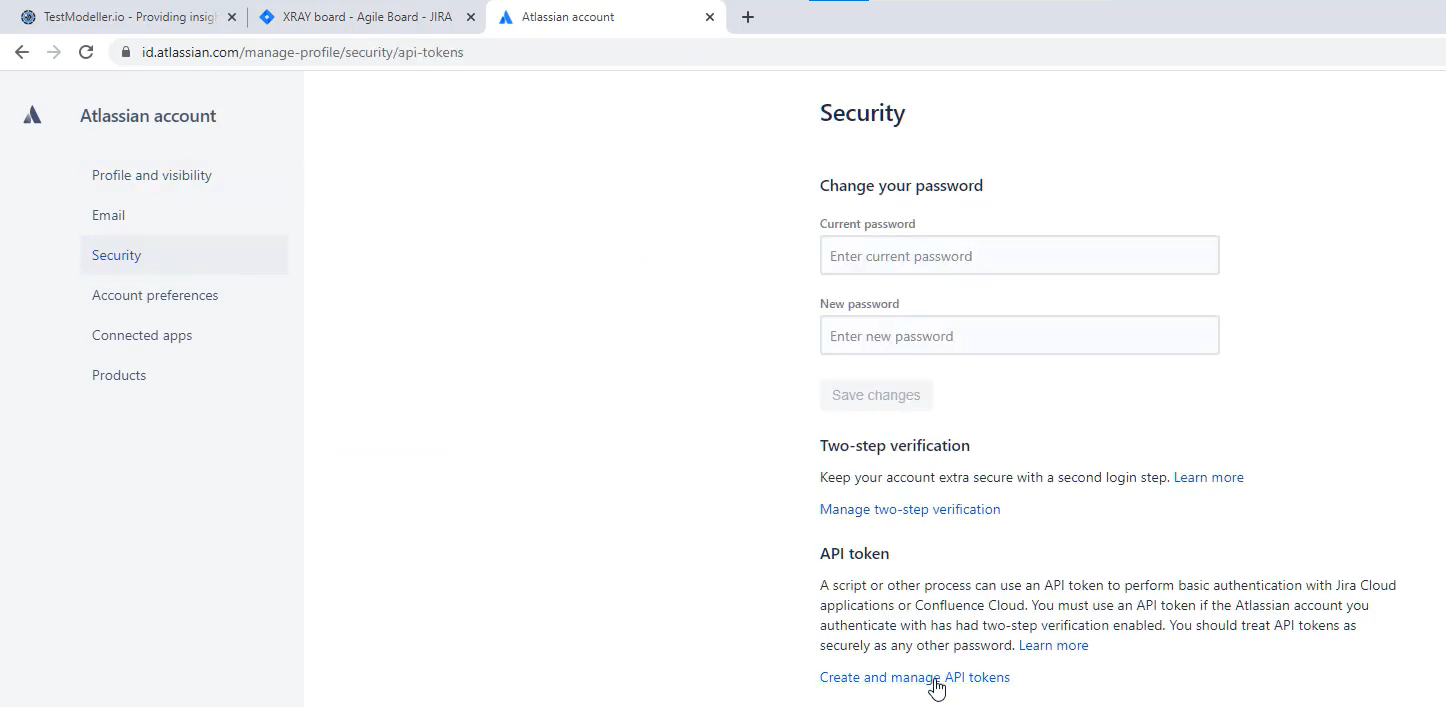
Click Create a New API Token and follow the instructions to generate the token. Copy and paste this token into Quality Modeller under Jira API key.
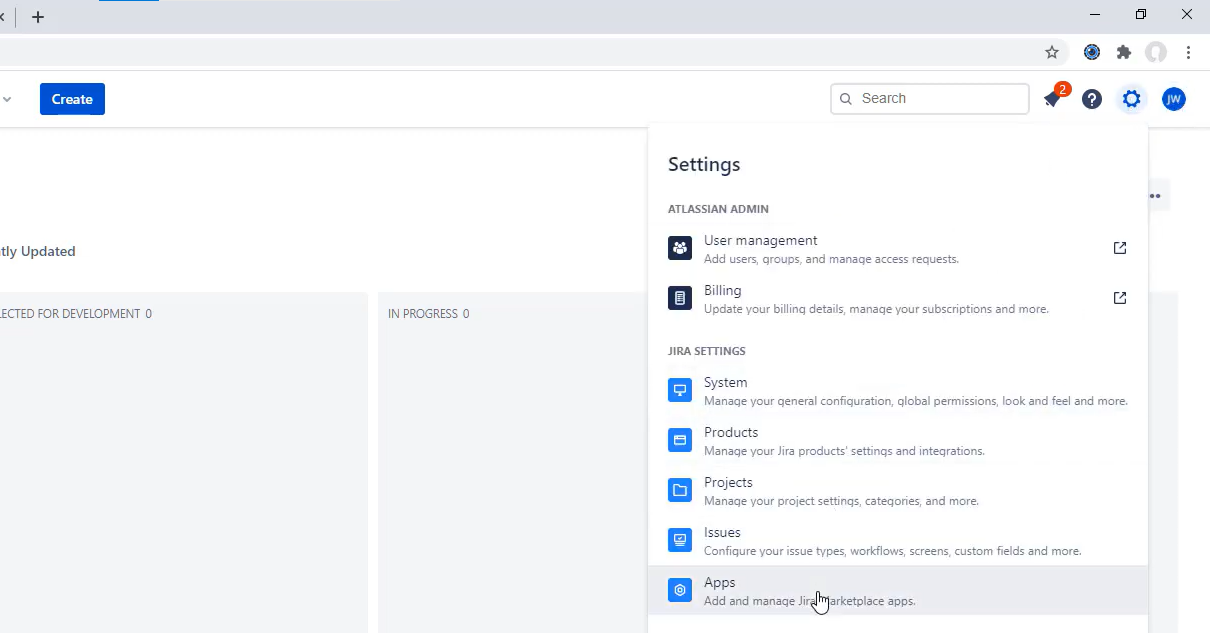
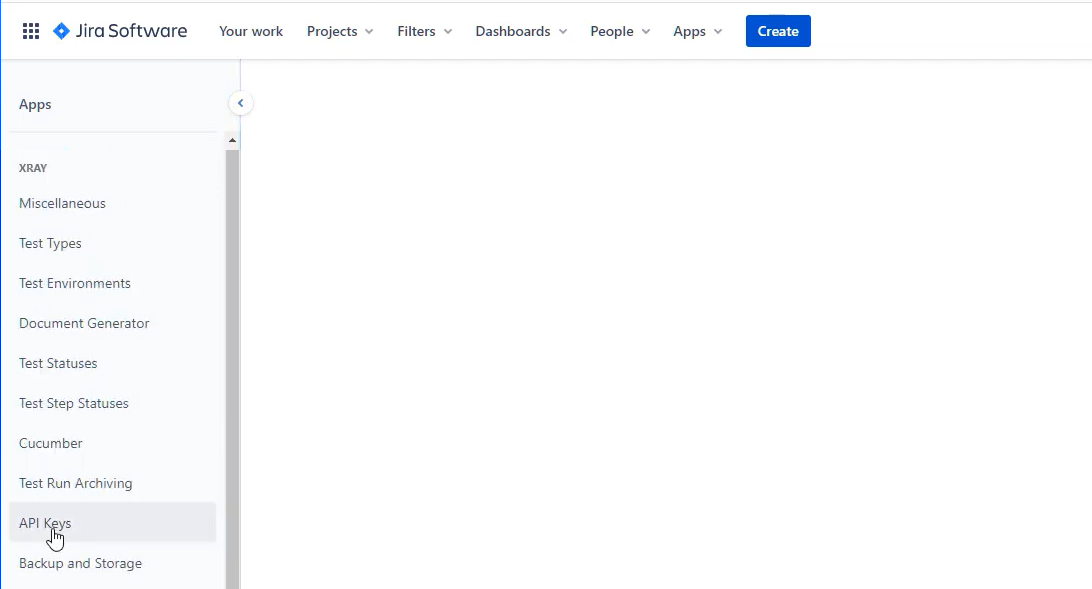
2.2 Create a Xray Client ID and Secret Key
Inside of Jira, navigate to Settings → Apps.
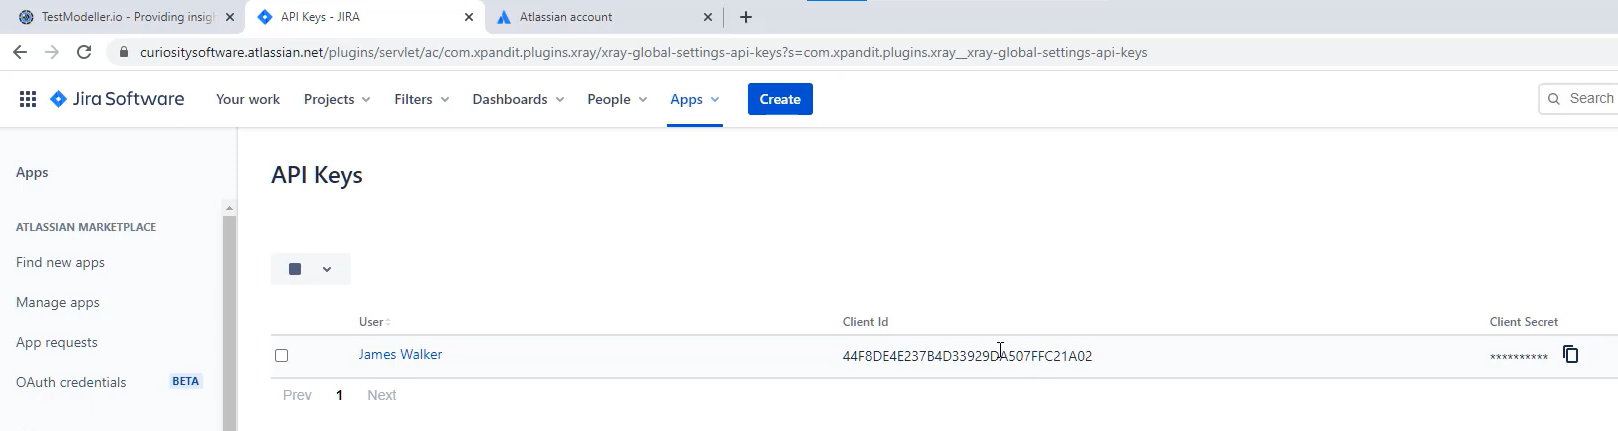
On the left-hand side of the application list, there is a section for Xray. Under Xray, there is a section called API Keys. Click Create API Key to generate a Client ID and Client Secret Key.
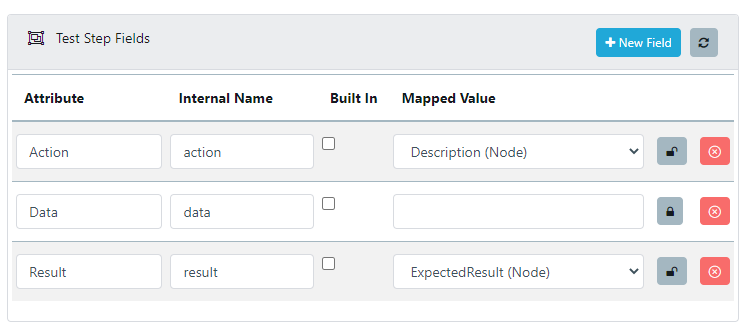
3. Field Mappings Tab
Field mappings are divided into two areas: Issue fields and Test Step Fields. The configurations for each:
- Attribute is the name of the field in your Jira instance.
- Internal Name is the key for the field in Jira (usually this is the name of the field in all lowercase).
- Built In refers to whether the field is required in Jira.
- Mapped Value is the value that will be exported from Quality Modeller into your chosen Jira field.
Issue fields are fields that are available in the normal Jira issue, such as the Summary and Description.
By default, these will be included in your connection.

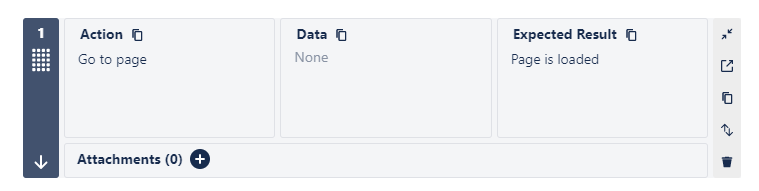
Test Step Fields are fields that are available in the Xray Test Details field as Steps. The default fields that are included with this connection type are Action, Data, and Expected Result.
Note: if you would like to export Quality Modeller data into fields that are not already inside of your Jira instance, you will first need to create the fields inside Jira. Quality Modeller can only map to existing fields in Jira.
For instructions on how to create custom fields in Jira, please refer to this link.
For instructions on how to create custom fields in Xray, please refer to this link.
Types of Mappings
Type | Description | Availability |
|---|---|---|
Model | Exports data from the model properties level. | Issue and Test Step Field |
Model Version | Exports data for the specific version of the chosen model. | Issue and Test Step Field |
Test Suite | Exports data from the test suite level. | Issue and Test Step Field |
Path | Exports data from the model paths, or test case names. | Issue Field |
Nodes | Exports data from the action level inside of models (ex: task blocks) | Test Step Field |
Export Override | Overrides any given field with a property set inside the mapping value. | Issue and Test Step Field |
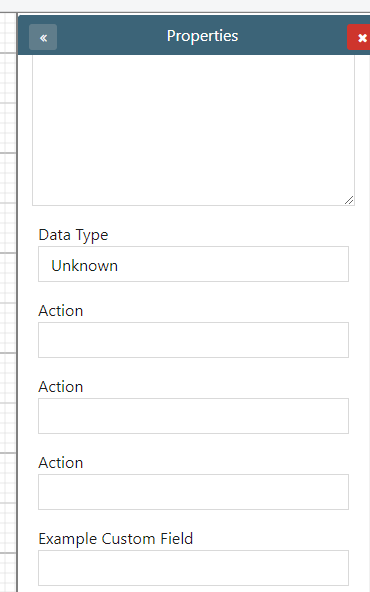
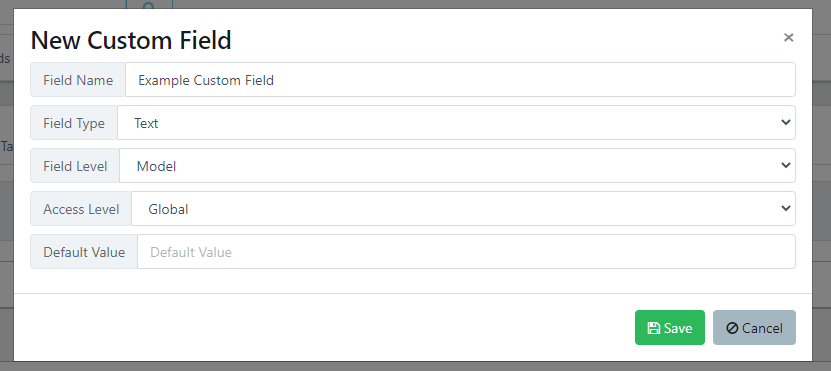
Custom Fields in Quality Modeller
Custom Fields can be created in Quality Modeller either at the Model or Node level to further customize what data can be exported.
To add custom fields to navigate to Workspace → Configuration → Custom Fields. Here, you can hit the blue New Field button to create a new field and select either Model or Node for the Field Level.
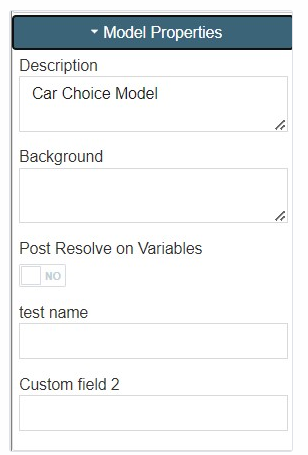
Custom model properties will be available underneath the Model Properties tab in a model.
Custom node Properties will be available inside the Properties section of an action block.