The Native job engine is utilised for connecting to local resources within an organisation’s infrastructure. This can be used from a Cloud or On-Premise Quality Modeller deployment.
This article covers installing the job engine to a Linux environment / native environment. If you are updating an existing installation, see section 5 below – the package is now self-contained and no longer requires .NET on the host.
1. Prerequisites
- A 64-bit (x64) Linux distribution with glibc 2.27 or newer. This includes Ubuntu 18.04+, Debian 10+, RHEL 8+, and Amazon Linux 2023. Amazon Linux 2 and CentOS 7 are not supported – their glibc is older than the bundled .NET runtime requires, and the engine will fail at startup with
GLIBC_2.27 not found. On such hosts use the containerised job engine instead. - No .NET installation is required – the job engine ships with its own .NET runtime.
- Download the Job server (request download link from Curiosity). The package is named
modeller_job_engine_net10.0_linux-x64_<version>.zip.
(Optional) If running automation
- Chrome web browser
- Install JDK - 21
sudo apt-get install openjdk-21-jdkVerify Java is installed and available on the path.
java -versionWe also recommend setting the JAVA_HOME environment variable.
sudo update-alternatives --config java

export JAVA_HOME=/path/to/java/home- Install Maven
sudo apt-get update

sudo apt-get install maven
Verify maven is installed and available on the path.
mvn -version- Install a dotnet SDK – only required if the engine will build or execute .NET-based test automation (the DotNetLocation setting below). The engine itself does not need it. Below are commands for Ubuntu Linux; we recommend following the official Microsoft guide for other distributions.
sudo apt-get update

sudo apt-get install -y dotnet-sdk-8.0

dotnet --version
2. Installation
Firstly, let’s install the job engine and configure connectivity to your Quality Modeller instance.
1 – Download the package and unzip it to your chosen location, for example /data/modeller_job_engine.
unzip modeller_job_engine_net10.0_linux-x64_<version>.zip

mv package /data/modeller_job_engine
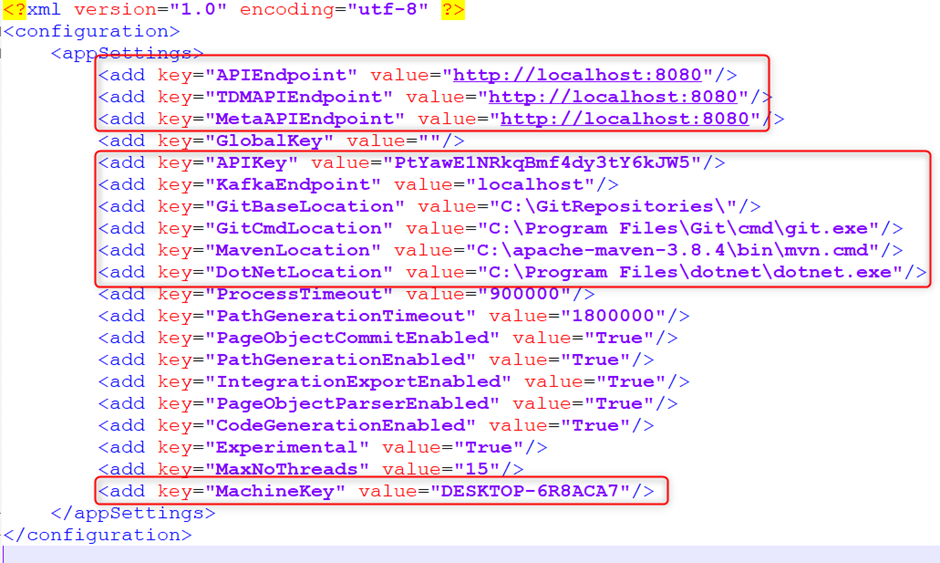
2 – Edit KafkaJobEngine.Net5.dll.config. This is an xml file which defines the configuration settings for the JobEngine service.
You will need to change the following values for your instance of modeller;
- APIEndpoint – The URL of the API endpoint
- TDMAPIEndpoint – The URL of the TDM API endpoint. Typically, this is the same as the APIEndpoint.
- MetaAPIEndpoint – The URL of the Meta API Endpoint. Typically, this is the same as the APIEndpoint.
- APIKey – The API Key to use for authentication against the selected workspace.
- KafkaEndpoint – The kafka URL.
- MavenLocation – Maven location (only used for automation execution)
- DotNetLocation – Dotnet location (only used for .NET automation execution)
- MachineKey – A unique machine key for the workspace.
3 – Once configured head to the root folder and run the instance. Run it from the installation folder (not by absolute path from elsewhere) so the logging configuration next to the binaries is picked up.
cd /data/modeller_job_engine

chmod +x KafkaJobEngine

./KafkaJobEngine
The chmod is only needed if the execute permission was lost in transfer. Older releases were started with dotnet KafkaJobEngine.Net5.dll – that form still works on machines that have a .NET installation (the engine’s bundled runtime is used either way), but ./KafkaJobEngine is the supported way to start the engine and requires no .NET on the host.
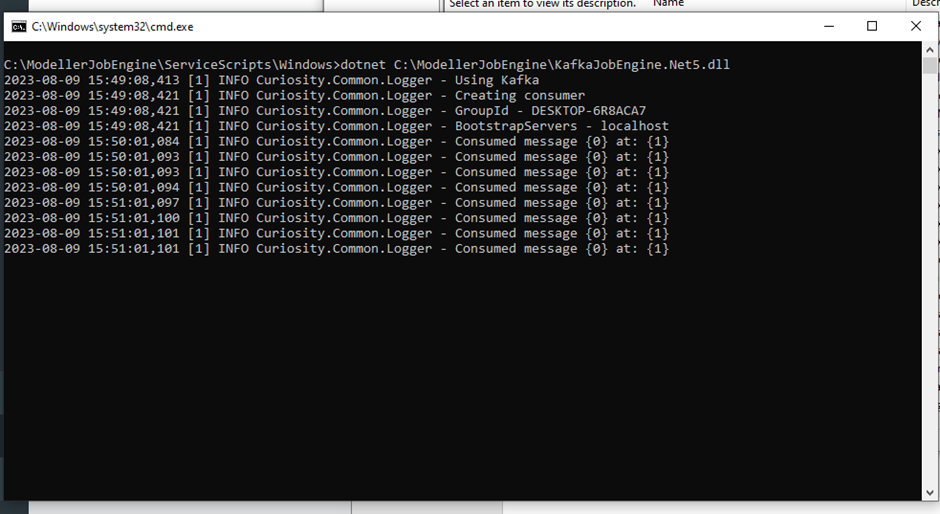
4 - On initial execution if all has been successful a command window will be displayed which shows the KafkaJobEngine running. If there are any errors, they will be displayed in the console window. Below shows a successful series of messages.
3. Verify Connectivity
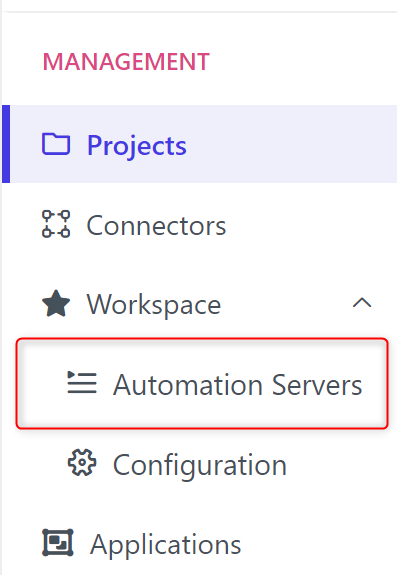
Next, we will verify the job engine has connectivity to the modeller instance. Navigate to Profile, and then select Automation Servers from the menu.
The job engine should be displayed under the Workspace Servers page, along with the engine version it is running.

4. Install as a Service
The job engine is now up and running whenever you run the executable. Next, we will install the job engine as a service. This will mean that you do not need to run the executable directly.
Head to the Linux folder in the ServiceScripts package and run the install script as root, or as a user with sudo rights. The script works out where the engine is installed from its own location and writes the systemd unit accordingly – no manual editing of the modeller_job_engine.service file is required. The service is installed as job_engine, starts on boot, and restarts automatically if the engine exits.
cd /data/modeller_job_engine/ServiceScripts/Linux

./install_service.sh
Once installed you can use the shell scripts alongside it to start, stop, review the status, and view the logs of the service – or use systemctl and journalctl directly with the job_engine service name.
5. Updating an Existing Installation
1 – Stop the service before extracting the new package. The engine binary cannot be overwritten while it is running.
sudo systemctl stop job_engine2 – Preserve your configuration. Your edited KafkaJobEngine.Net5.dll.config is the one file to keep: copy it aside, extract the new package over the installation directory, then restore it. The zip contains a default config which would otherwise overwrite yours.
3 – Re-run the service install to pick up the current unit file; this also starts the service for you.
cd /data/modeller_job_engine/ServiceScripts/Linux

./install_service.sh
Notes when upgrading from the .NET 8 package:
- You do not need to install .NET 10, and you do not need to remove .NET 8 – the engine now carries its own runtime and ignores whatever is installed.
- An existing service file that runs
dotnet .../KafkaJobEngine.Net5.dllkeeps working as long as a dotnet remains installed. If you remove .NET from the host, you must also switch to the new service file (step 3) – do those together or not at all. - Any hand-made changes to the unit file (for example User= or Environment= entries) are overwritten by step 3 and need re-applying.