This guide shows you how to create a pipeline that will try to find data and, if it fails, will generate the data. The example given is for adding customer/order/orderitem records, with specific values, for example a specified credit limit. If a record for that credit limit is not found then a record will be generated.
Prior to creating a pipeline, you should set up and successfully test your find and generate data activities. In the examples used in this guide, both these activities had already been created and tested and so could be added into the pipeline with minimal changes.
Create the Find Data activity
If you do not already have an appropriate Find Data activity, then you will need to generate one.
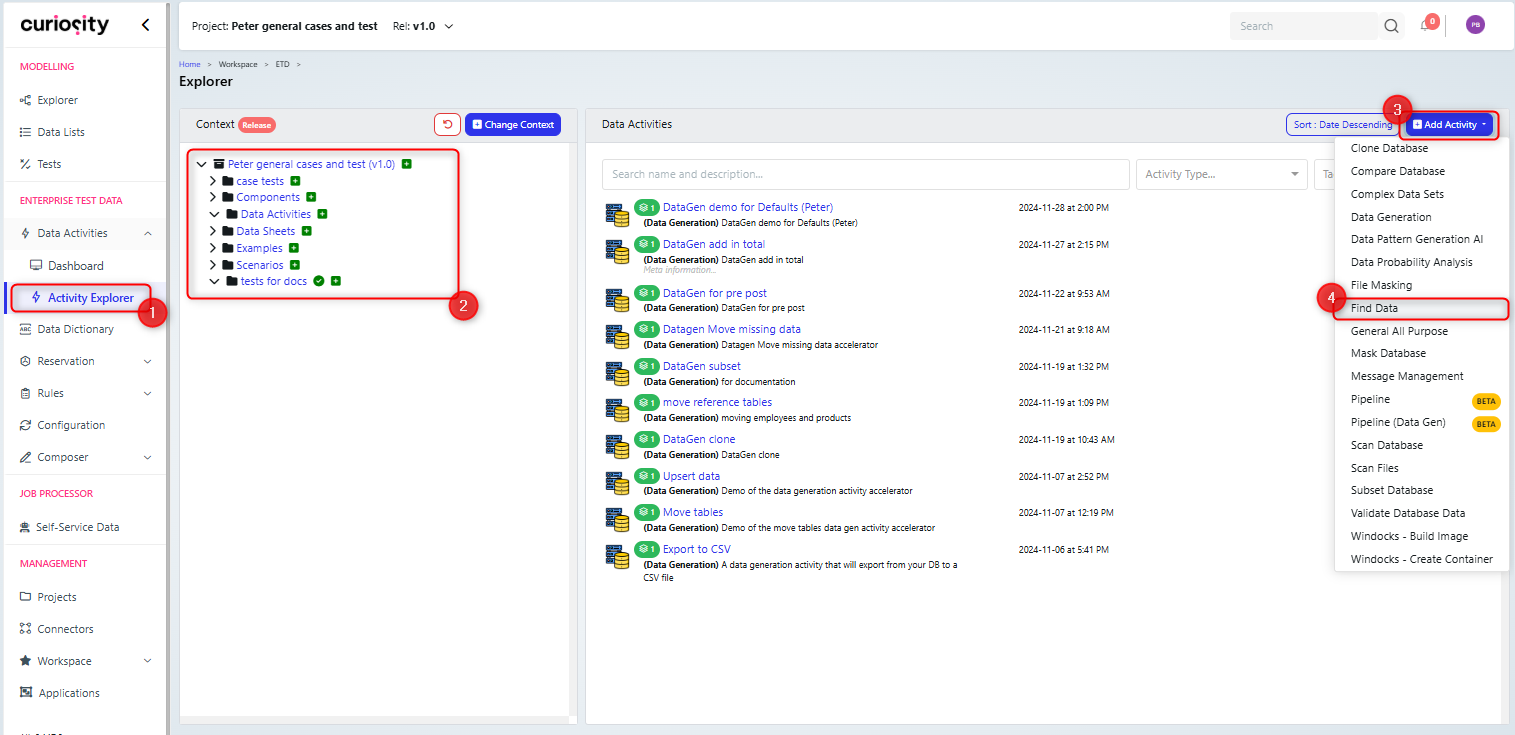
On the Activity Explorer (1), choose an appropriate folder (2), click ‘+Add Activity’ (3) and choose ‘Find Data’ (4).
Create the Data generation activity
Now create your data generation activity, if you haven’t done so already.
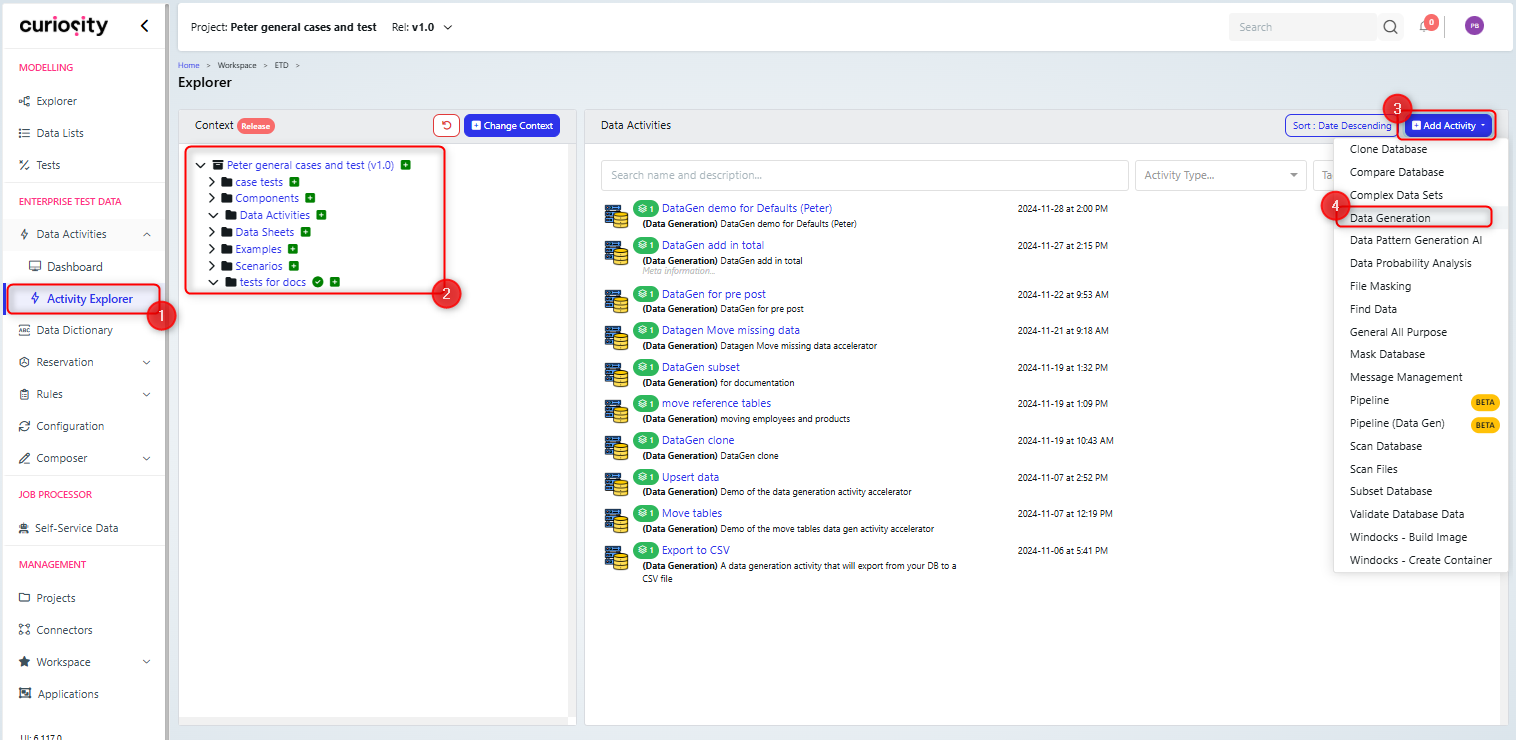
On the Activity Explorer (1), choose an appropriate folder (2), click ‘+Add Activity’ (3) and choose ‘Data Generation’ (4).
Then configure the data generation activity:
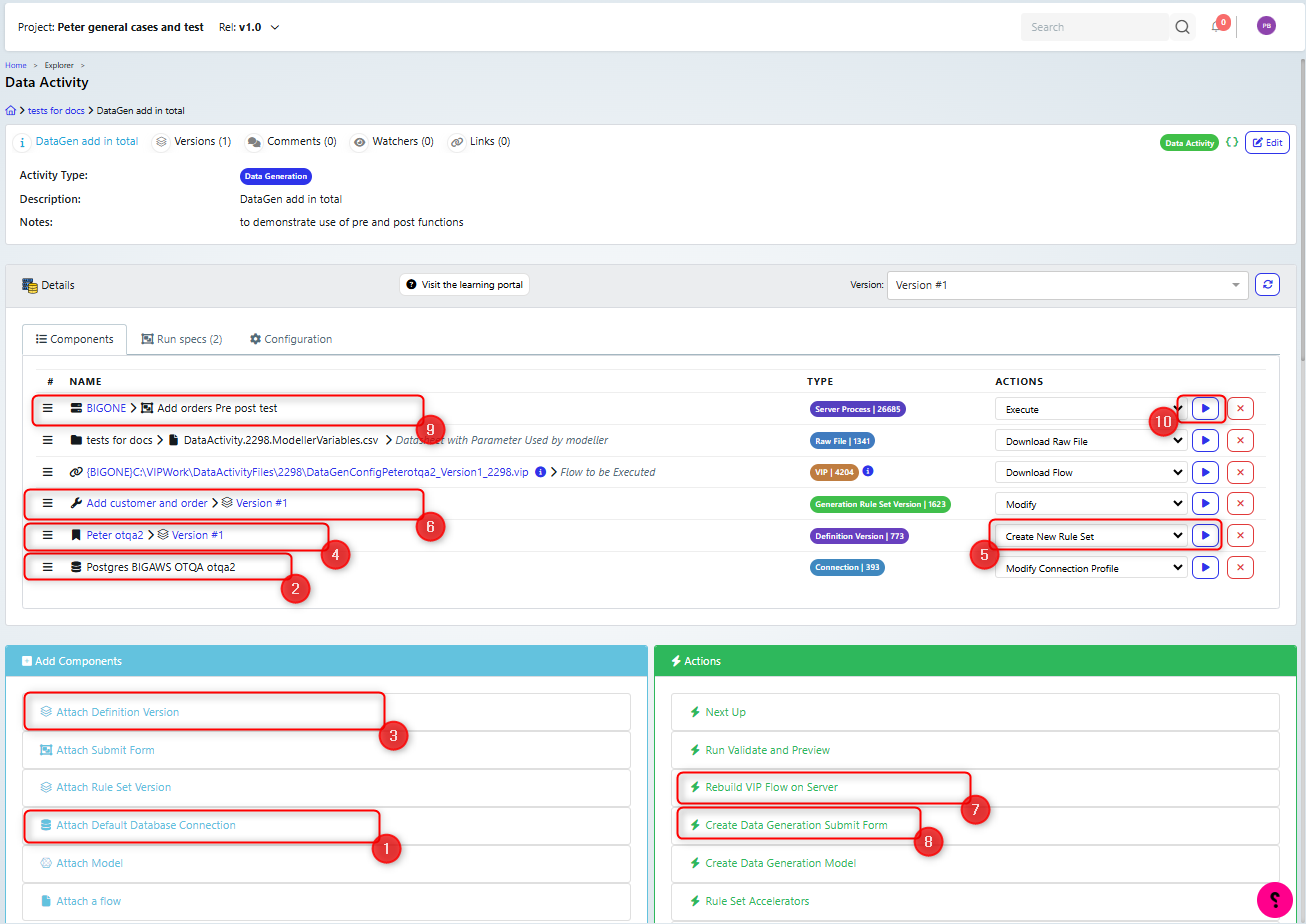
Attach a database connection (1)(2)
Attach a database definition (3)(4)
Create a ruleset (5)
edit the ruleset as needed (6)
Recreate the VIP Flow (7)
Create the submit form (8)(9)
Then test the submit form (10)
There are further details on setting up data generation activities in the Data Generation guides.
Create the pipeline Model for ‘find and make’
Initially you need to follow the steps for Setting up a Pipeline and adding a pipeline model as specified in the pipelines guide.
Add the Find data activity
Open the model and add the required “find data” activity onto the canvas
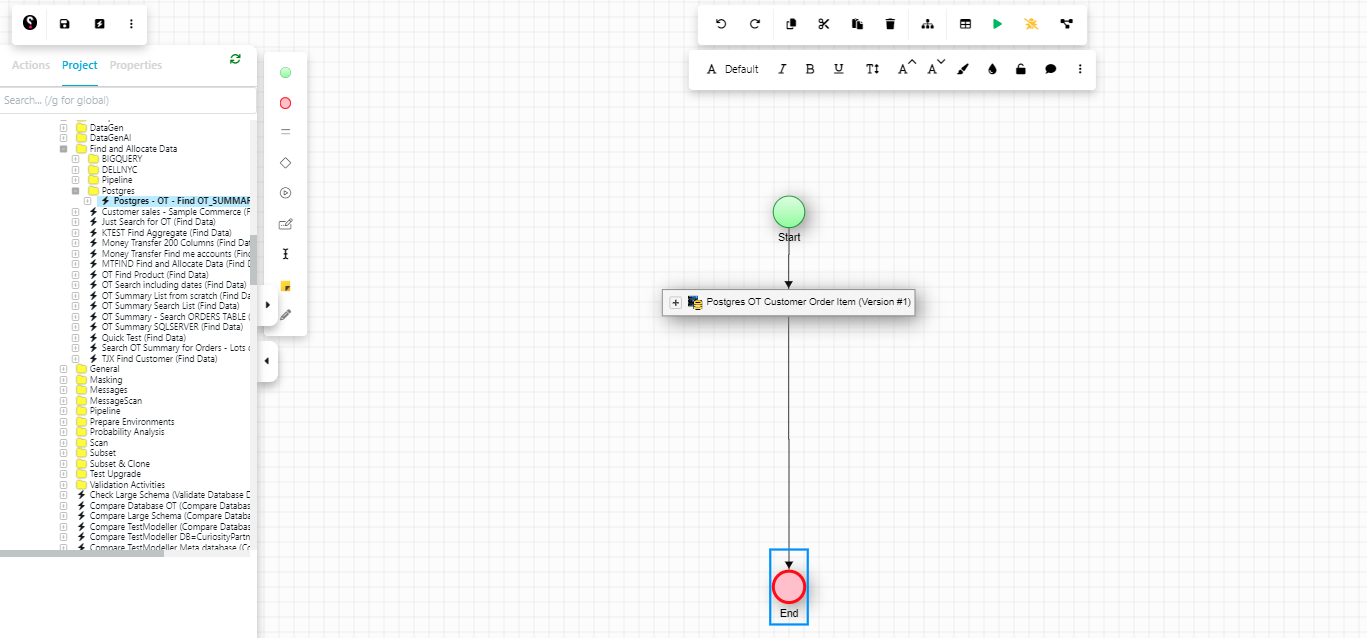
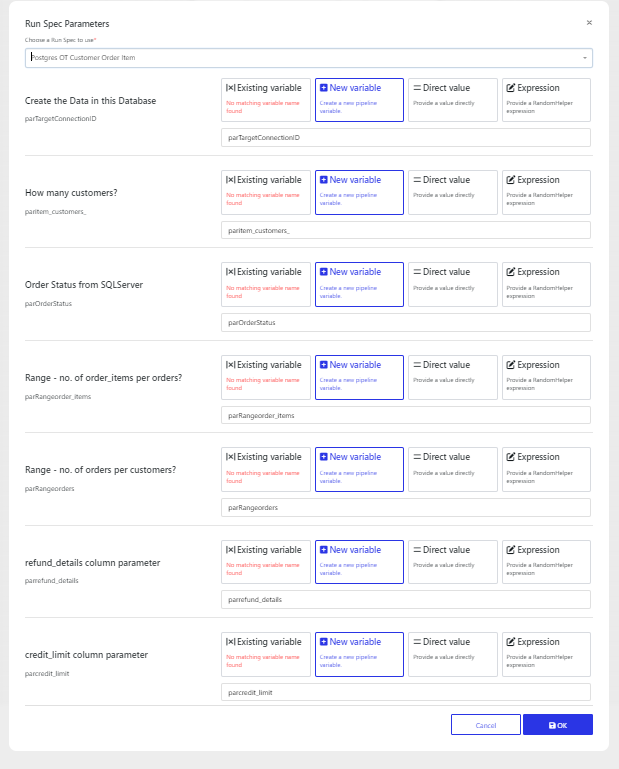
This will display the Run Spec parameters dialog.
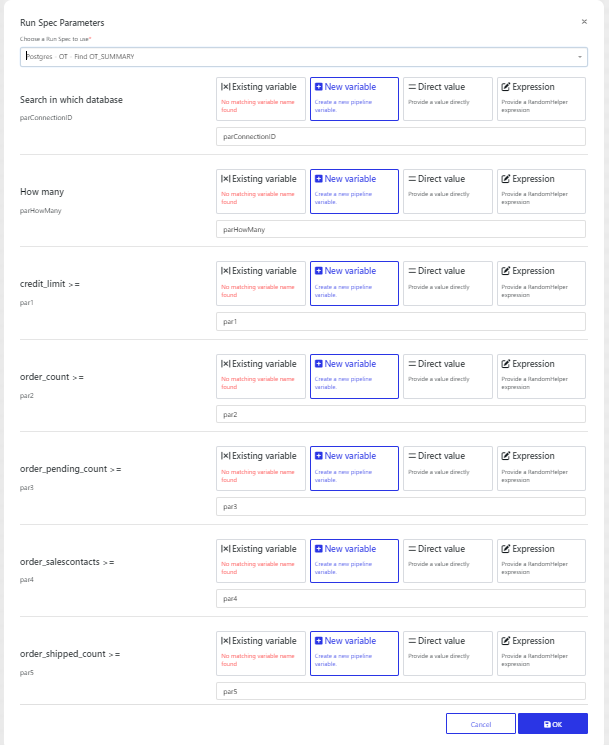
The run spec that you choose will depend on what has been set up and what you require, since you may have a number of different scenarios, for example just generating data, or generate and extract some of that data.
It includes a list of the parameters that the data activity uses. By default, these are mapped to variables but you can amend this behaviour. Normally you will leave them as the default option, which will be “New Variable”. The options are:
Existing variable: you can map this parameter to an existing variable in the model. Note that if there is a variable in the model that matches the name of the parameter, then that variable will pick picked automatically (as an existing variable).

New Variable: in which a new variable will be created in the model when the activity is imported. This will be given the same name as the parameter

Direct value: you can enter a hard coded value. Note that the value you can enter is based upon the type of the parameter. In the first example, the parameter value must be one of a list of values, so when you enter a direct value, you need to choose from the available options. In the second example, a range is required.


Expression: you can set up an expression. For these values you need to enter an expression, there is a Data Painter available, which you can use to set up the expression
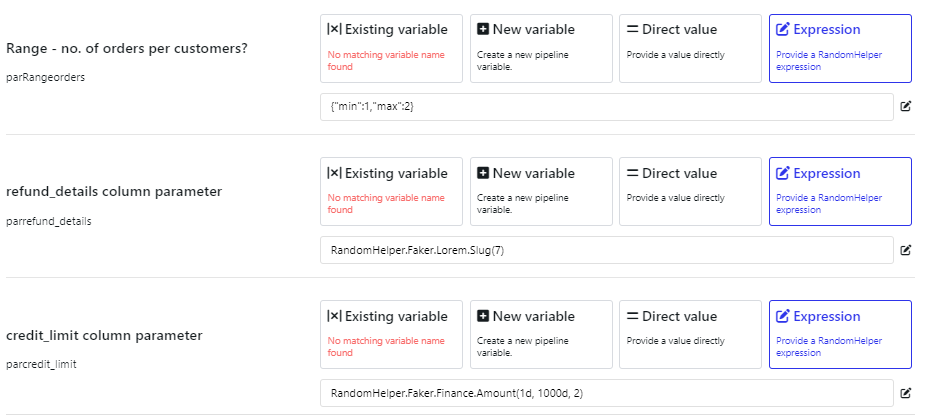
Then click OK to add it.
Add the generation activity
Open the model and add a data generation activity
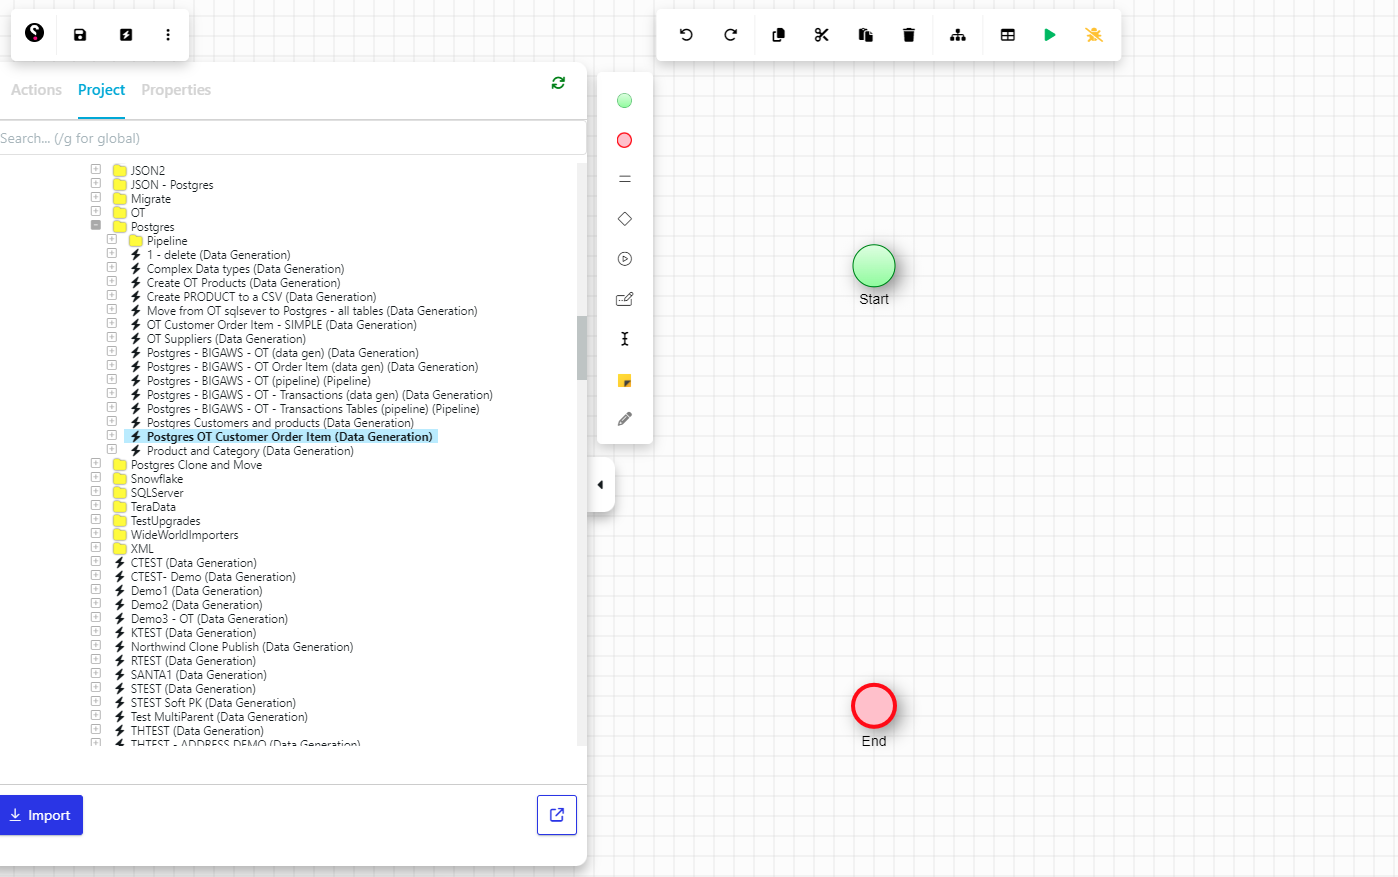
Drag the datagen activity onto the canvas. The Run spec parameter will be displayed and click ok to add it.
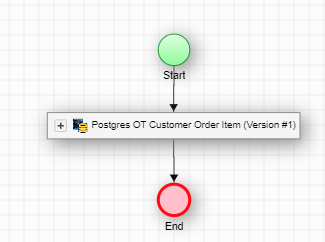
If you click the + on the datagen activity, you can view the data that will be generated.
 In this example a customer, order and order_item will be created.
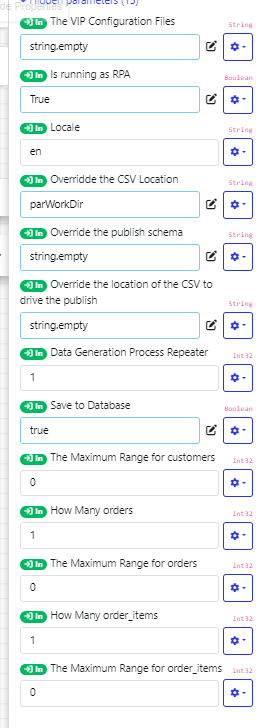
You can review the datagen parameters by clicking the node variables on the right hand side to see the parameters that are set up for the datagen activity.
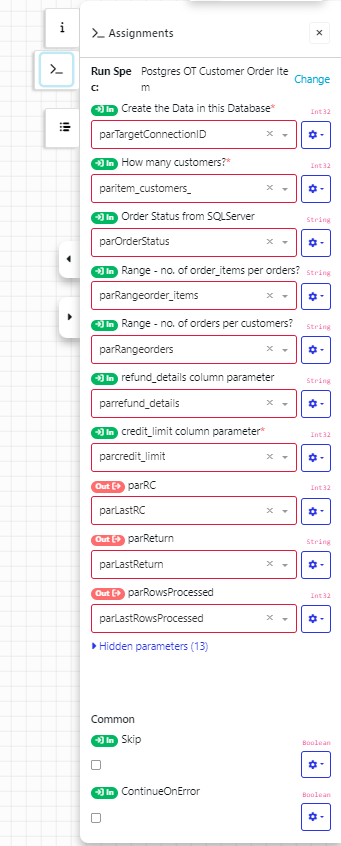
You can update the parameters. By clicking on the cog, you can change how the parameter is assigned, as in the screen grab below (value, variable or expression) similar to when they are imported.
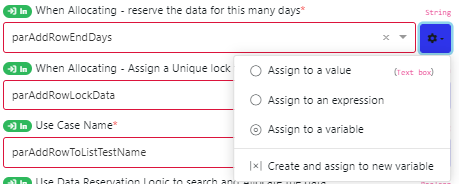
Initially these parameters will be set to the model variables that were set up when the datagen activity was imported. You can view the model variables by clicking the variable button on the top menu.

There are hidden parameters, these are internal ones that generally are left as default but can be altered. For example, a csv file can added to the ‘override the location of the CSV to drive the publish’ in order to generate based on that CSV file.
Add a “No data found” decision component

Add this after the find and test if no data is found (Last rows processed being 0)
In order to generate data if none is found, you place the Data Gen activity on the true branch of ‘no data found’. But in order to only call it once, you need to add a count variable to check if it has already been called.
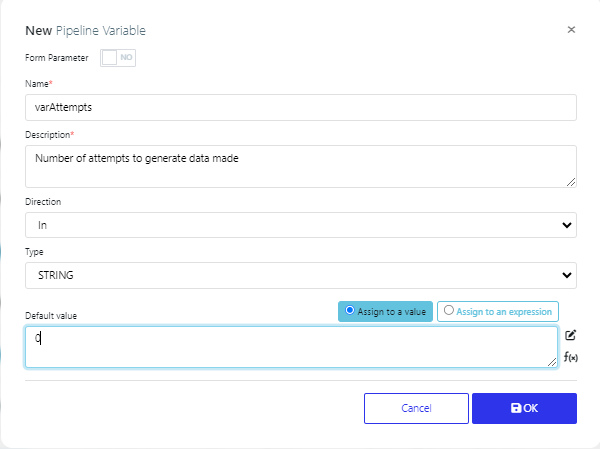
In this example, the count variable is called varAttempts
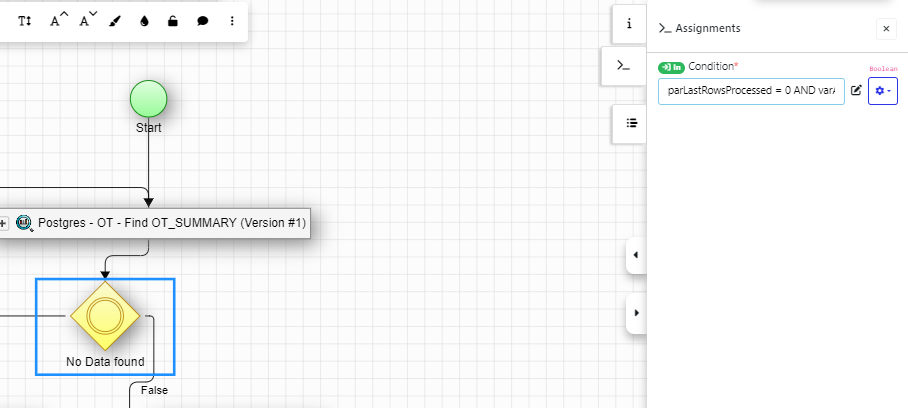
Set the condition for the ‘No Data found decision’ to check both whether any data was retrieved and the value of the counter (varAttempts):
parLastRowsProcessed = 0 AND varAttempts = 0
Then add an assign action to the true branch, to set the increment the value of the counter (varAttempts)
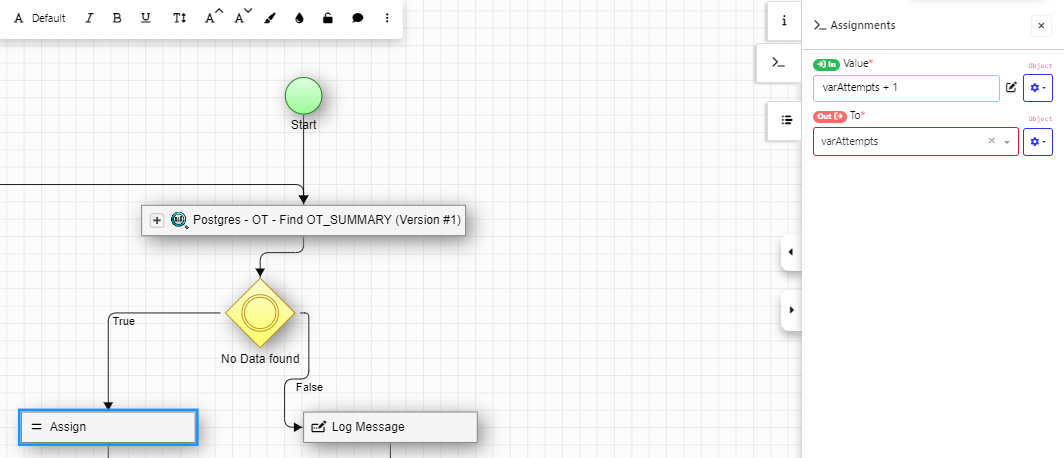
So the whole model will look like the following
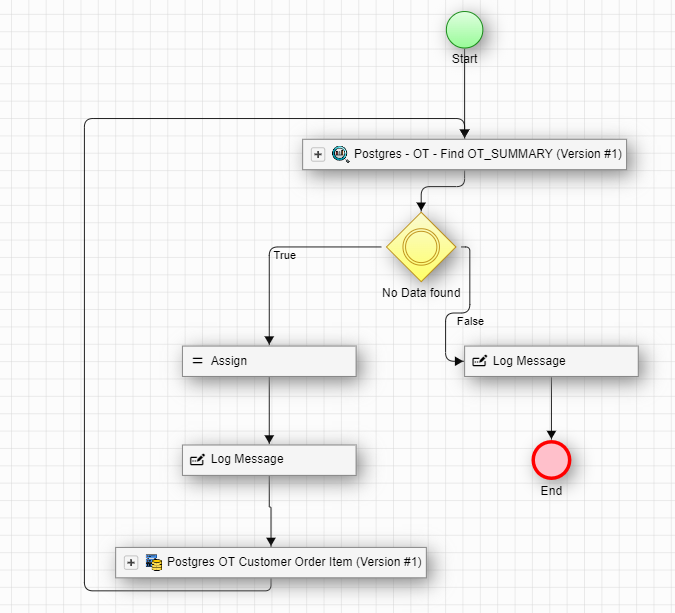
Note that when generating the data using the datagen action, you can map the values you need to generate from the values being used to find data in the Data Find action.
For example, if you are trying to generate an order for a customer with a specific credit limit. Then you can map the value of that parameter (in this example par1):
Find variable:

datagen variable:

Test the activity
You can use the green arrow on the top menu in order to run the activity.

Create the pipeline submit form
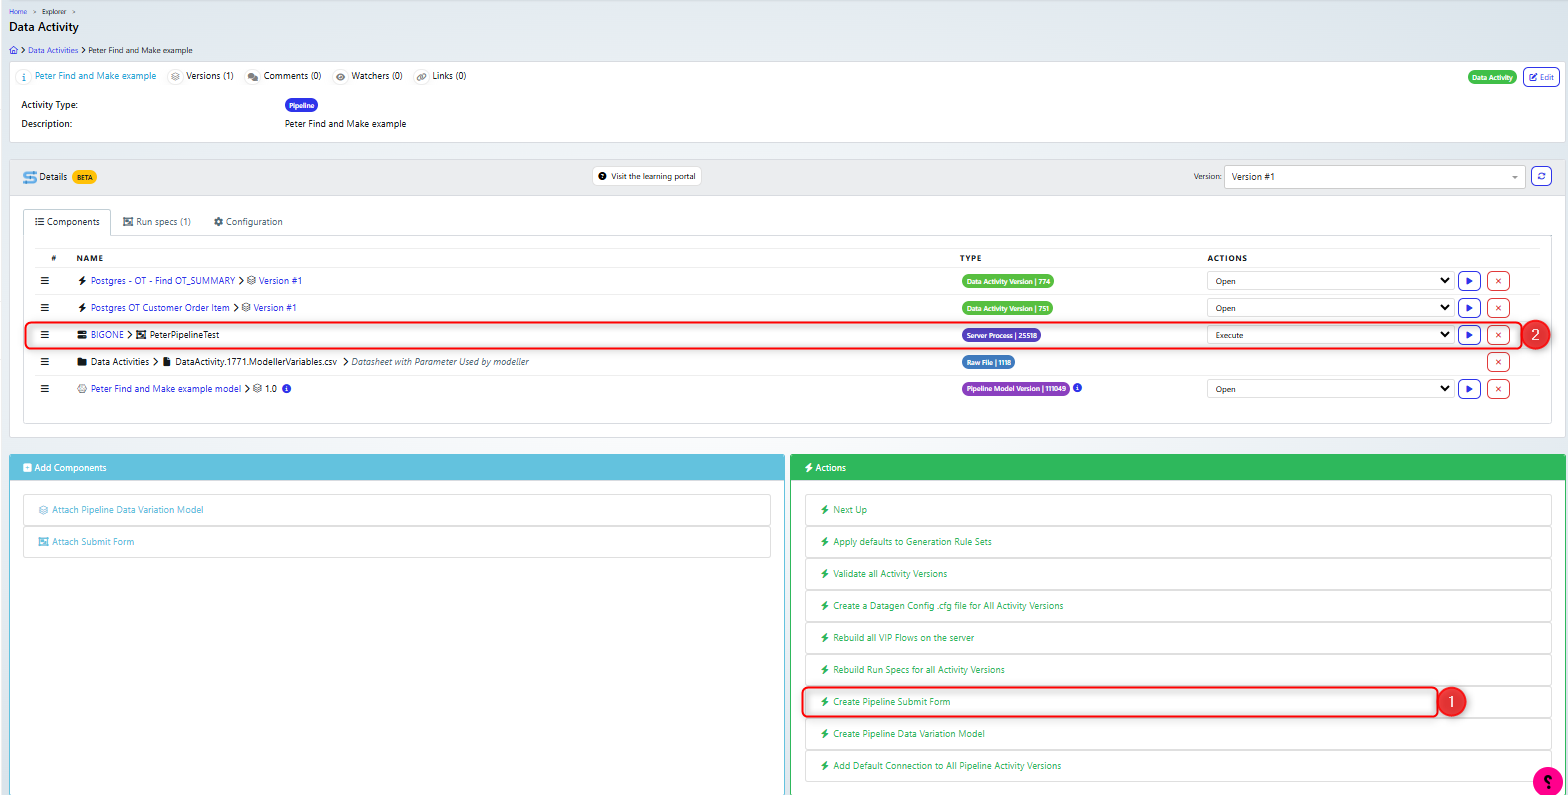
Once you have it working correctly, then you can review the section of creating a submit for in the Pipeline guide, so that users will not need to open the activity model in order to generate the data. To summarise, you click the Create Pipeline Submit Form action (1), then fill in the dialogs and, assuming it is successful, the submit form will be visible, once you refresh the screen (2).
