This guide walks you through configuring and deploying a database update script within the Curiosity Software pipeline. You will create a new Pipeline activity, set up the required SQL script parameters, and use variables and decision nodes to control how the pipeline runs.
For a full guide to what Pipelines are and their benefits, see here.
Part 1: Create the Pipeline Activity
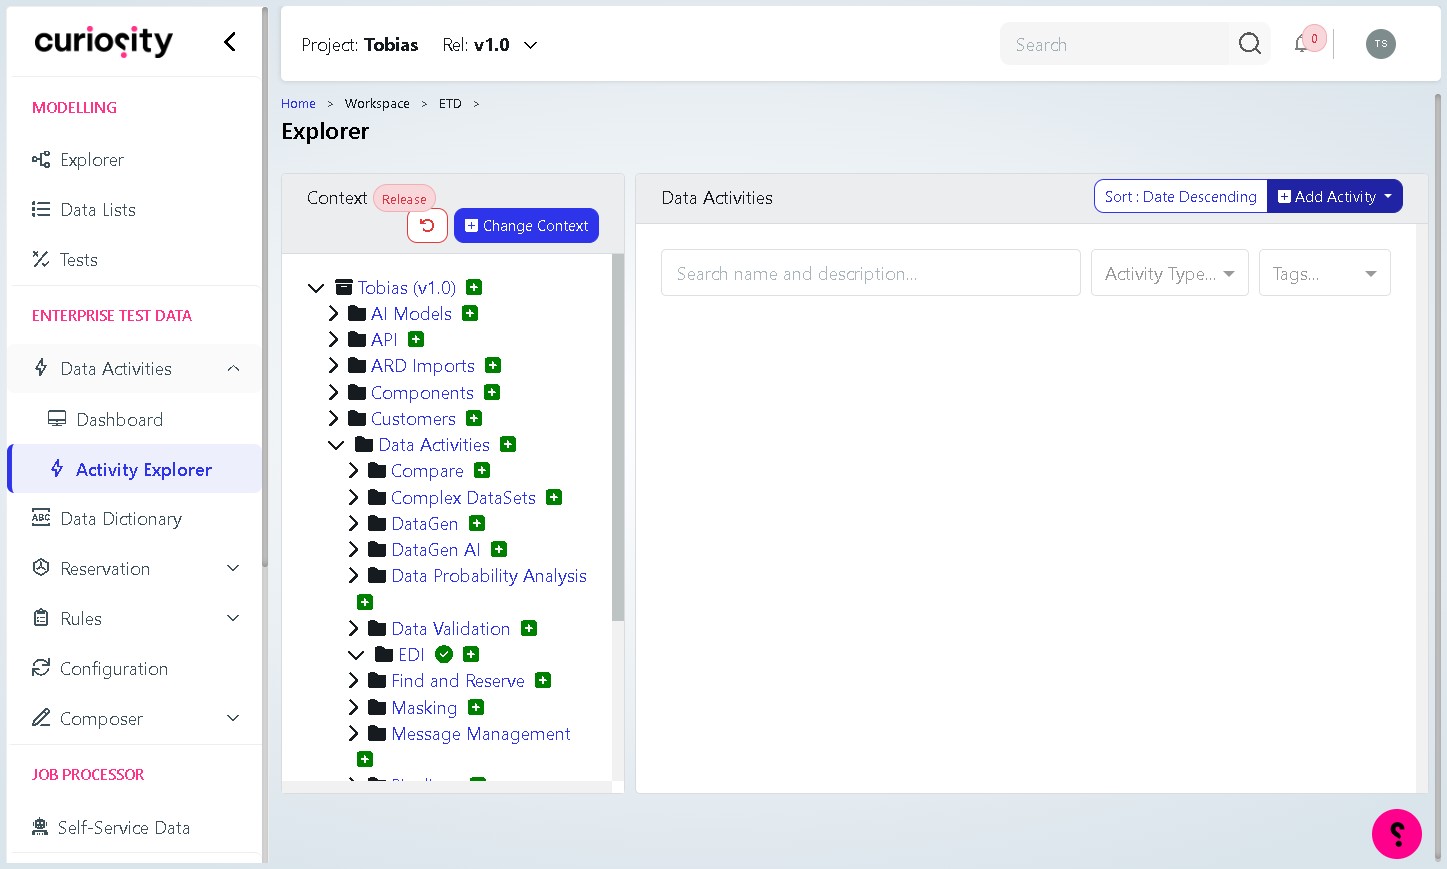
Step 1 Navigate to your workspace URL
Open your browser and go to your Curiosity Software workspace URL. You will land on the Explorer view, which lists all your existing data activities.

Step 2 Click “Add Activity”
In the top-right corner of the Explorer view, click the Add Activity button. A dropdown menu will appear with the available activity types.
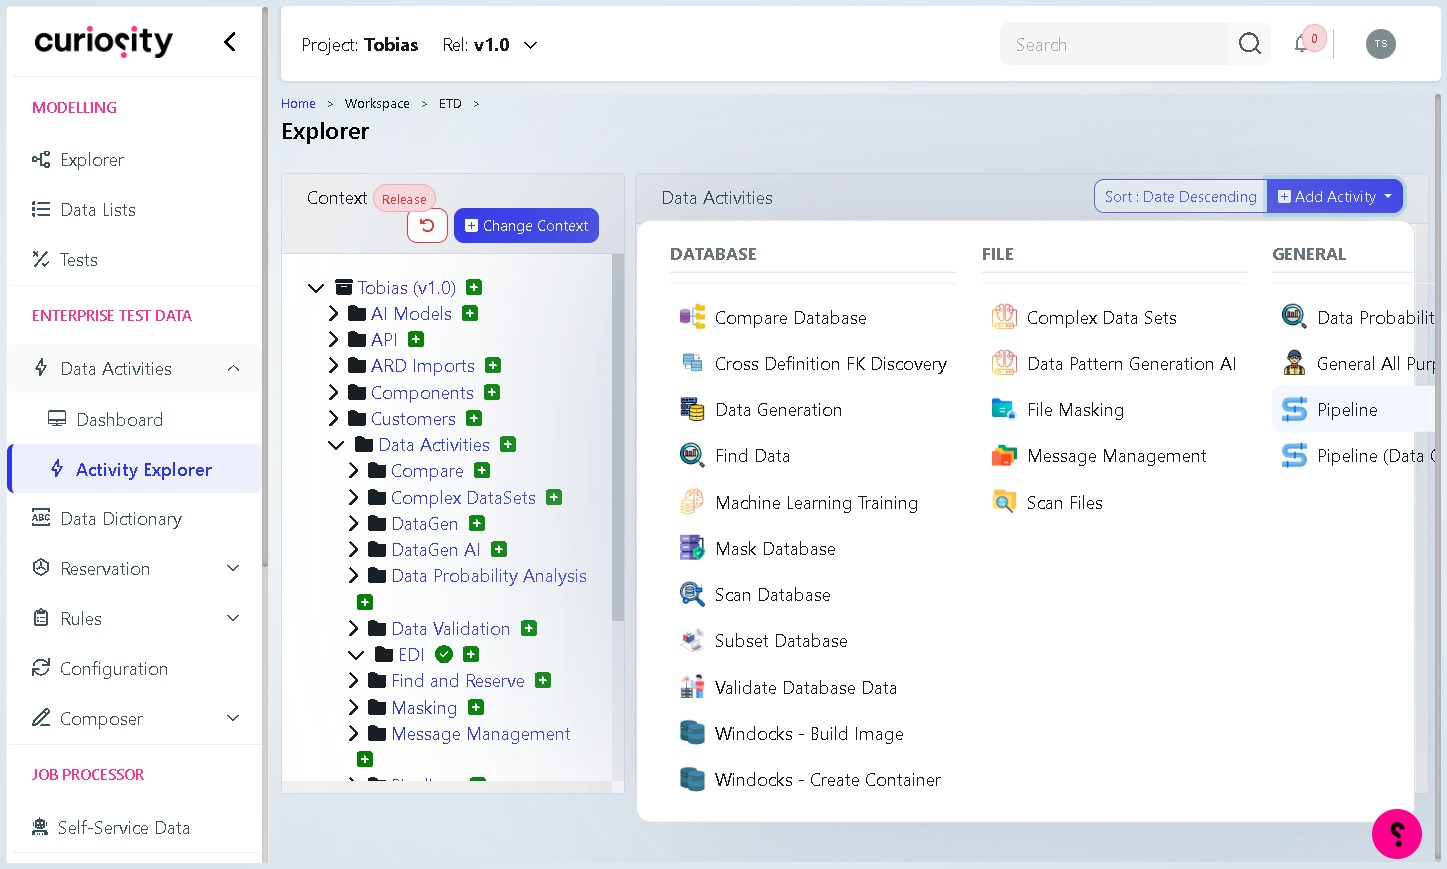
Step 3 Select “Pipeline”
From the dropdown, click Pipeline under the General column. This opens the New Pipeline dialog.
Step 4 Enter a name
Click the Name field and type a clear, descriptive name for your pipeline (for example, DB Update Script Example). The name will appear in the Explorer and is used to identify this activity.
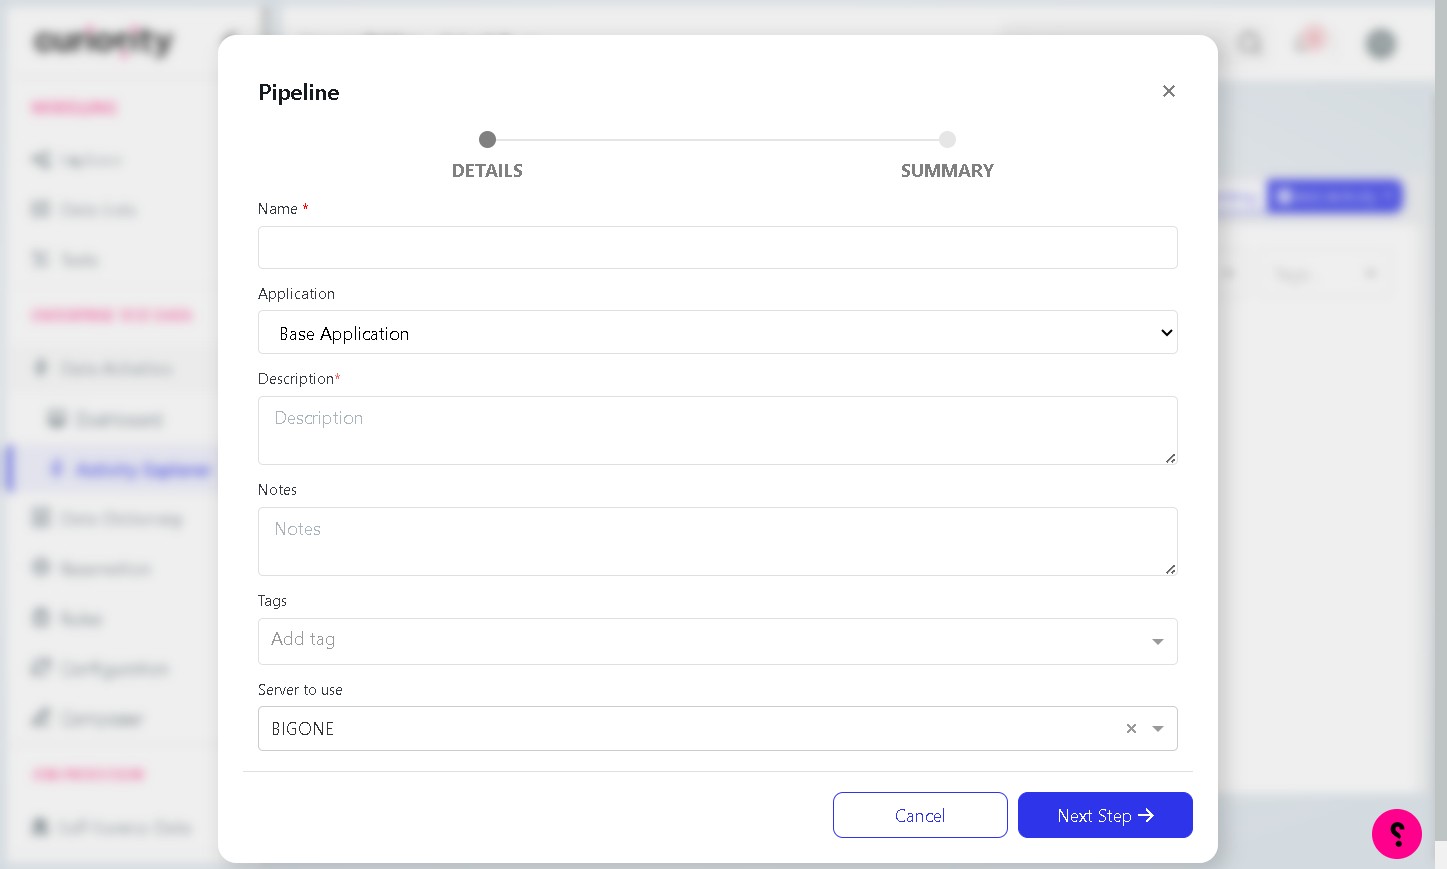
Step 5 Enter a description
Click the Description field and type a short explanation of what the pipeline does. A good description helps other users understand the purpose of the activity at a glance.
Step 6 Click “Next Step”
Click the Next Step button to move to the Summary page. Review the details shown, then click Finish to create the pipeline.
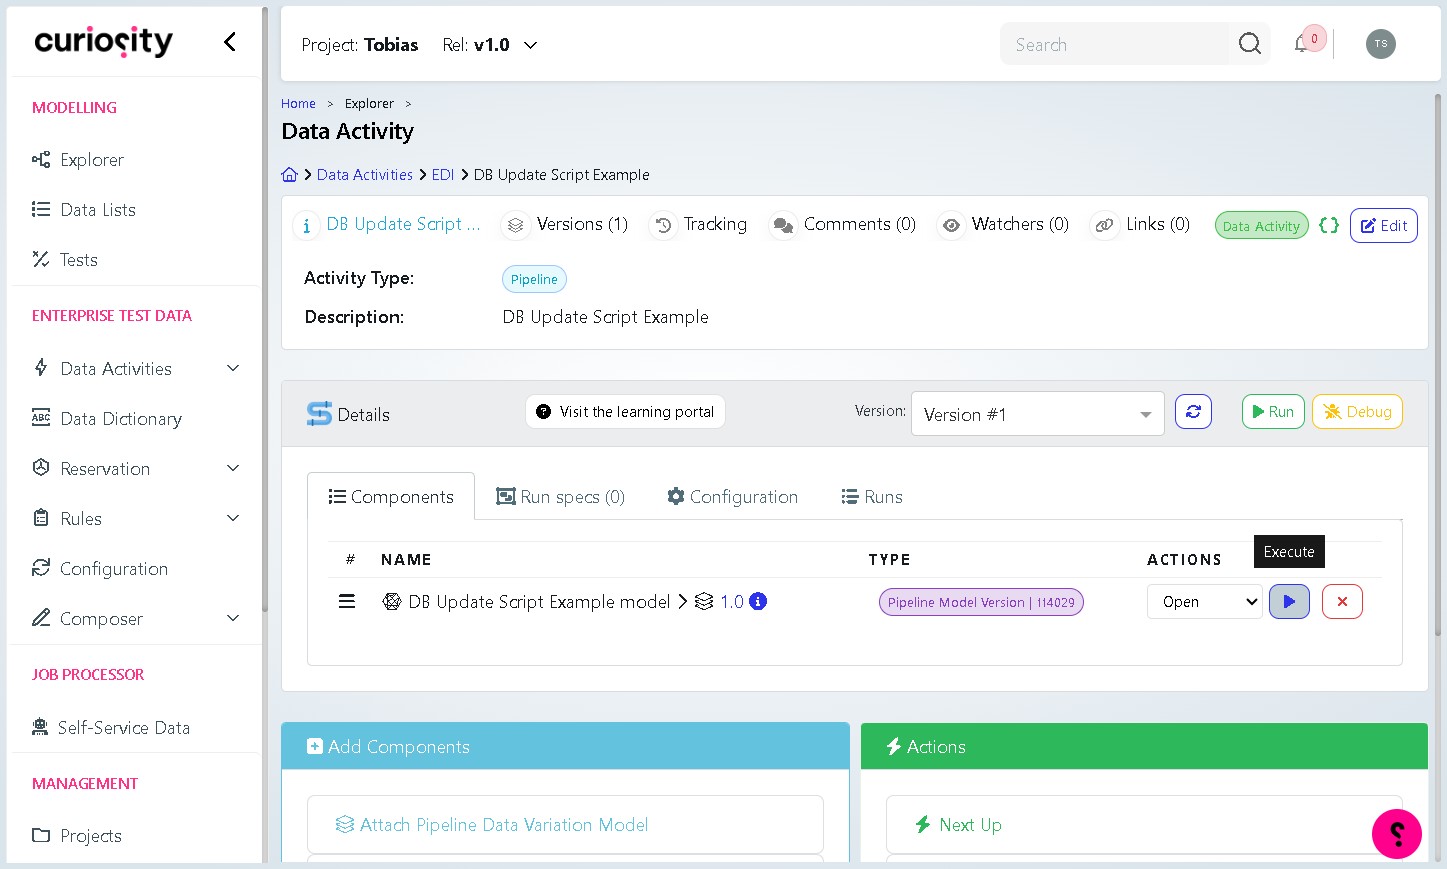
Step 7 Open the new activity
A success message will confirm the activity has been saved. Click Go to Data Activity to open it. You will see the activity’s detail page, which lists its components and run history.
Step 8 Open the Pipeline model
On the activity detail page, click the pipeline model link (shown under the Components tab) to open the visual canvas editor. This is where you will build the pipeline logic.
Part 2: Build the Pipeline Canvas
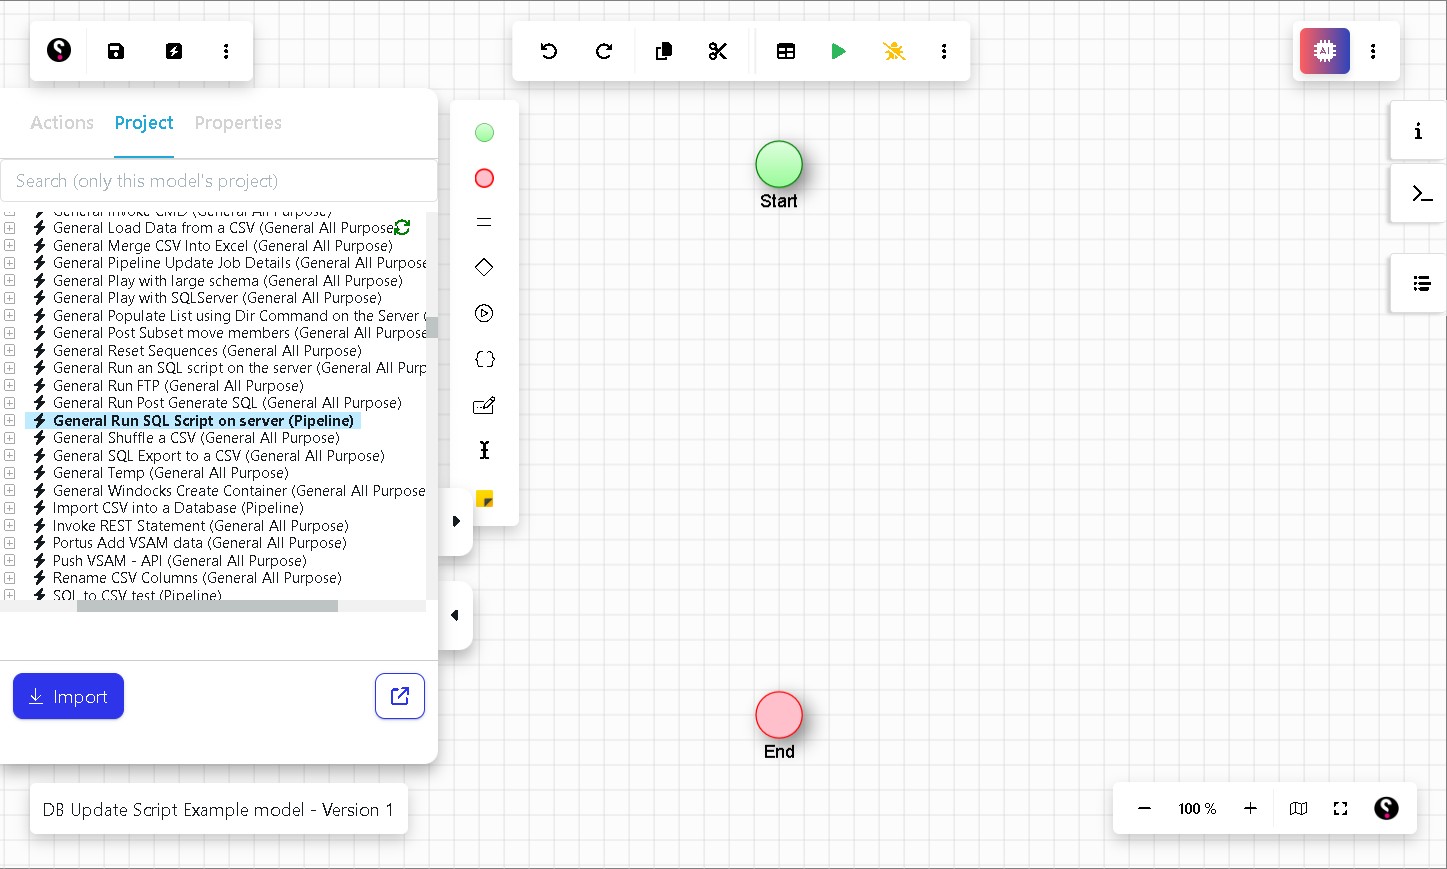
Step 9 Add the ‘General Run SQL Script on Server’ activity
In the left-hand panel, find General Run SQL Script on server (Pipeline) in the activity list. Drag it onto the canvas and drop it between the Start and End nodes.
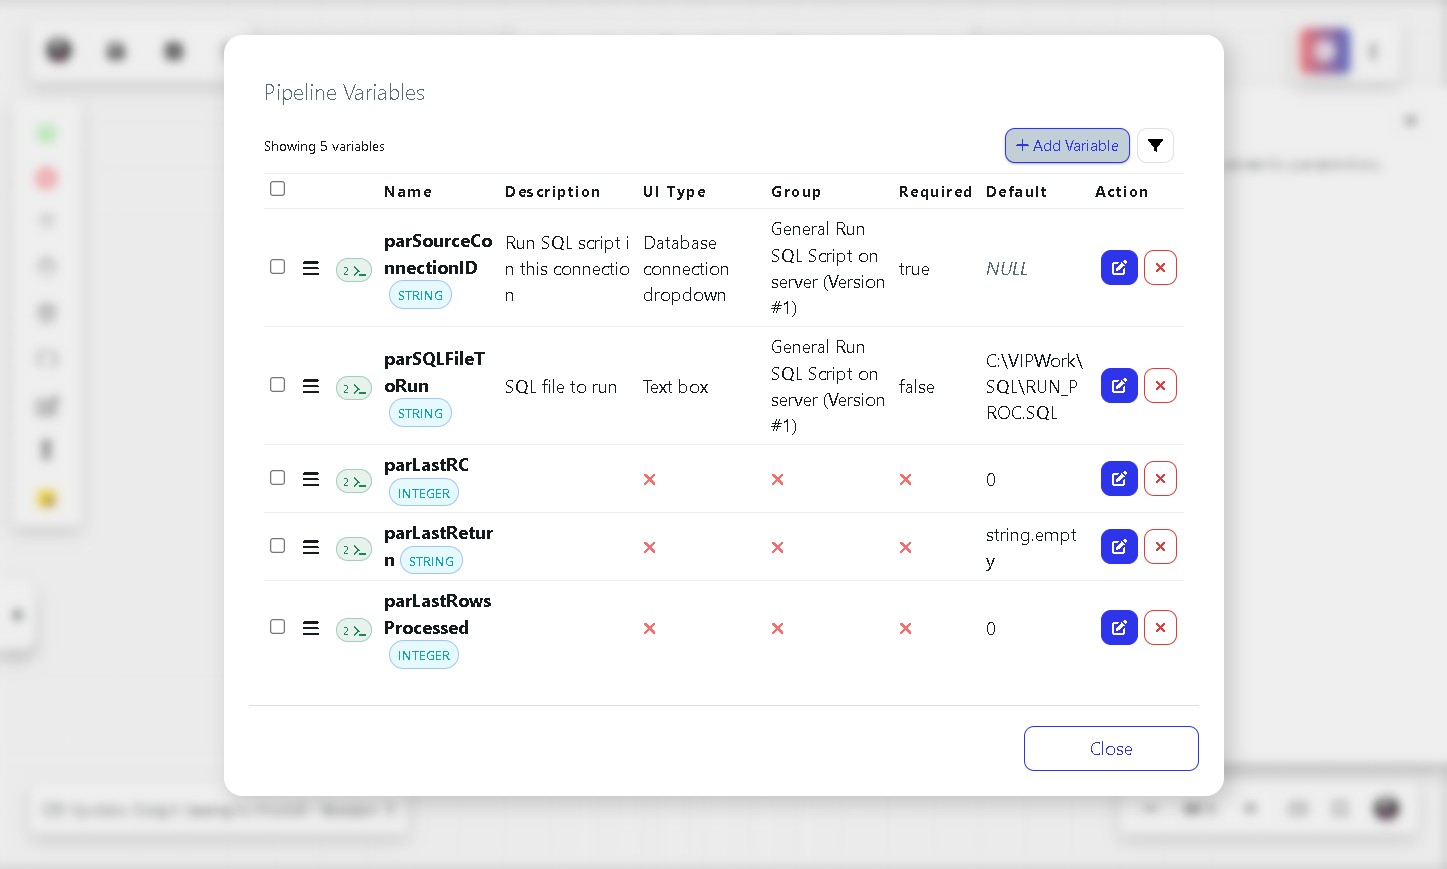
Note: This activity executes a SQL script file that lives on your VIP server. When you drop it onto the canvas, two pipeline variables are automatically created:
Variable | Description |
parSourceConnectionID | The database connection the script will run against. |
parSQLFileToRun | The full file path to the SQL script on the server. |
Step 10 Add a Log Message action (optional)
Optional Adding a Log Message helps you debug the pipeline if something goes wrong.
In the left-hand panel, select the Log Message action and drag it onto the canvas below the SQL Script activity. To connect the two nodes, drag an arrow from the SQL Script activity down to the Log Message node — not the other way around.
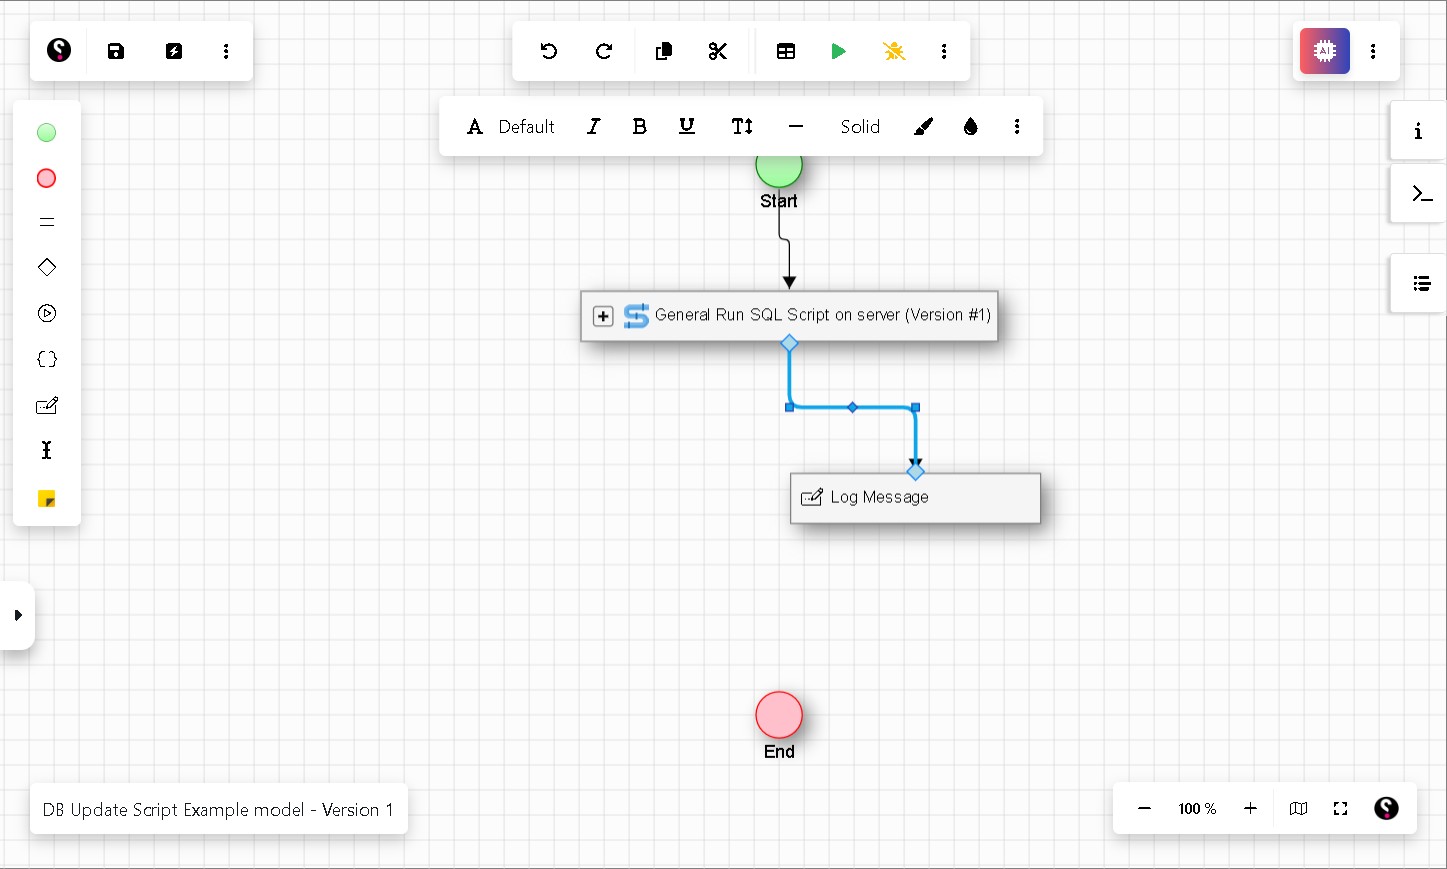
Click the Log Message node to open its variable panel. In the MessageToLog field, enter any text you want printed to the console. To include a variable value, use the settings icon on the right side of the field. For example, entering RC = & parLastRC will print the return code of the previous step, helping you confirm whether it passed or failed.
Step 11 Add a Decision node to check for errors
From the left-hand panel, drag a Decision node onto the canvas below the Log Message node. Connect it by dragging an arrow from the Log Message node down to the Decision node.
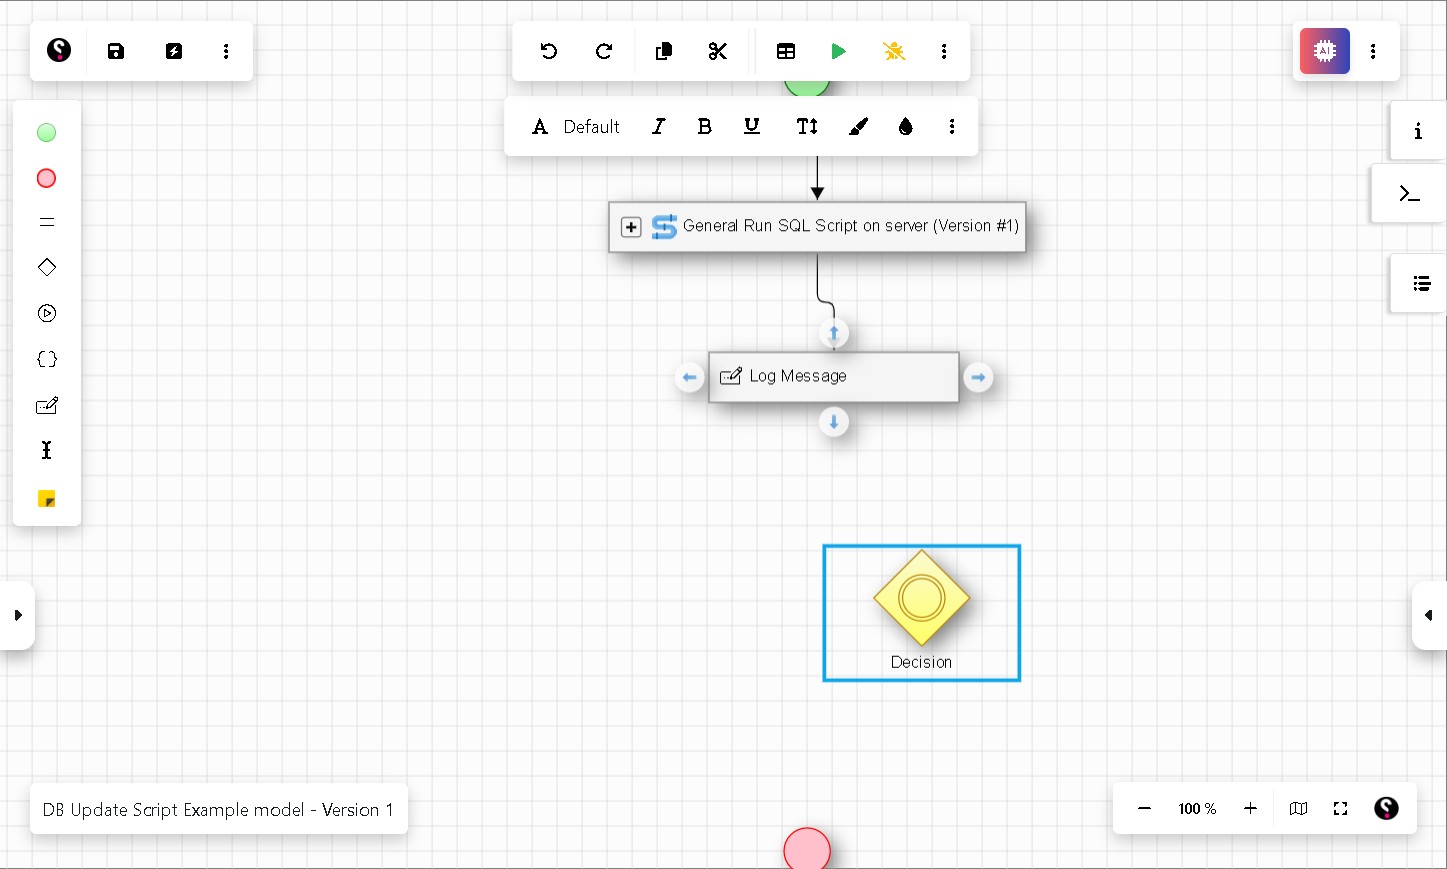
Click the Decision node to open its variable panel and set the condition. Use the parLastRC variable to check whether the SQL script ran successfully:
parLastRC = 0
A return code of 0 means the activity completed without errors. Any other value indicates a failure.
Step 12 Connect the False path to the End node
The Decision node produces two output paths: True and False. Drag the False path to the End node. This is the route the pipeline takes if the SQL script fails. You can optionally add another Log Message on this path to record details about the failure.
Part 3: Add an Optional Script with a Custom Variable
The following steps show how to use a custom pipeline variable to make part of the pipeline optional — for example, running a second SQL script only when a checkbox is selected at runtime.
Step 13 Add a second Decision node
Drag another Decision node onto the canvas. Connect it to the True path of the first Decision node.
Step 14 Add the optional SQL Script activity
Drag a second General Run SQL Script on server (Pipeline) activity onto the canvas. Connect the True path of the new Decision node to this activity, and connect the activity’s output to the End node. Connect the False path of the Decision node directly to the End node as well.
When the Run Spec Parameters dialog appears, click OK to accept the existing variable mappings.
Step 15 Create a new pipeline variable
Click the Variables button in the canvas toolbar to open the Pipeline Variables panel. You will see all variables currently defined in the model. Click Add Variable.
In the New Pipeline Variable dialog, enable the Form Parameter toggle so the variable appears on the submission form when the pipeline is run.
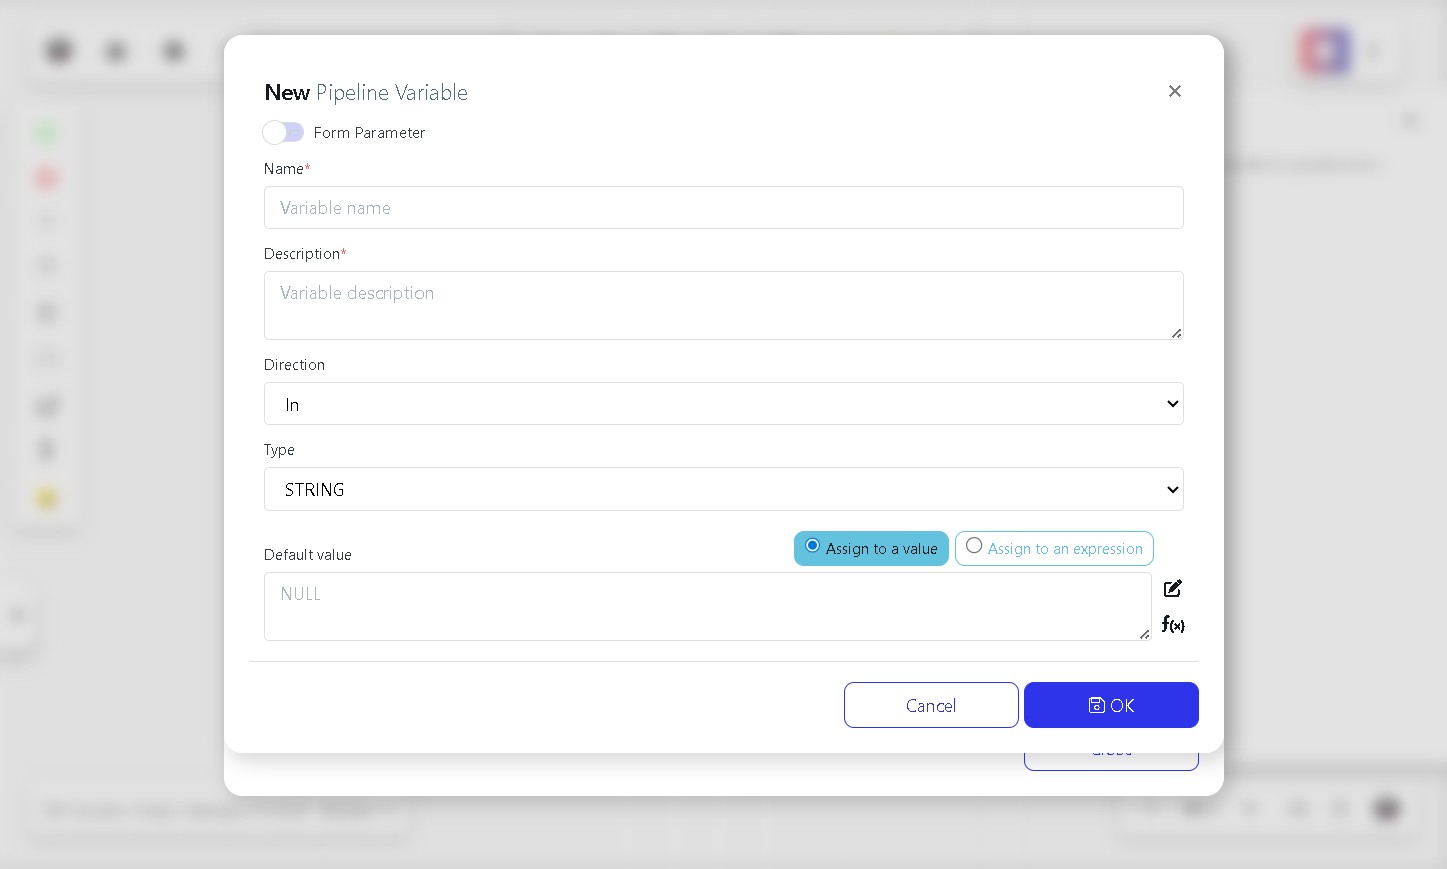
Fill in the following fields:
Variable | Description |
Name | A meaningful name for the variable, for example parMode. |
Description | A short explanation, for example Run Optional Script. |
Type | Set to BOOLEAN (true/false value). |
UI Type | Select Checkbox so the user can tick or untick it when submitting the form. |
Click OK to save the variable.
Step 16 Set the Decision condition to use the new variable
Click the second Decision node to open its variable panel. Set the condition to your new variable:
parMode
When parMode is true (the checkbox is ticked), the pipeline runs the optional SQL script. When false, it skips to the End node.
Part 4: Configure Default Variable Values
Step 17 Set the default SQL file path
Open the Pipeline Variables panel and click the edit icon next to parSQLFileToRun. In the Default field, enter the full path to your SQL file on the VIP server (for example, C:\VIPWork\SQL\RUN_PROC.SQL). Click OK.
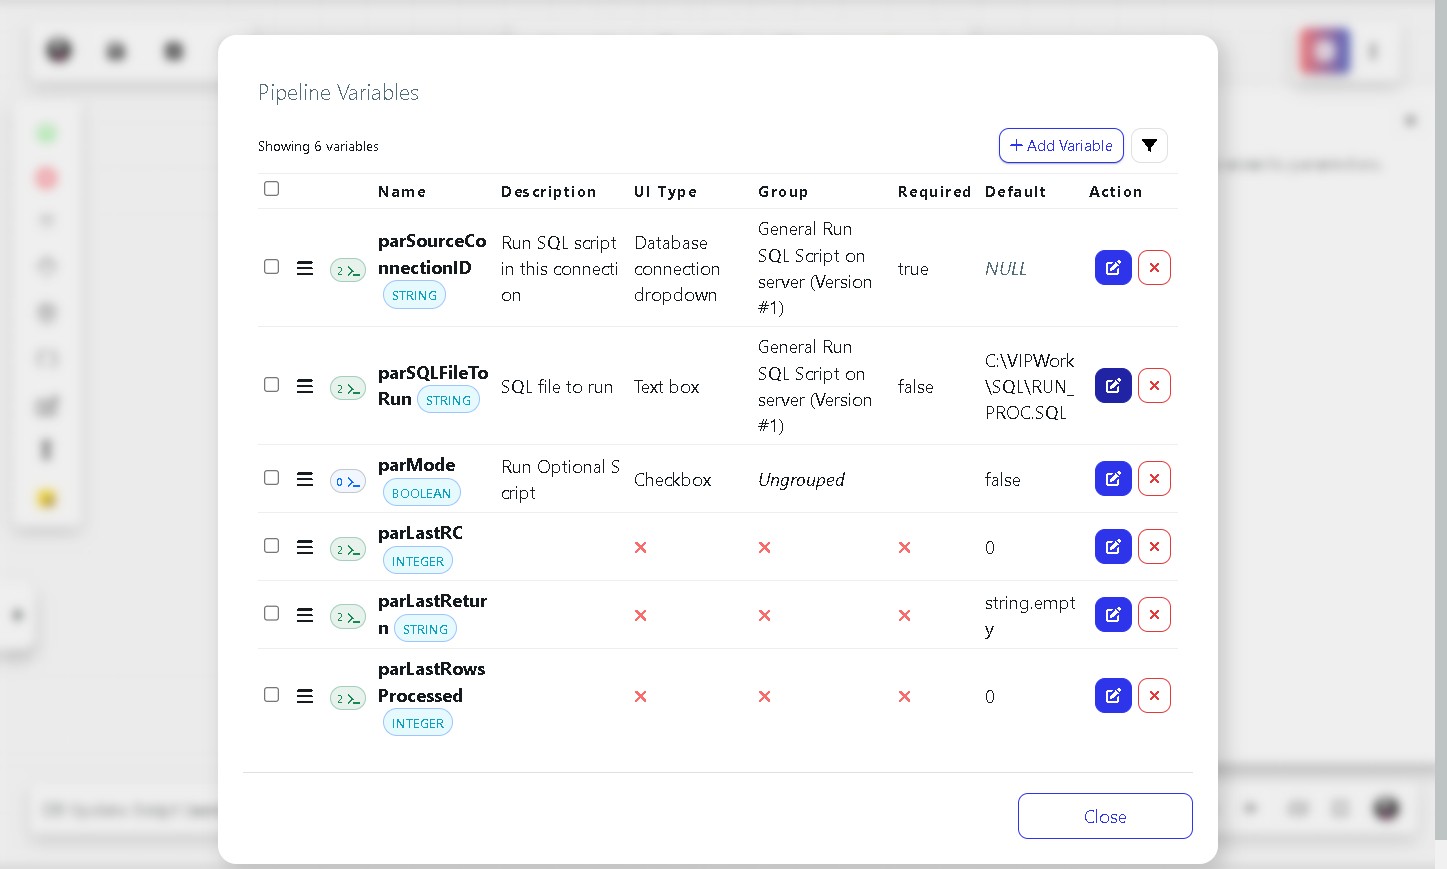
Note: Setting a default value means you will not need to enter the path manually every time you run the pipeline.
Step 18 Set the default database connection
Click the edit icon next to parSourceConnectionID. In the Default field, select your database connection from the dropdown list. Click OK.
If you prefer to choose the connection each time the pipeline runs, leave this field set to NULL.
Once you have finished configuring the variables, click Close to return to the canvas.
Part 5: Run the Pipeline
Step 19 Execute the pipeline
Click the Run button in the canvas toolbar. A submission form will appear, showing all variables marked as Form Parameters. Review the values, tick the optional checkbox if you want the second script to run, and click Submit.
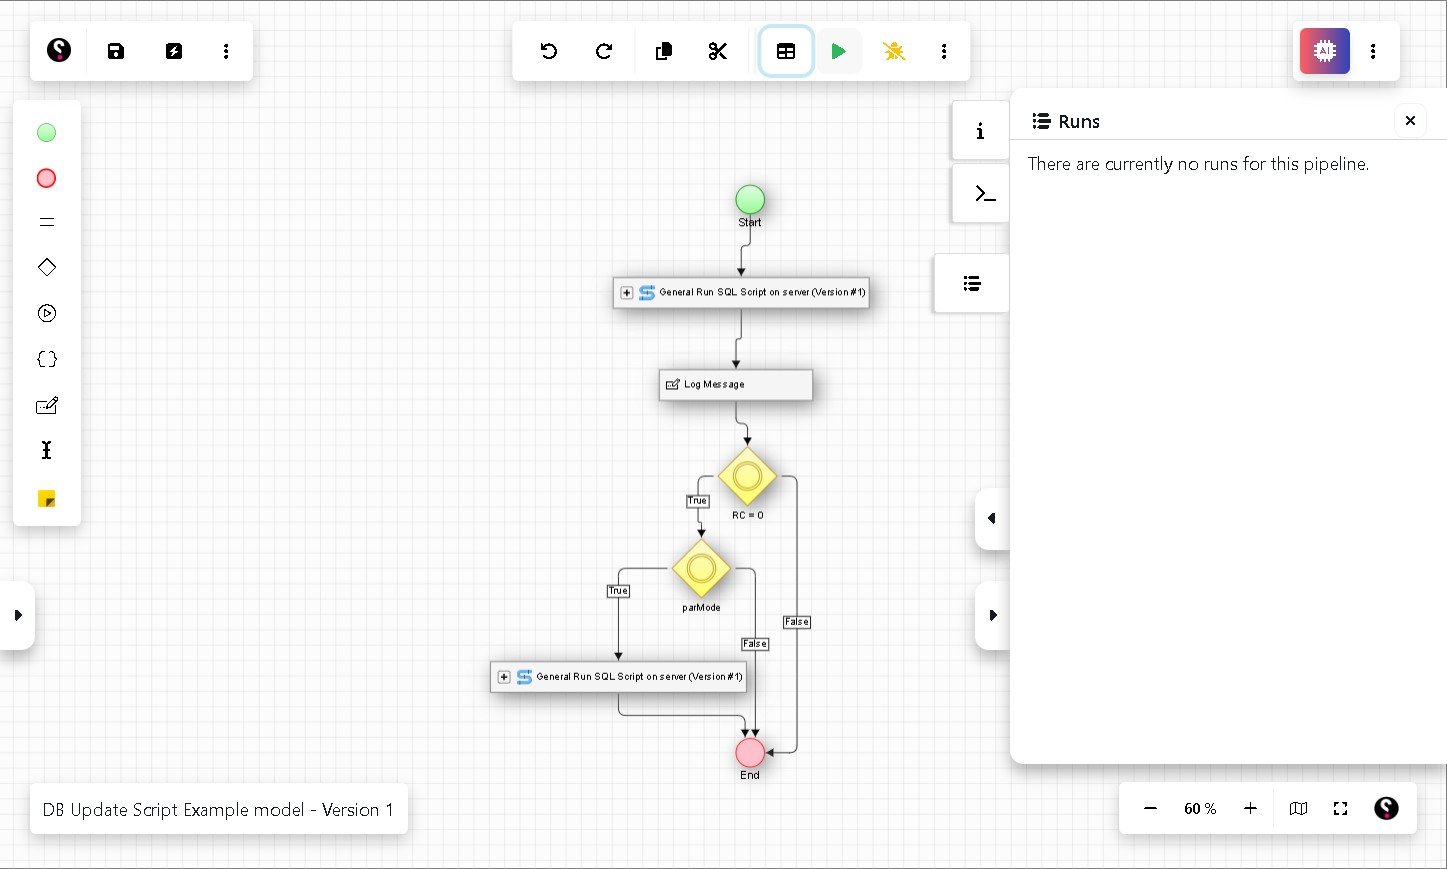
The Runs panel on the right will update as the pipeline executes. Each node will show its status, and any Log Message output will appear in the console, making it straightforward to confirm whether each step succeeded.