There's no prerequisite to have a pre-existing schema, or a file to create a definition. In this article, we'll be creating an empty definition and attaching a schema after.
1. New Definition
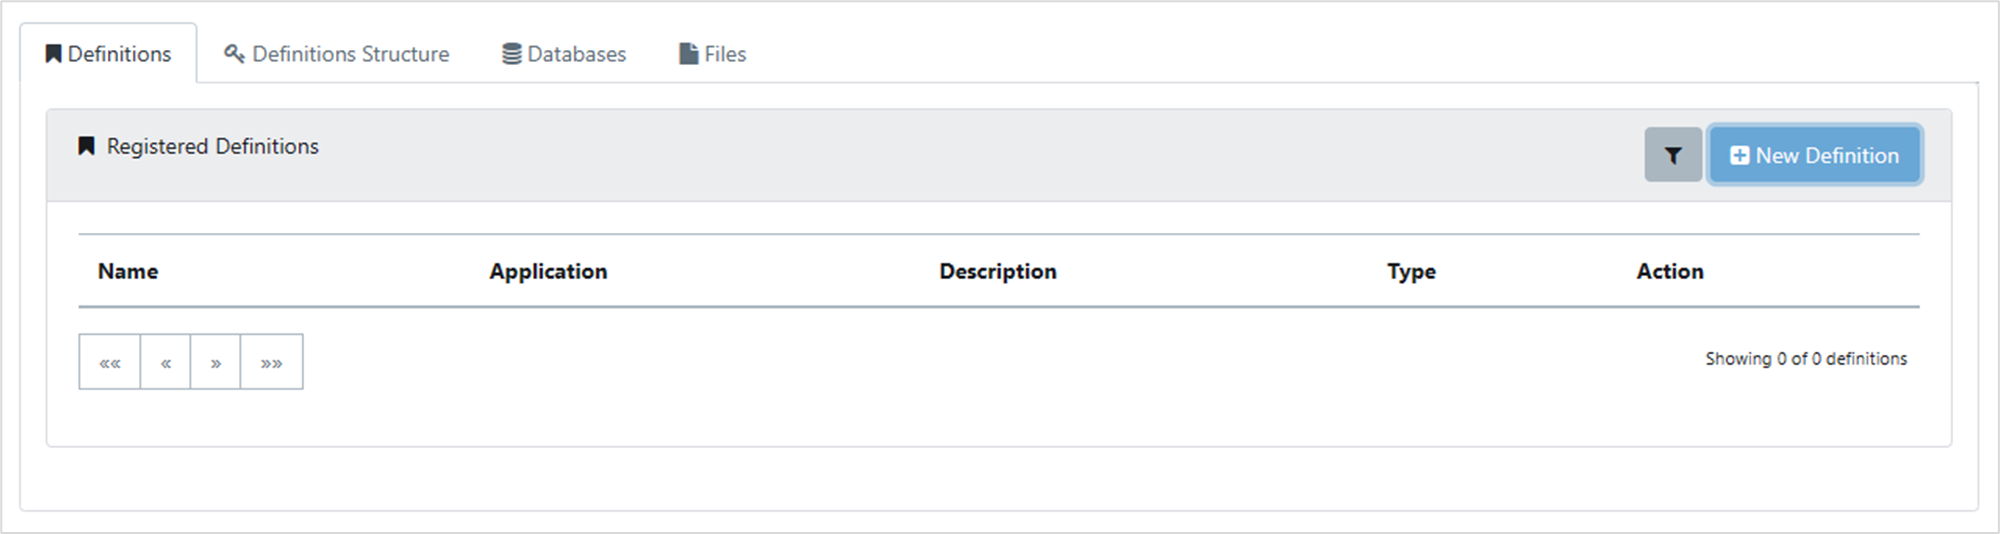
Begin in the Data Dictionary, by clicking on Data Dictionary in the Master Data Management section of the Navigation Panel. The Definitions tab is selected by default. Click on 'New Definition'.
2. Definition Details
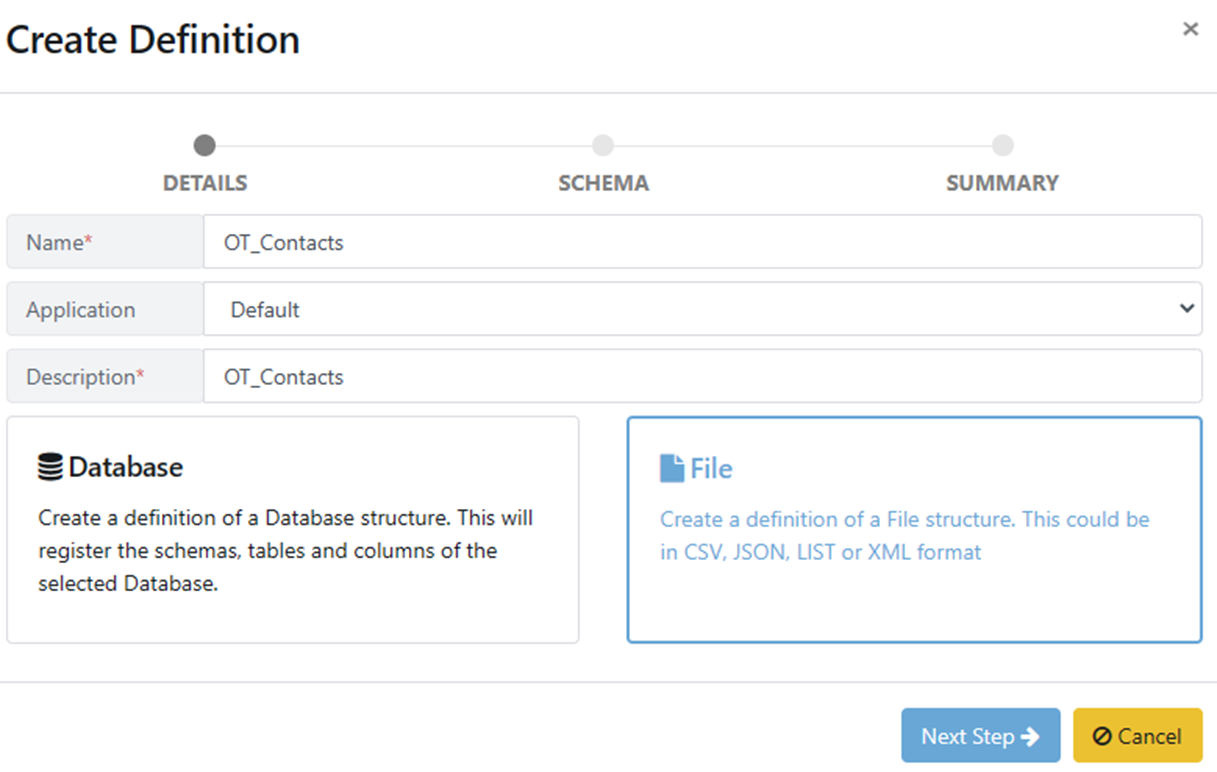
The Create Definition box appears. Fill in the Name and Description text boxes, select File from the two options near the bottom of the box, then click Next Step.
3. Definition Source
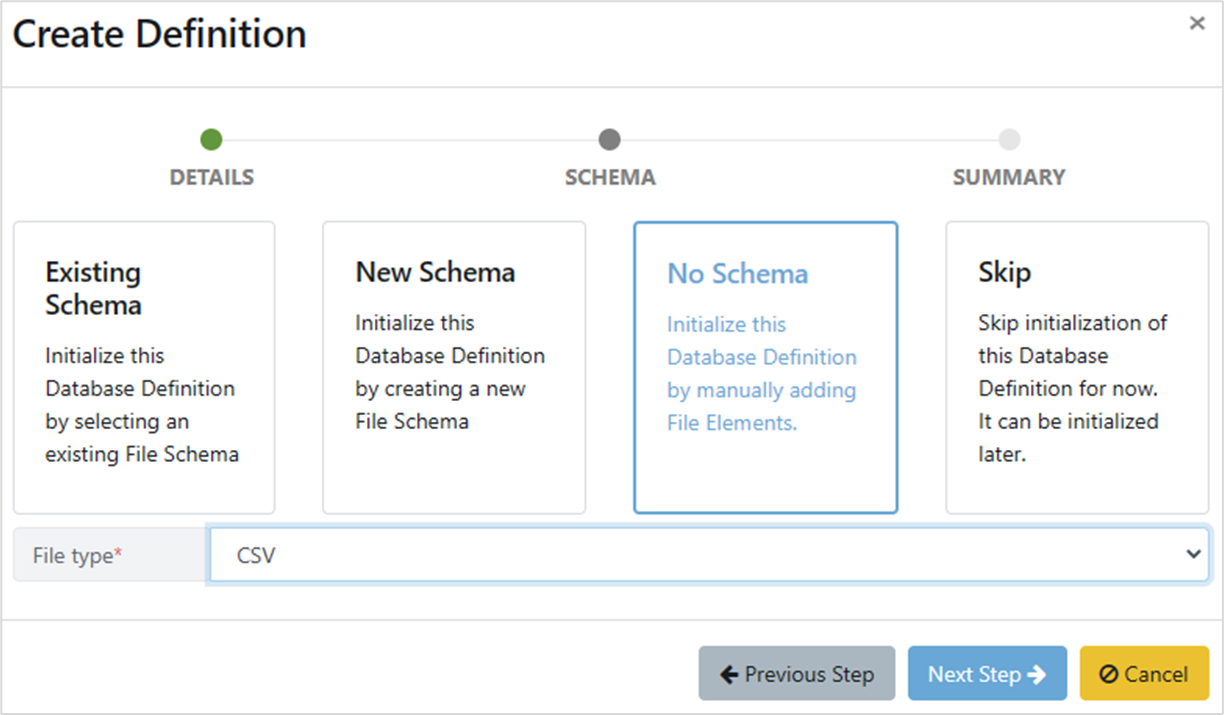
Select No Schema and provide the file type of the source data file to be scanned, then click Next Step.
4. Definition Complete
The Create Definition box change again, showing a summary of the steps Quality Modeller will complete to create the definition. Click < Finish.
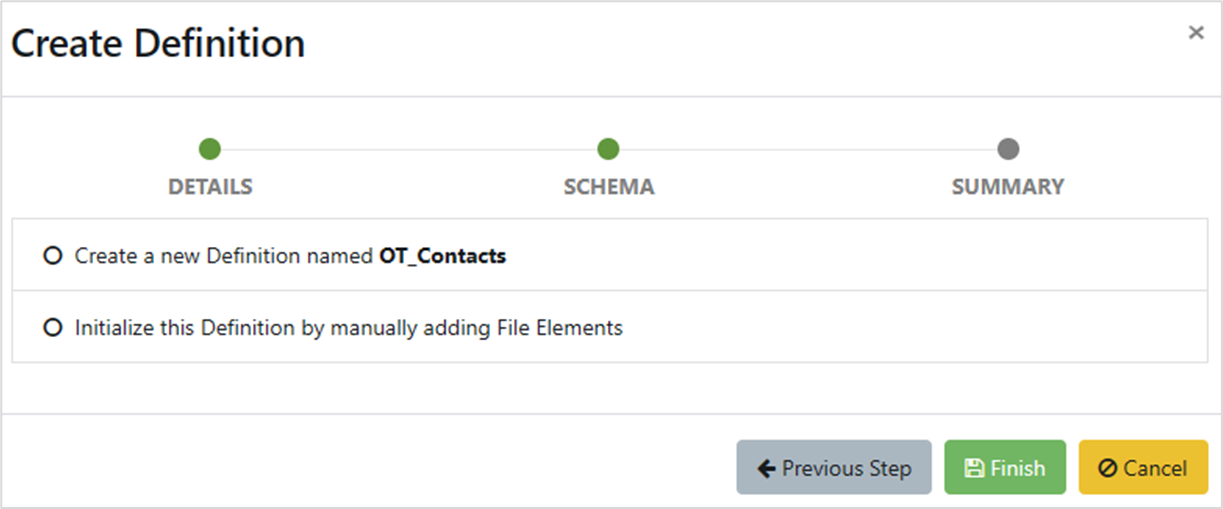
Note that the circles to the left of the text are not radio buttons, they are progress markers, and will change to green circles with white ticks as the creation progresses.
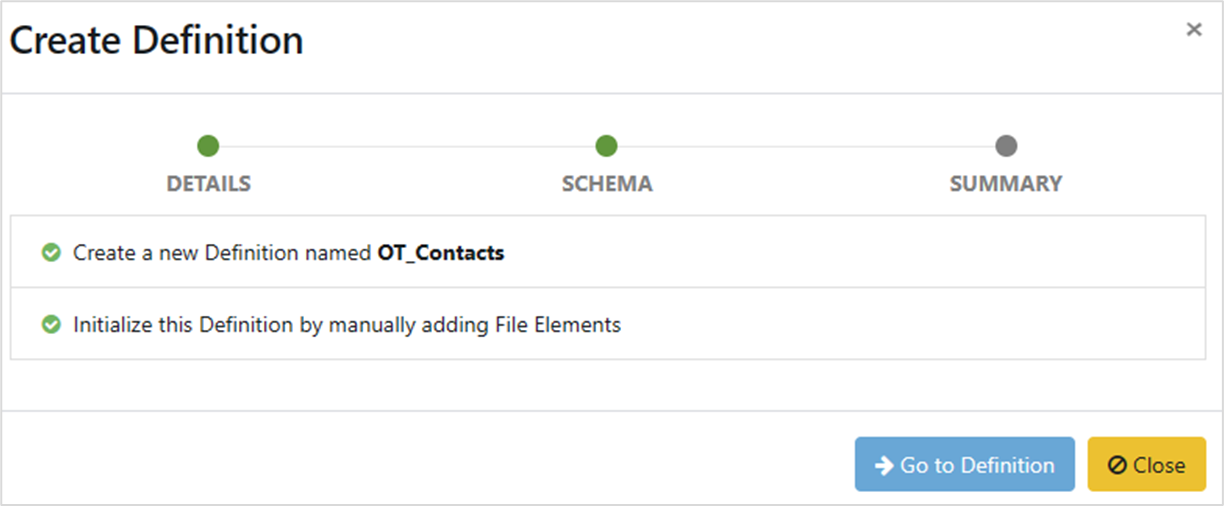
When processing has completed, you can click on â Go to Definition to see the details of the definition, or X Close to close the Create Definition box and return to the Data Dictionary window. It’s safe to close the box, as the definition has been created and will show on the Definitions tab. Clicking on the definition in the Definitions tab will open the same pane as you would if you clicked on Go to Definition.
5. Create Definition Version
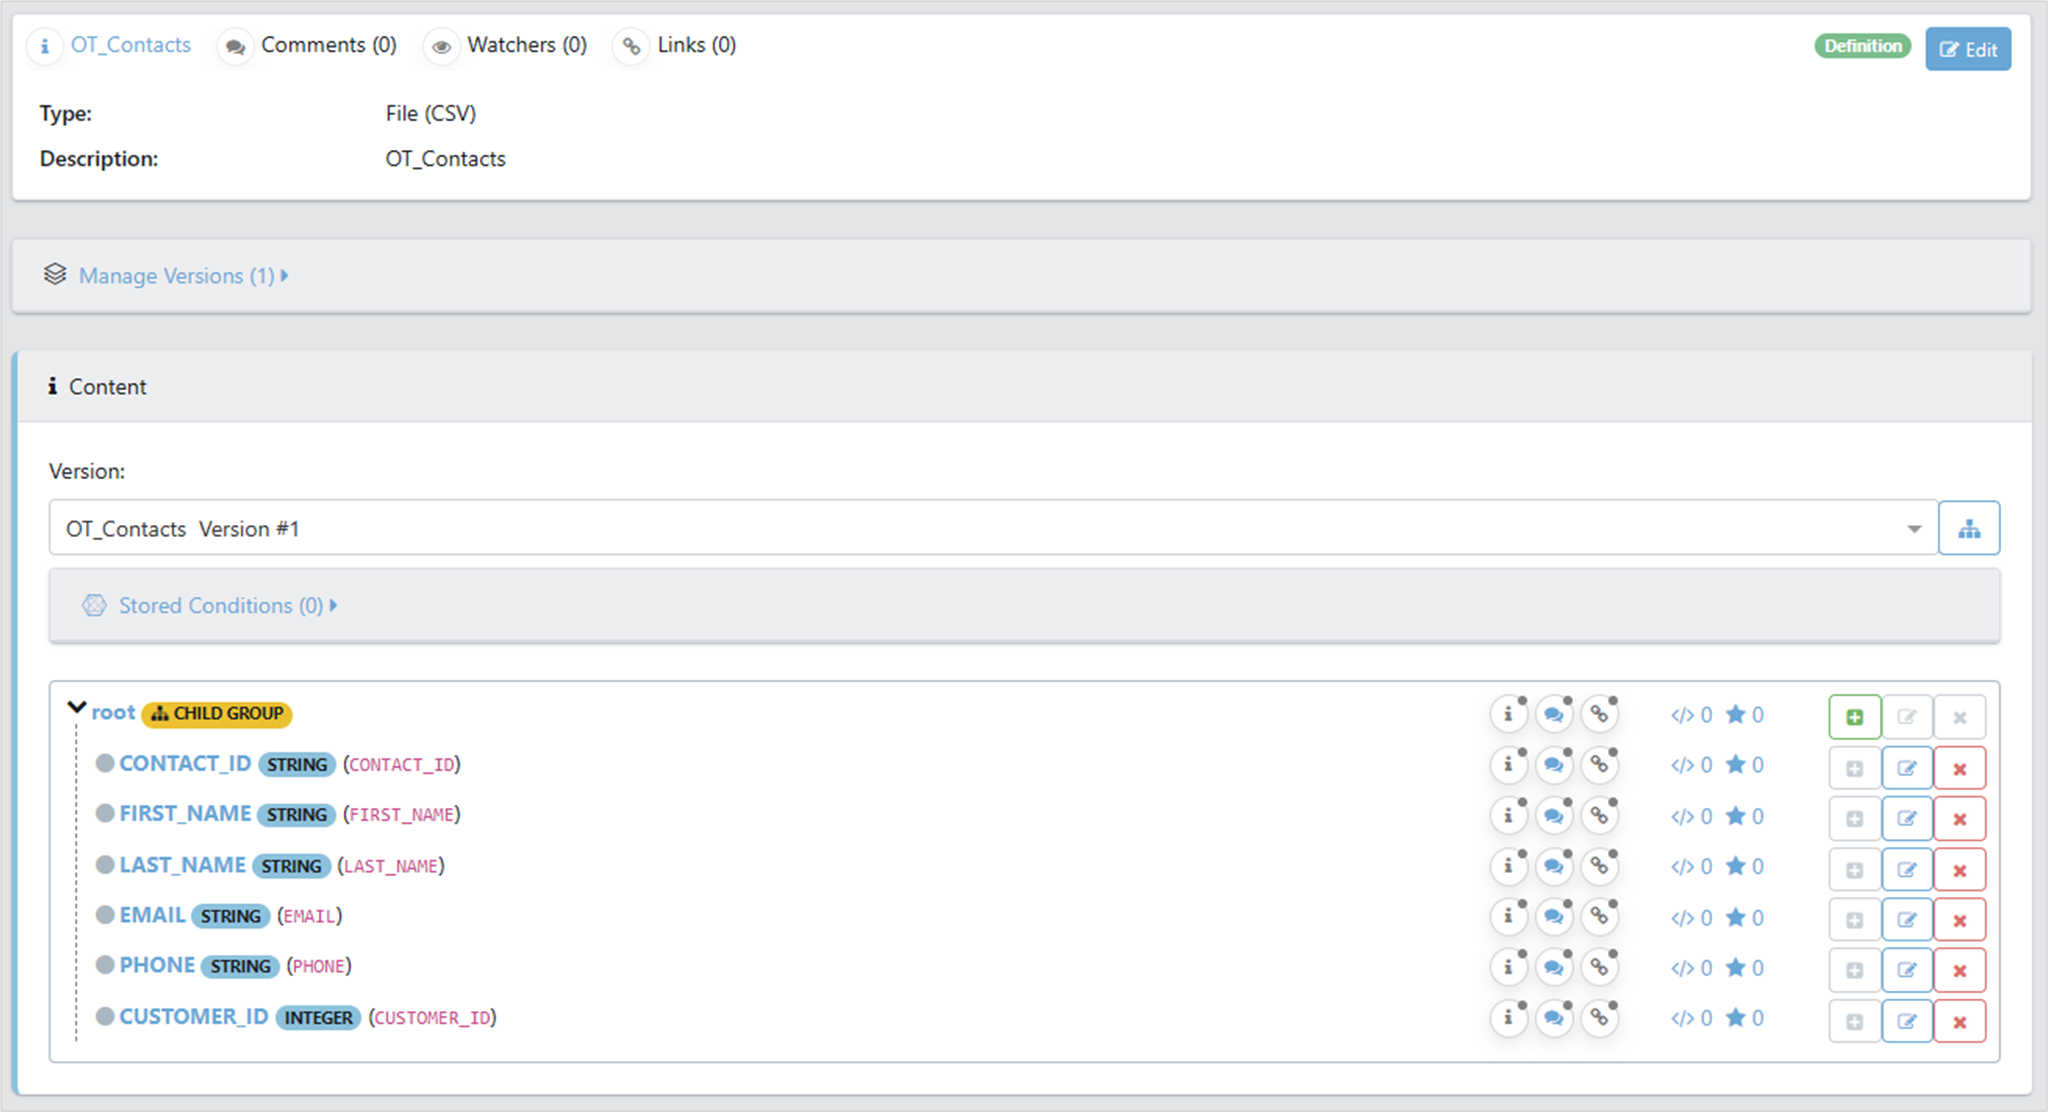
When you go to the definition, the pane looks very much like the one in the Details of Definition part of this document, however, in the Content section, the schema shows only the root. As no schema was included, there are no file elements to show. You can add them manually using the green + button to the right of root, or you can link a file scan.
To do this, first follow the process in the Scan a File part of this document to create a file scan.
Next, in the Manage Versions section, delete the existing version by clicking on the x button to the right of Version #1 in the Manage Versions section

Then click on the Add Version button.

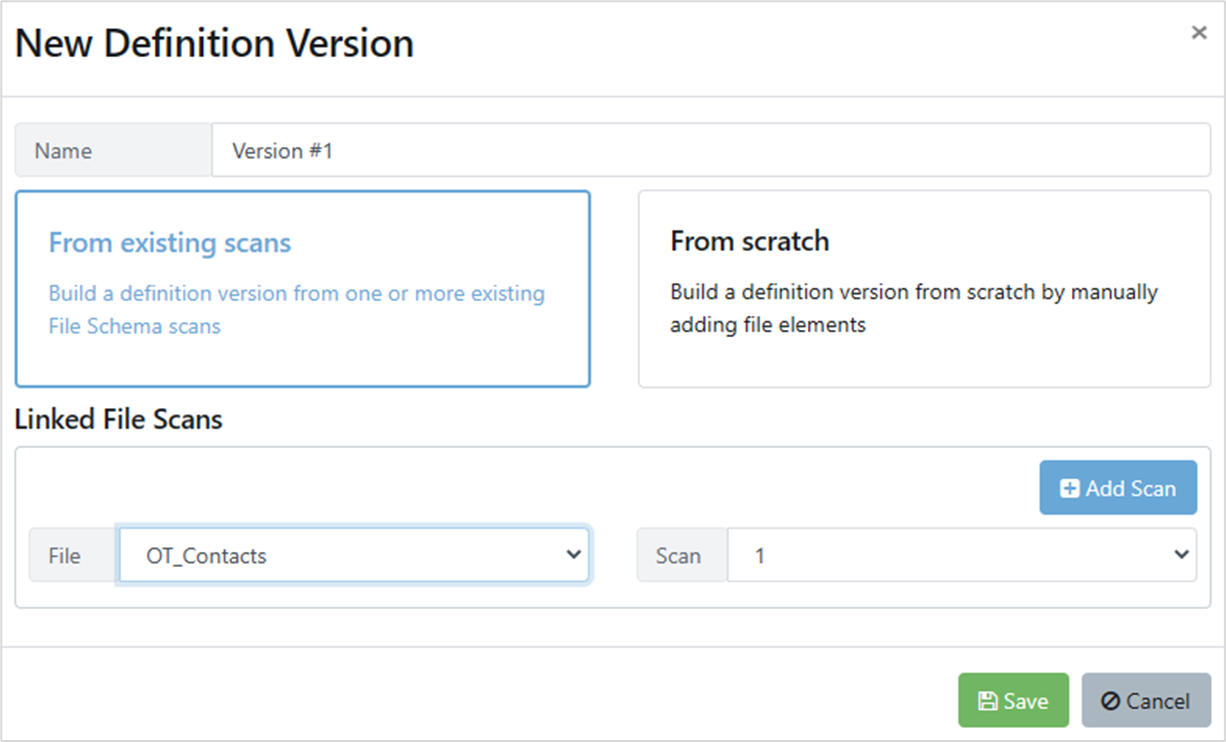
The New Definition Version box appears. Select From existing scans, then click on the + Add Scan button. Dropdowns appear to let you select the scan you created and the version if you created more than one, then click on < Save.
The Definition Details pane will fill out, and a Scan clone job in progress banner displays.
6. Review Definition
Once complete, the resulting pane is complete and ready for use.