This guide describes the end-to-end process for masking sensitive information inside EDI files using Curiosity Test Data Management (TDM). It is intended for technical users who already have a working knowledge of the platform — navigating projects, data lists, and activities.
Overview
EDI file masking in Curiosity TDM is driven by two artefacts working together:
A masking rules data list that defines, per transaction type and per element, which masking function to apply.
The Mask EDI Files pipeline activity, which reads source EDI files, applies the rules from the data list, and writes the masked output to the configured folder.
In practice the workflow has two phases: configure (or extend) the masking rules in the data list, then run the pipeline against a specific transaction type and EDI file.
Key Concepts
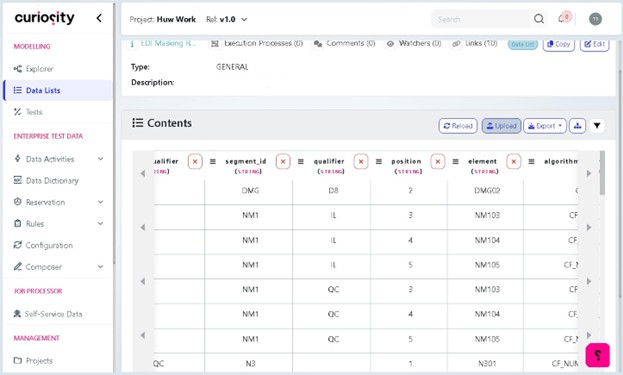
The masking rules data list
Each row in the data list represents a single rule and is keyed by the columns shown below. When the pipeline encounters a matching segment in an EDI file, it applies the function named in the csi_function column to the targeted element.
Column | Purpose |
|---|---|
transaction_type | EDI transaction set the rule applies to (e.g. EDI_834, EDI_820, EDI_276). |
loop_segment_id / loop_qualifier | Identifies the loop the target segment lives in. Empty when the rule applies to a top-level segment. |
segment_id | Segment containing the value to mask (NM1, DMG, ISA, REF, N3, …). |
qualifier | Qualifier that disambiguates the segment, e.g. IL (insured), QC (patient), 03 (dependent). |
position | 1-based index of the element within the segment. |
element | EDI element identifier targeted (NM103, NM104, NM105, DMG02, ISA15, …). |
algorithm_reference_name | Internal reference to the masking algorithms imported |
csi_function | The function actually executed at runtime. This is the value most commonly edited when extending the rules — see the function reference below. |
Common csi_function values
Function | Behaviour |
|---|---|
ReplaceAlphanum | Replaces the element with a randomly generated alphanumeric value of equivalent length and shape. Used for generic identifiers (REF02, N3xx numeric globals). |
FirstName | Replaces the element with a realistic first name. Typical target: NM104 on member/dependent NM1 loops. |
LastName | Replaces the element with a realistic last name. Typical target: NM103. |
AddRandomPeriodToDate | Shifts a date by a random interval while preserving format. Typical target: DMG02 (date of birth). |
UPPER | Forces the element to upper case. Typical target: ISA15 (usage indicator). |
Phase 1 — Configure the Masking Rules Data List
The data list lives under Modelling > Data Lists. The example in this guide uses the EDI Masking rules list.
1. Open the masking rules data list
Navigate to Modelling > Data Lists and open the EDI Masking rules list
Confirm the Contents pane shows the existing rule columns: transaction_type, loop_segment_id, loop_qualifier, segment_id, qualifier, position, element, algorithm_reference_name, csi_function.
2. Upload a CSV of rules for the transaction type
Click Upload (top right of the Contents pane).

In the Choose CSV to Upload dialog, click Choose file and select the rules CSV (e.g. EDI_834.csv).
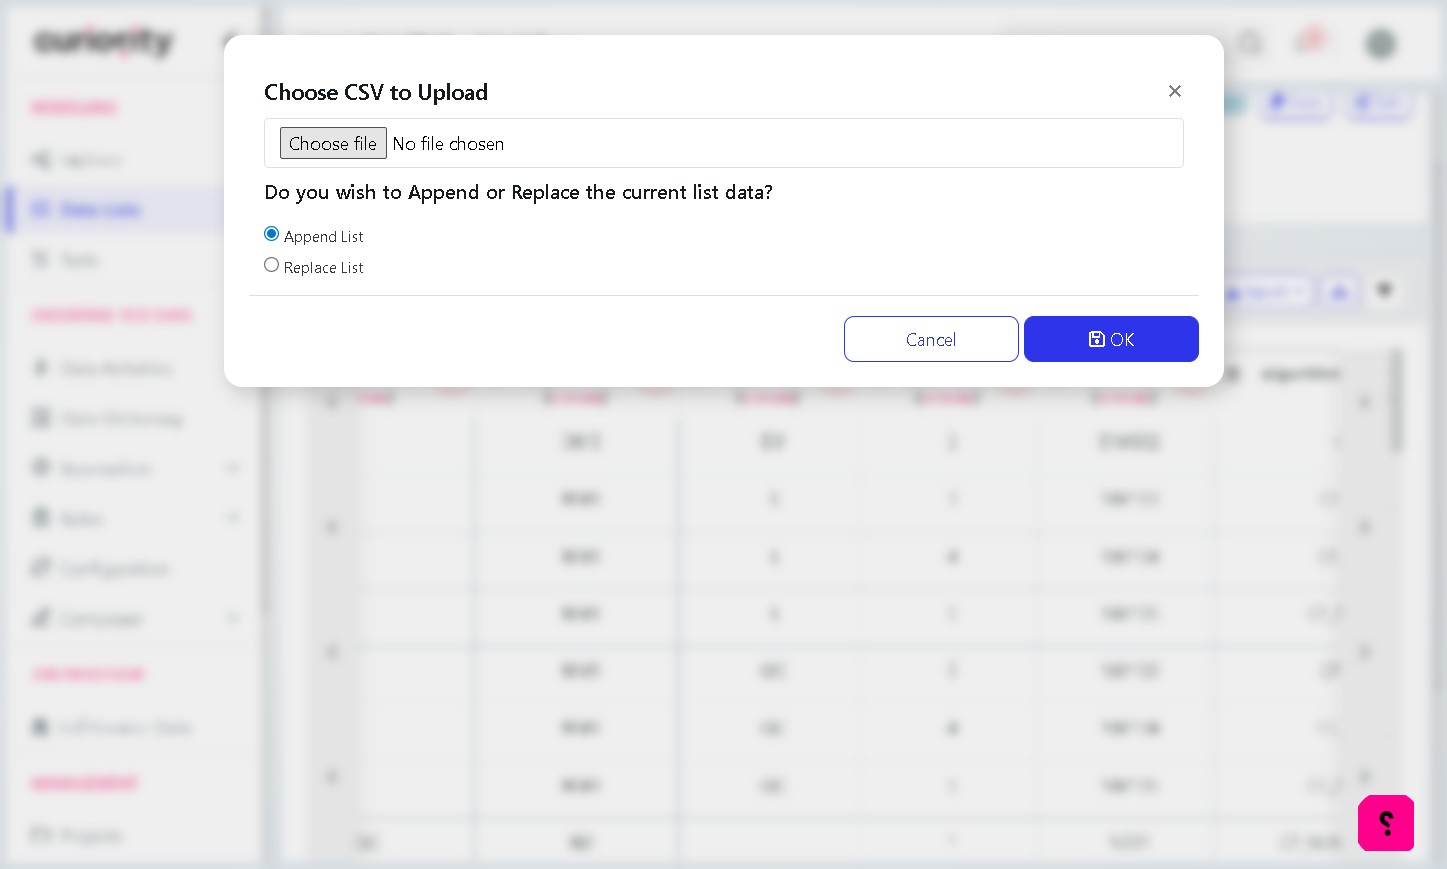
Choose the merge mode:
Append List — adds the new rows alongside existing rules. Use this when extending coverage to an additional transaction type.
Click OK to commit the upload. The new rows appear in the Contents pane and are tagged with the relevant transaction_type.
3. Apply masking functions to the new rows
Newly uploaded rows will normally have algorithm_reference_name populated but csi_function empty. The csi_function value drives runtime behaviour, so each new row must be assigned a function.
Procedure (repeat for each function in your new rows):
Locate an existing row whose algorithm_reference_name matches the new row
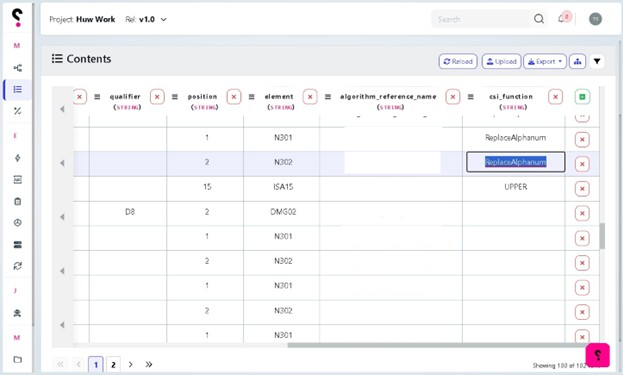
Click the cell in the csi_function column and press Ctrl+C.
Click the empty csi_function cell on the new row and press Ctrl+V.
Repeat for every empty csi_function cell in the new rows.
Once every new row has a csi_function value, the data list is ready to drive a pipeline run.
Phase 2 — Run the Mask EDI Files Pipeline
1. Open the activity
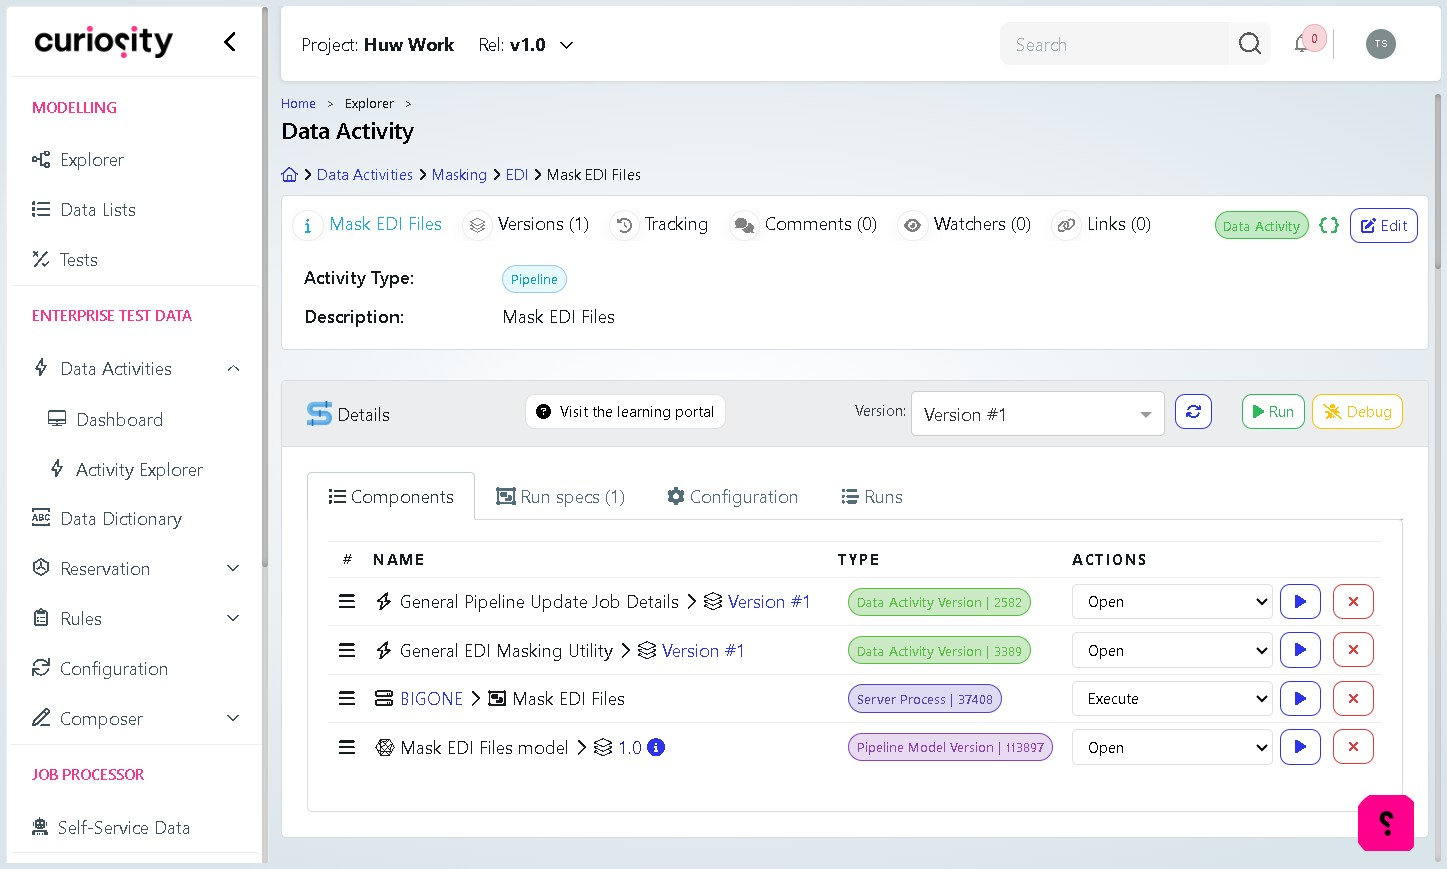
In the left navigation, expand Enterprise Test Data > Data Activities and click Activity Explorer.
In the Context tree, drill into the location where Mask EDI Files pipeline is present.
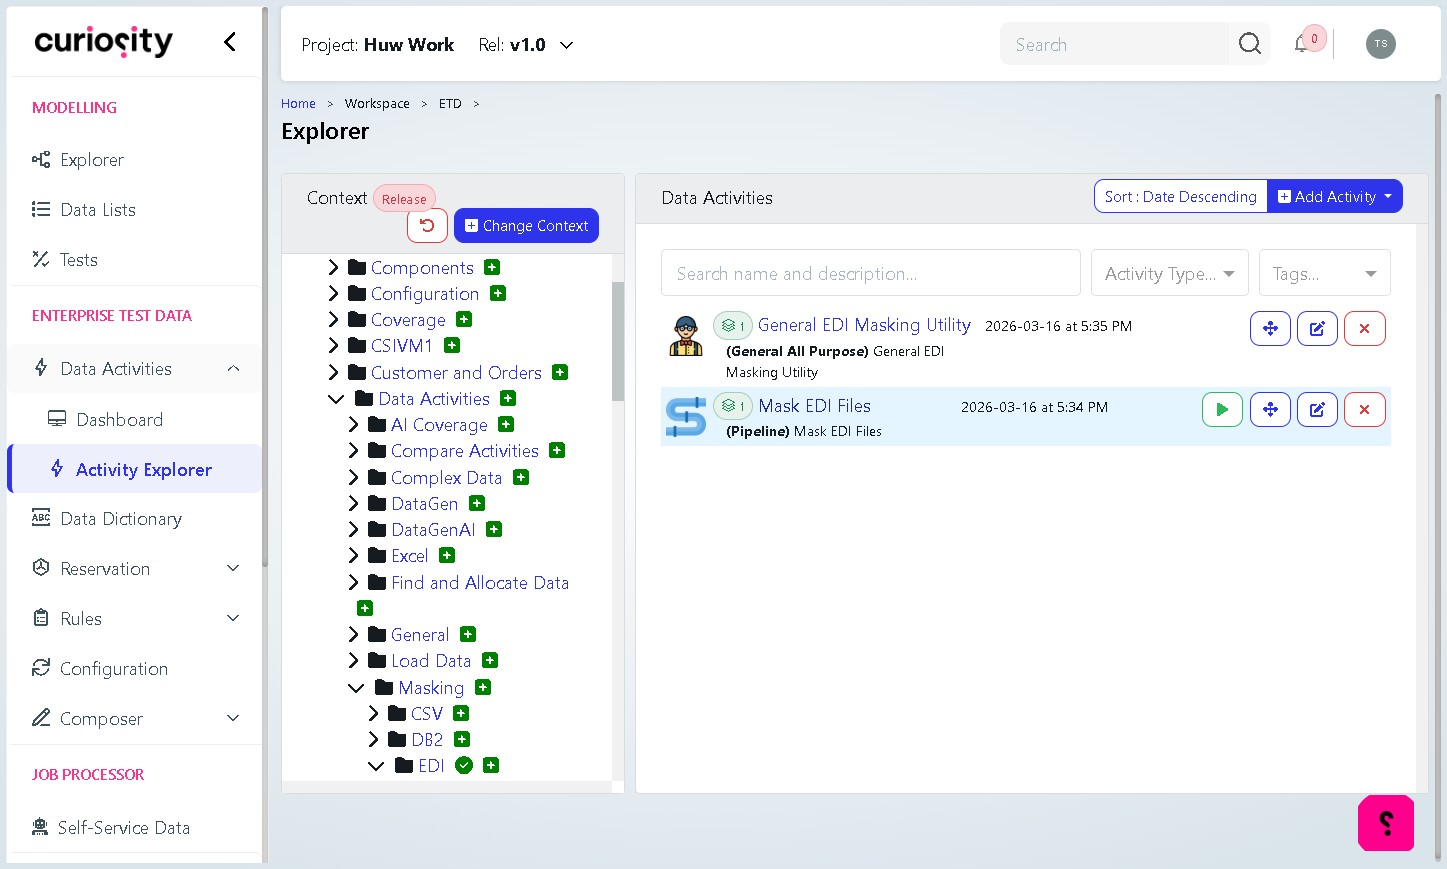
On the Details pane, click on the blue Execute button under Actions for the Pipeline Model (In this scenario at the bottom of the components)
2. Trigger a run
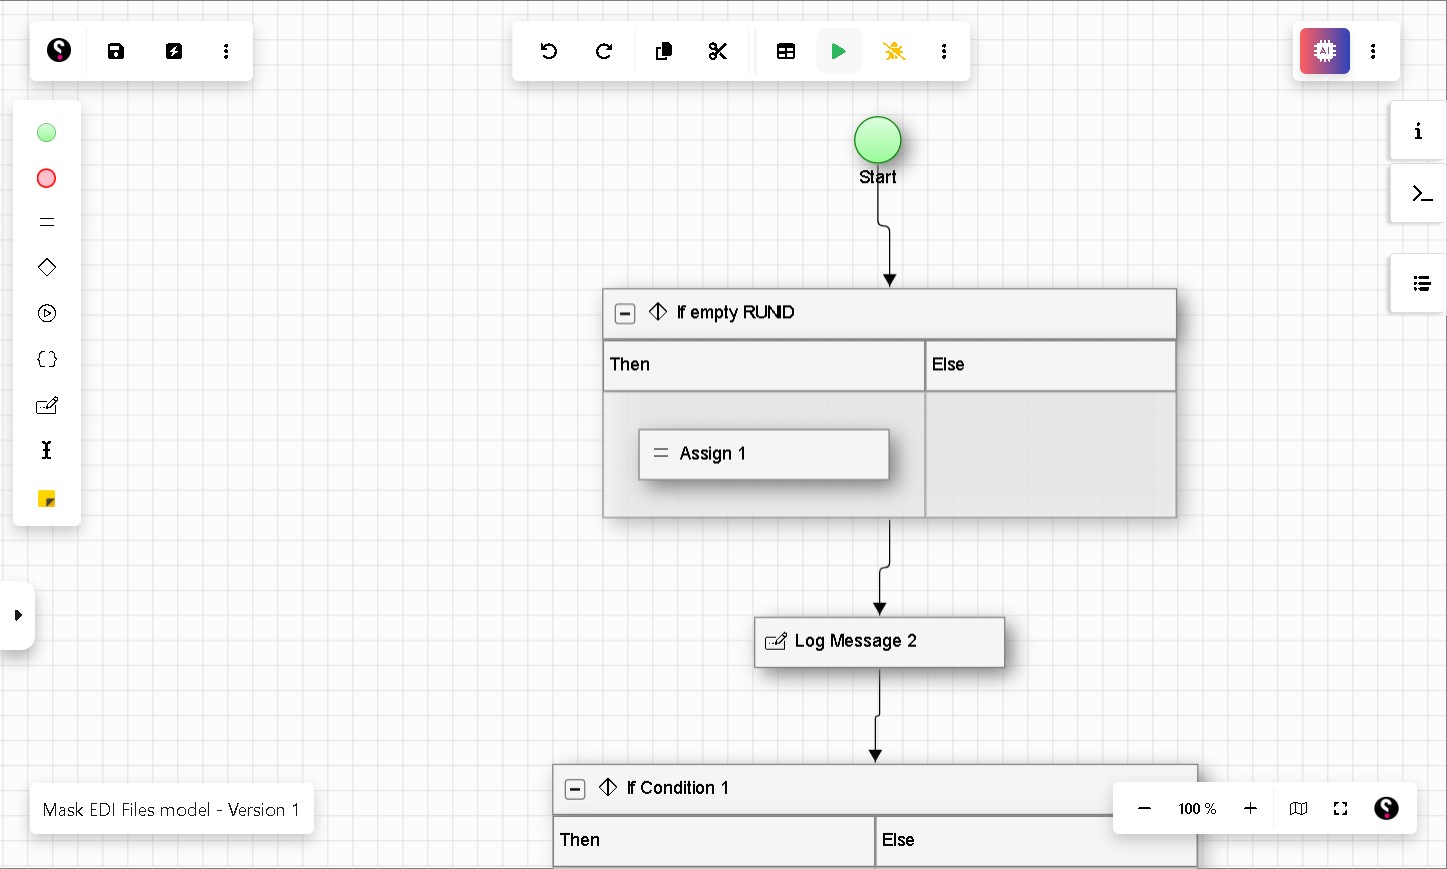
From the pipeline graph view, click the green Run button in the top toolbar.
In the Submit form dialog, leave the form selected as Mask EDI Files and click OK.
3. Configure the masking run
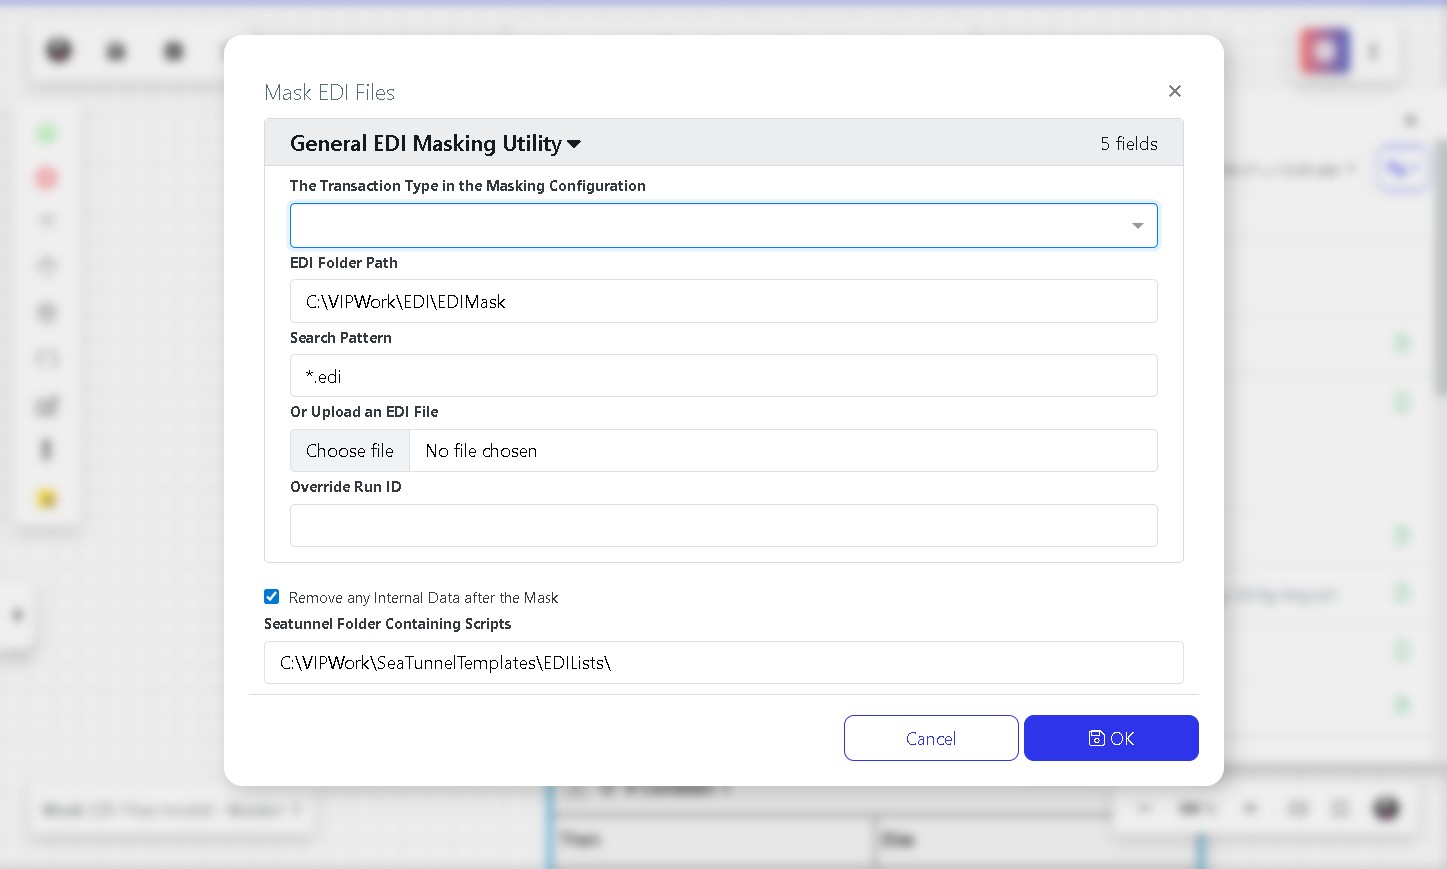
The Mask EDI Files form (General EDI Masking Utility, 5 fields) captures the run-time parameters:
Field | Value / notes |
|---|---|
The Transaction Type in the Masking Configuration | Pick the transaction set you are masking, e.g. EDI_834. The dropdown is populated from the transaction_type values present in the rules data list. |
EDI Folder Path | Filesystem path containing the source EDI files. Defaults to C:\VIPWork\EDI\EDIMask. Adjust if your environment uses a different location. |
Search Pattern | Glob applied within the folder. Defaults to *.edi. Use a more specific pattern (e.g. T834*.edi) if you need to scope the run. |
Or Upload an EDI File | Use this when you want to mask a single file uploaded ad-hoc, bypassing the folder/pattern. Click Choose file and select the source .edi file |
Override Run ID | Optional. Set when you need to correlate this execution with an external job ID; leave blank to auto-generate. |
Remove any Internal Data after the Mask | Leave checked (default) so that intermediate scratch data is cleaned up after the run. Uncheck only when debugging the pipeline itself. |
SeaTunnel Folder Containing Scripts | Defaults to C:\VIPWork\SeaTunnelTemplates\EDILists\. This is the location of the SeaTunnel job templates the pipeline orchestrates; change only if your install uses a custom path. |
Click OK to execute.
Monitor progress on the Runs tab of the activity. Masked output is written back to the EDI Folder Path (or the SeaTunnel-configured output sub-folder, depending on your template).
Verifying the Output
Open one of the masked .edi files and confirm that values targeted by the rules have been replaced (names, dates, ISA15 usage indicator, numeric identifiers).
Confirm that segments and elements not covered by any rule remain unchanged — this is the easiest way to catch a missing rule.
Check the run log for any WARN or ERROR entries. Common causes are missing csi_function values (the rule is silently skipped) and inaccessible EDI / SeaTunnel folders.
Troubleshooting
Symptom | Likely cause / fix |
|---|---|
Run completes but a known field is not masked | The rule row exists but csi_function is empty. Open the data list and paste the appropriate function value into the cell. |
Transaction type missing from the dropdown | No rows in the rules data list have that transaction_type. Upload the CSV for that transaction type (Phase 1, step 2). |
Run fails immediately | EDI Folder Path or SeaTunnel folder does not exist on the host. Verify the paths and that the TDM service account has read/write access. |
Dates masked to invalid values | DMG02 rule is using ReplaceAlphanum instead of AddRandomPeriodToDate. Correct the csi_function value on that row. |
Pipeline appears to do nothing | Search Pattern does not match any file in the EDI Folder Path, or the uploaded ad-hoc file was discarded. Re-check the pattern, or use Or Upload an EDI File to bypass the folder scan. |