Overview
This guide explains how to run the ExtractEDIAttributes job to pull EDI attribute data from a JSON file, and then upload the resulting masking rules CSV to the EDI Masking Rules data list inside the platform.
Part 1: Run the ExtractEDIAttributes Job
This part covers navigating to the correct server process and triggering the extraction job.
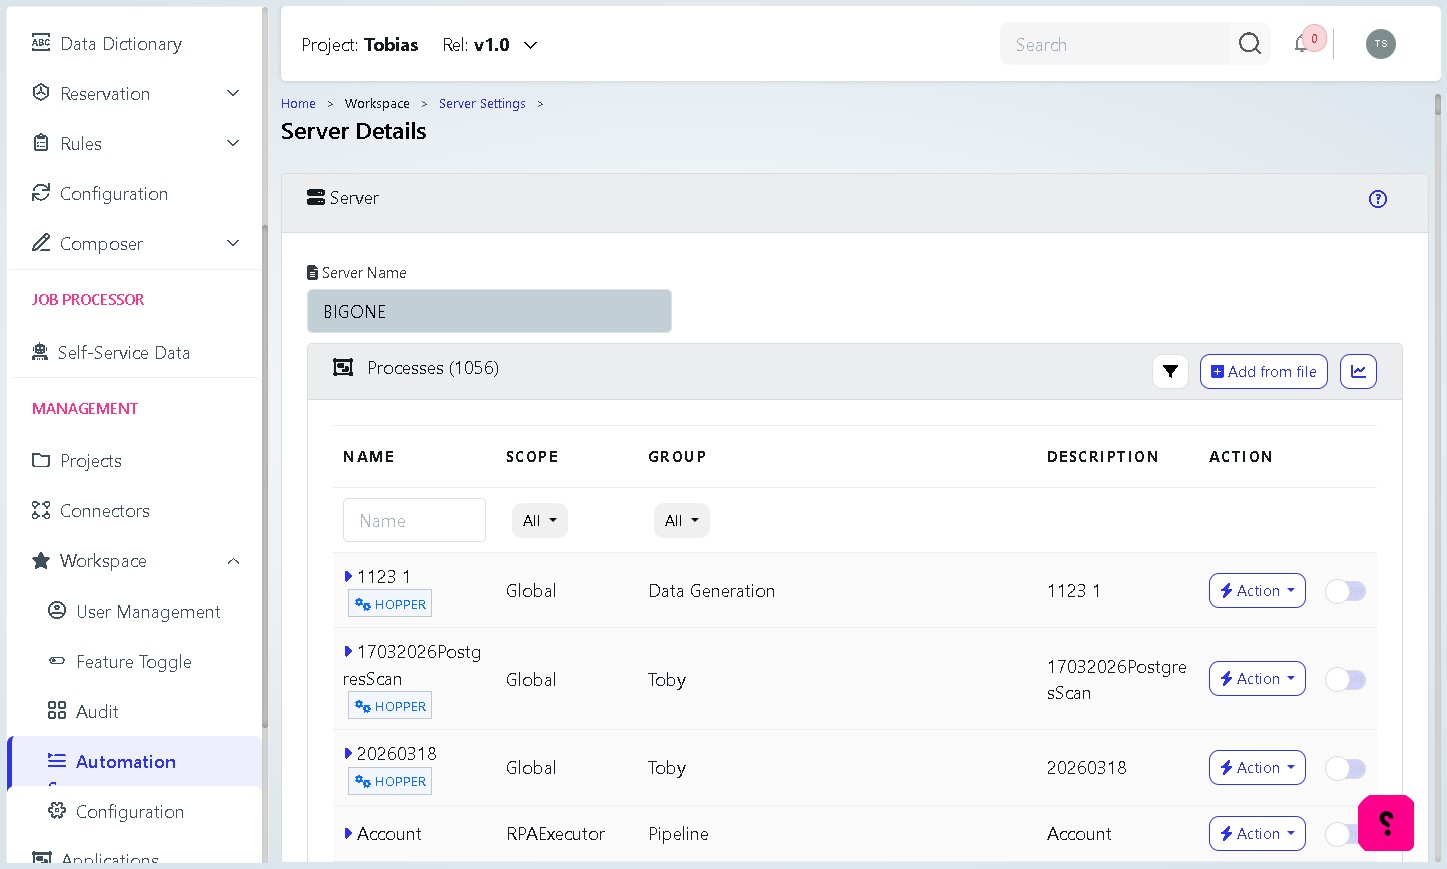
1 | Navigate to Automation Servers In the left-hand navigation menu, expand Workspace and click Automation. The Server Details page will open, showing the list of available server processes. |
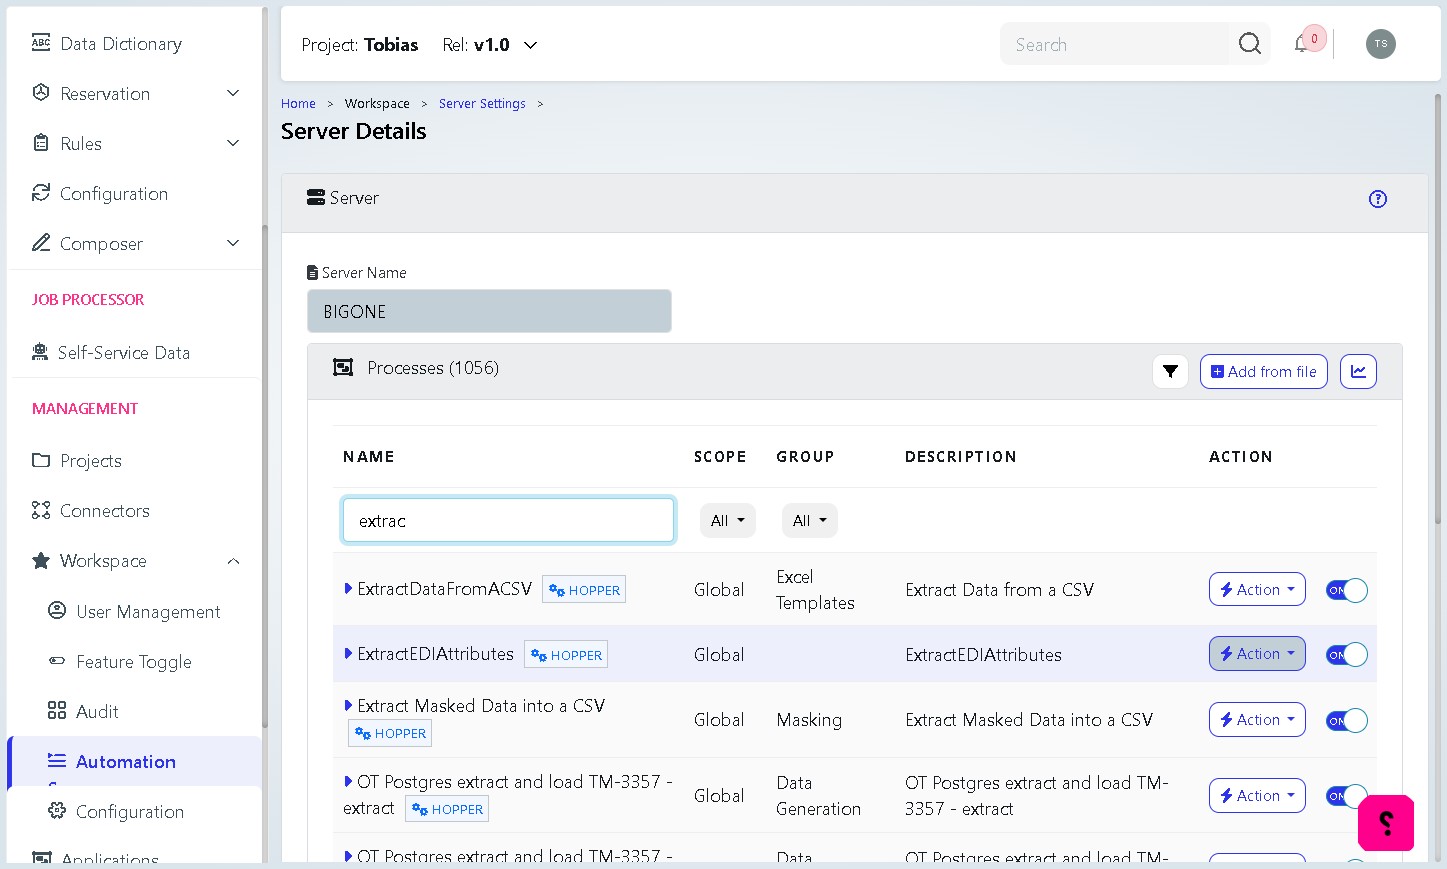
2 | Search for the ExtractEDIAttributes process Click inside the Name filter field, the list will filter to show relevant processes, including ExtractEDIAttributes. |
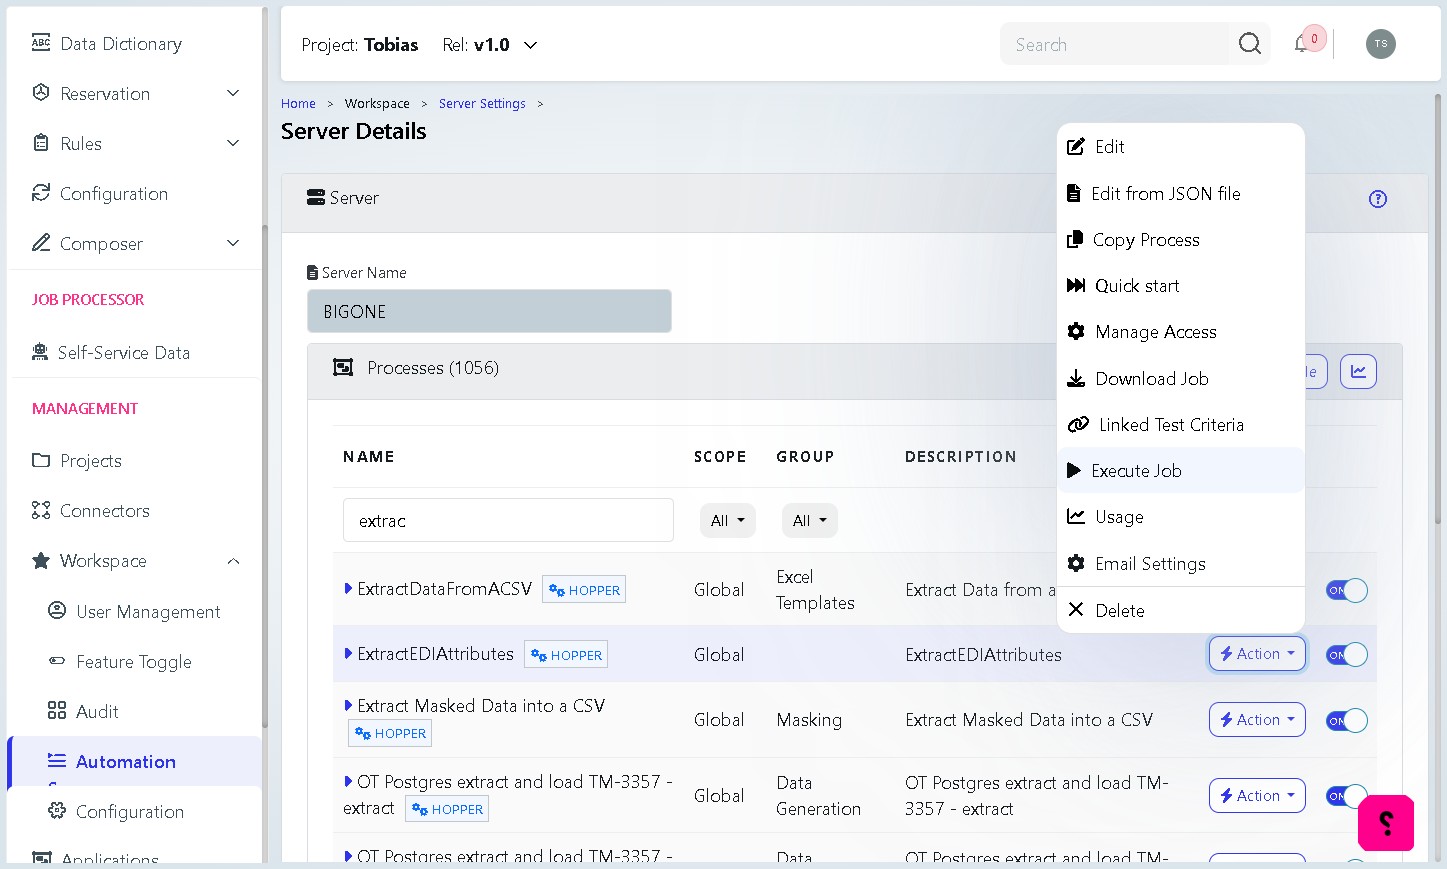
3 | Open the Action menu Locate the ExtractEDIAttributes row in the filtered list. Click the Action button on the right-hand side of that row to open the action dropdown menu. |
4 | Click “Execute Job” From the dropdown menu, select Execute Job. A job parameters dialog box will appear. |
5 | Upload your JSON file (parJsonFilePath) In the ExtractEDIAttributes – Job Parameters dialog, click Choose file next to the parJsonFilePath field. Select your EDI JSON source file from your computer (e.g. EDI_835.json). This JSON file contains the information for the EDI file regarding the following information: -
Example JSON body that could occur, note that this is just for one segment, you will typically have multiple segments that are to be masked within your EDI file |
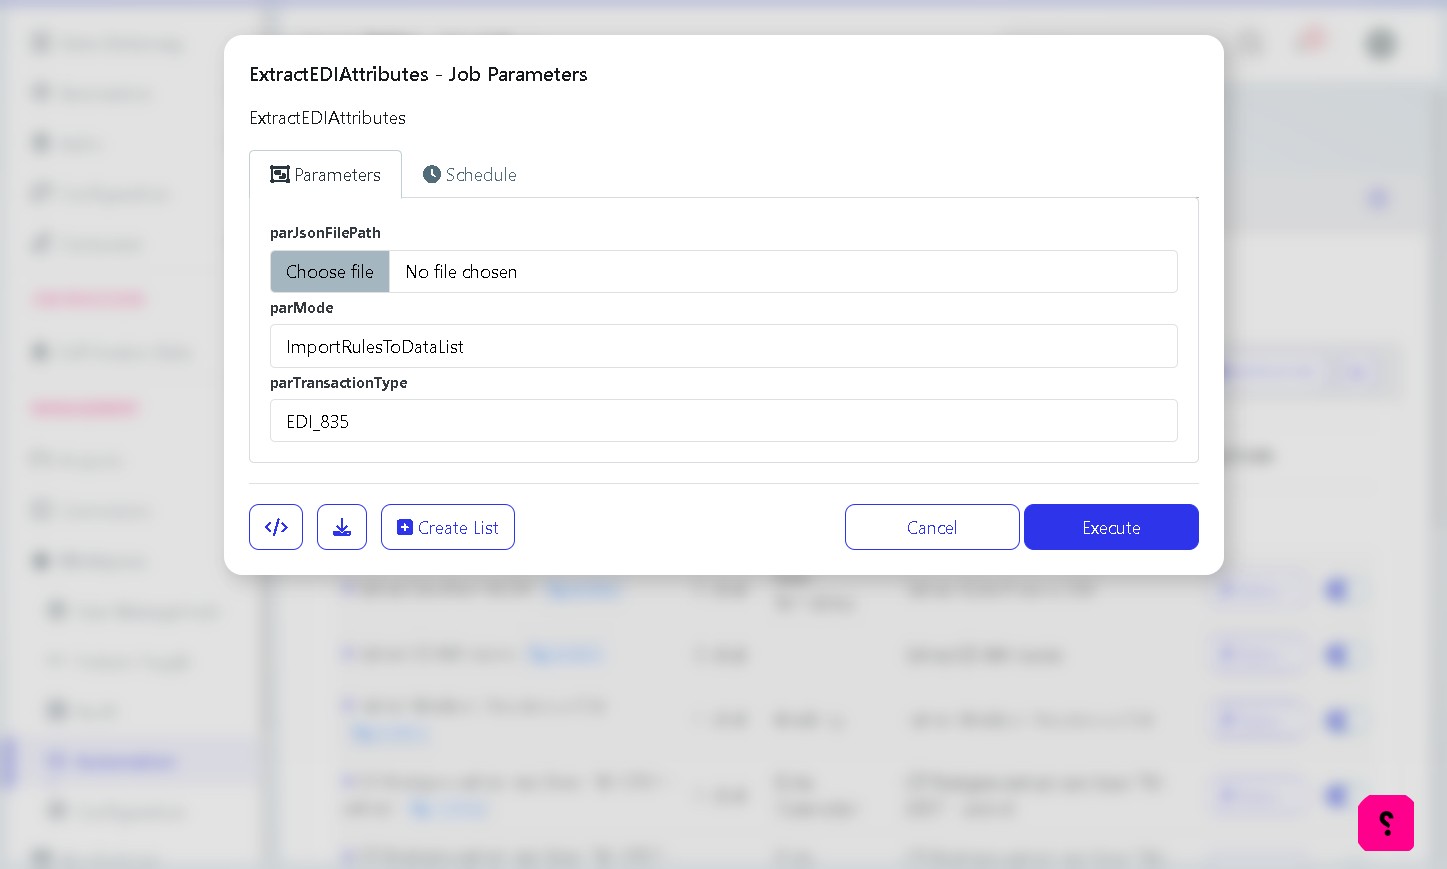
Note: The parMode field will be pre-set to ImportRulesToDataList. Do not change this value. |
6 | Verify the transaction type and execute Check the parTransactionType field. Ensure it matches the transaction type of the file you are uploading (e.g. EDI_835). Once confirmed, click the Execute button. |
Important: If parTransactionType does not match the uploaded file, the job may produce incorrect results or fail silently. Always double-check this value before clicking Execute. |
Part 2: Download and Prepare the Results
After the job runs, you will download the output file and prepare it for upload.
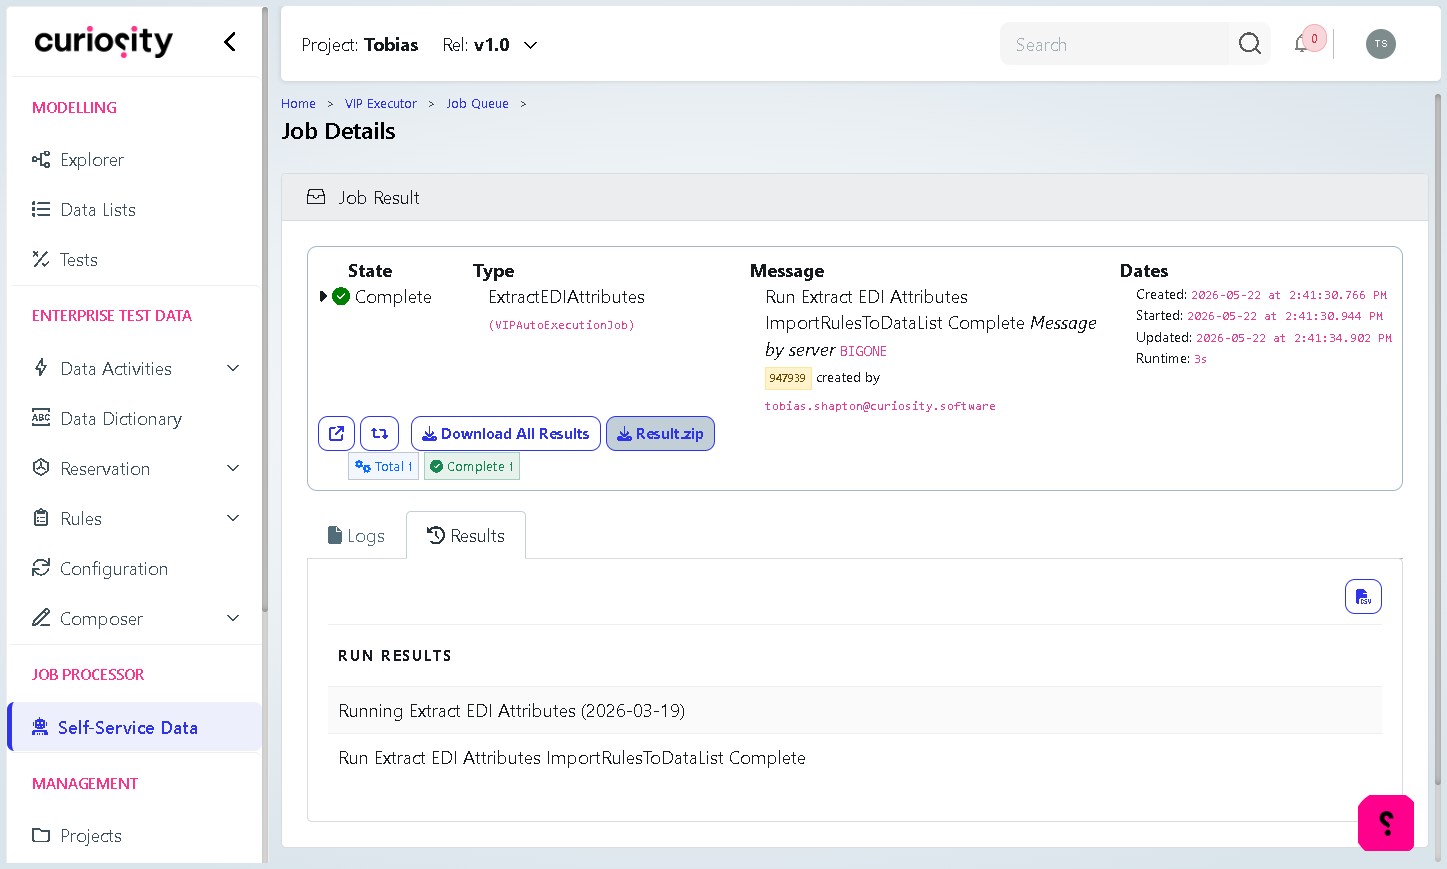
7 | View the job details After clicking Execute, a confirmation banner will appear at the bottom of the screen with an in-progress status. Click View Details to open the Job Details page and monitor progress. |
8 | Download Result.zip Once the job status shows Complete, locate the Result.zip link in the Job Result section and click it to download the zip archive to your computer. Extract the archive to find the CSV output file inside. |
9 | Add the csi_function column Open the downloaded CSV file in Excel or a similar application. Add a new column named csi_function. |
Note: The csi_function column is required by the EDI Masking Rules data list schema. The CSV will error out otherwise |
Part 3: Upload to the EDI Masking Rules Data List
This final part uploads your prepared CSV into the correct data list on the platform.
1 | Navigate to Data Lists From the left-hand navigation menu, click Data Lists (under the Modelling section). You will see the full list of available data lists. |
1.1 | Filter for EDI Masking Rules Click the Name filter field at the top of the list and type “masking”. From the filtered results, click on EDI Masking Rules to open the list details page. |
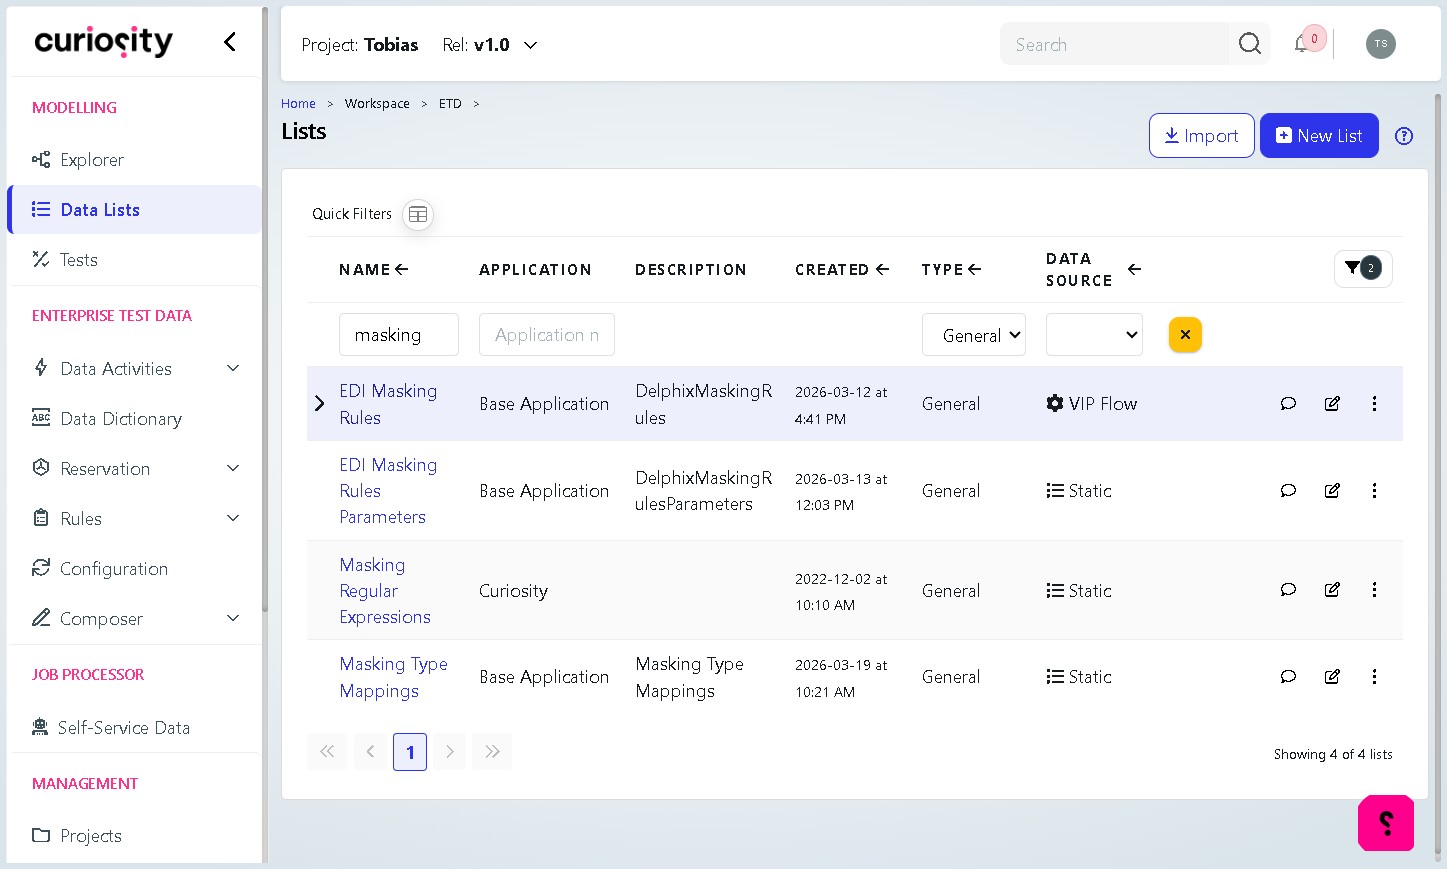
1.2 | Click Upload On the EDI Masking Rules – List Details page, click the Upload button in the top-right area of the Contents section. A “Choose CSV to Upload” dialog will appear. |
1.3 | Select your prepared CSV file In the dialog, click Choose file and select the CSV file you prepared in Step 9 (with the csi_function column added). |
1.4 | Confirm Append mode and click OK Before clicking OK, verify that the Append List option is selected — not Replace List. Appending adds the new rows to the existing data without deleting anything. Once confirmed, click OK to begin the upload. |
Important: Always use Append List. Selecting Replace List will permanently delete all existing records in the EDI Masking Rules data list before uploading the new data. |
Quick Reference: Job Parameters
Parameter | Default Value | Notes |
|---|---|---|
parJsonFilePath | (none — user-supplied) | The EDI JSON source file. Must be selected each time the job is run. |
parMode | ImportRulesToDataList | Pre-set. Do not change. |
parTransactionType | EDI_835 | Must match the transaction type of the uploaded JSON file (e.g. EDI_835, EDI_276). |
Troubleshooting
Symptom | What to Check |
|---|---|
Job completes but Result.zip is empty | Verify that parTransactionType matches the transaction type inside the JSON file. |
Upload fails or rows are rejected | Confirm the CSV contains the csi_function column and the file is saved in CSV format (not .xlsx). |
Existing masking rules have disappeared | Replace List was selected instead of Append List during upload. Contact your administrator to restore the previous data. |
ExtractEDIAttributes not visible in process list | Type “extrac” in the Name filter field. If still not visible, confirm you have access to relevant server. |