The scan process brings the schema of the database into Enterprise Test Data. The schema contains details about the database tables, columns, and associated attributes.
1. Connection Details
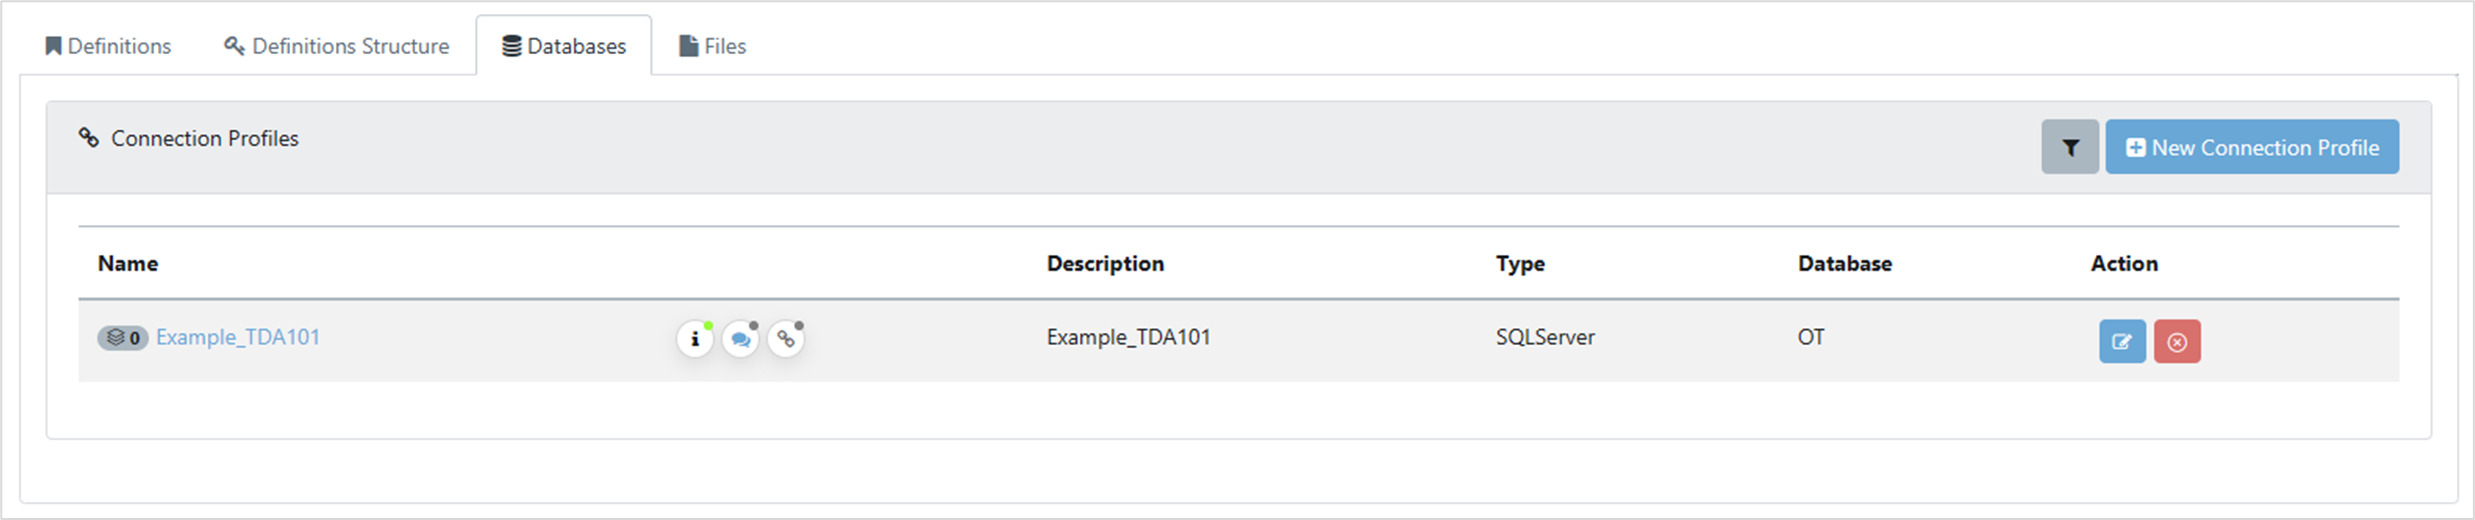
Begin in the Data Dictionary, by clicking on Data Dictionary in the Master Data Management section of the Navigation Panel, then select the Databases tab and find the profile you created. If there are many profiles, use the filter button next to the New Connection Profile.
Click on the name of the profile.
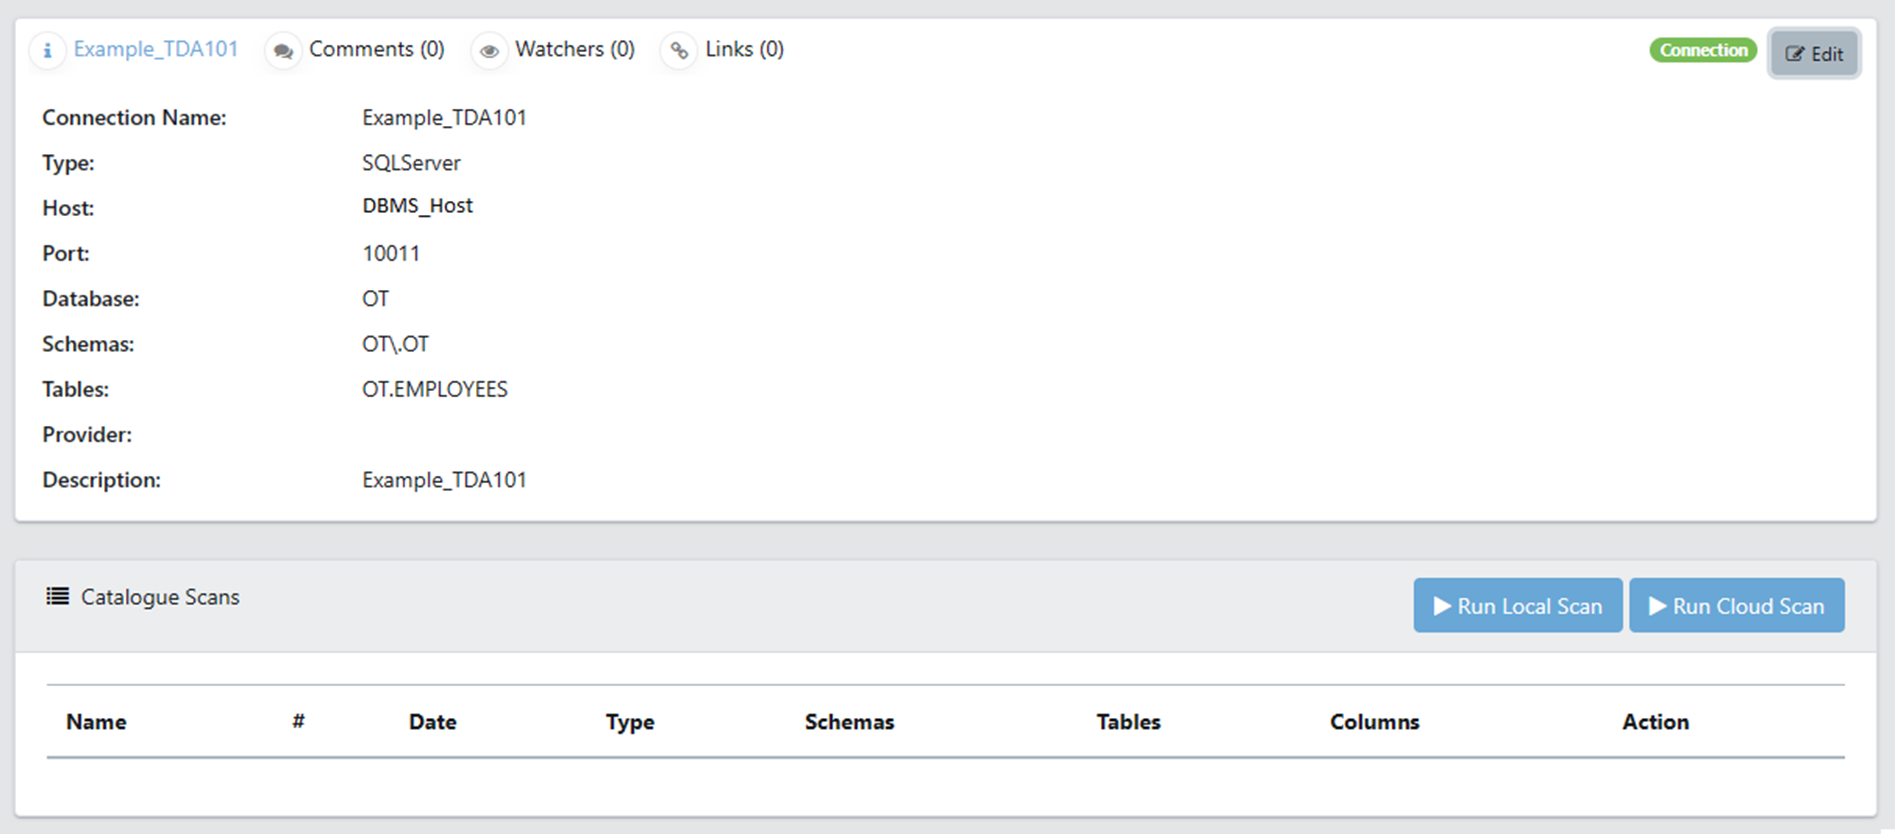
The Profile Details page is displayed.
2. Perform Scan
- If your database is publicly accessible, click on Run Cloud Scan.
- If your database is within a local network, and you require scanning to be performed on a specific VIP server, click on Run Local Scan.
A new box is displayed asking for the name of the VIP server to use and the process you want to run. Select your server.
Use the Process dropdown to select Get Schema Metadata and Analyse Data

The Get Schema Metadata and Analyse Data – Job Parameters box appears. The defaults are shown in the diagram below, but the minimum options you should select are:
- Get schema metadata
- Include tables
- Include Views
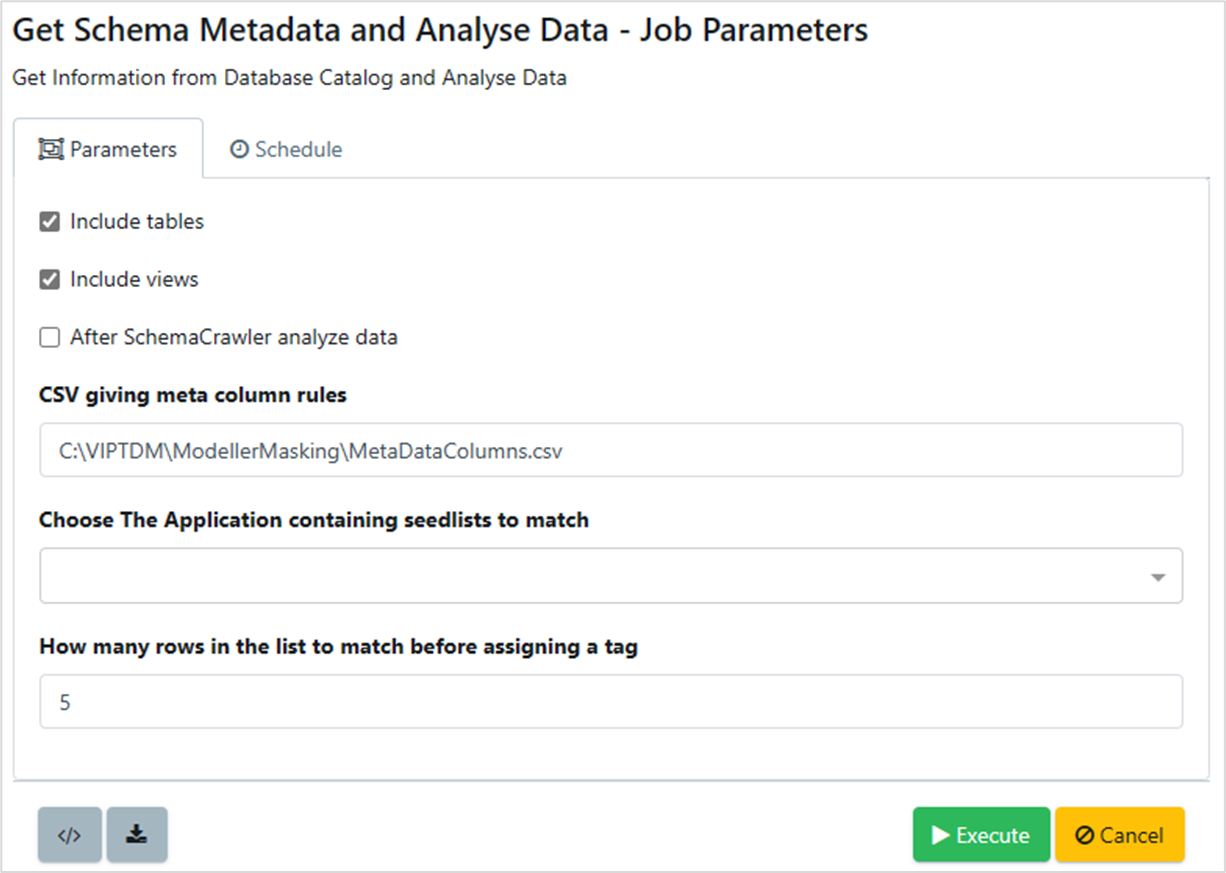
Click Execute
3. Review Scan
After the scan is complete, in the Data Dictionary, Databases tab, the name of the connection profile has a 1 next to it showing that the scan was successful.

Clicking on the profile name displays the Profile Details page, showing the successful Scan.

Clicking on Scan #1 shows the Scan Details with one successful schema associated with it.

You can click on the schema to reveal the tables and their columns.