Fixed Width File Schema, Data Dictionary & Query Composer
This guide walks you through setting up a fixed-width file schema, linking it to a data dictionary definition, and running queries against your data in the Query Composer. By the end you will have a fully configured file structure that Curiosity can use to parse, catalogue, and query your fixed-width data files.
Part 1: Create the File Schema
Step 1 Navigate to your workspace URL
Open your browser and go to your Curiosity Software workspace URL. In the left-hand navigation, click Data Dictionary to expand it, then select File Schemas. You will see a list of all existing schemas.

Step 2 Click “New File Schema”
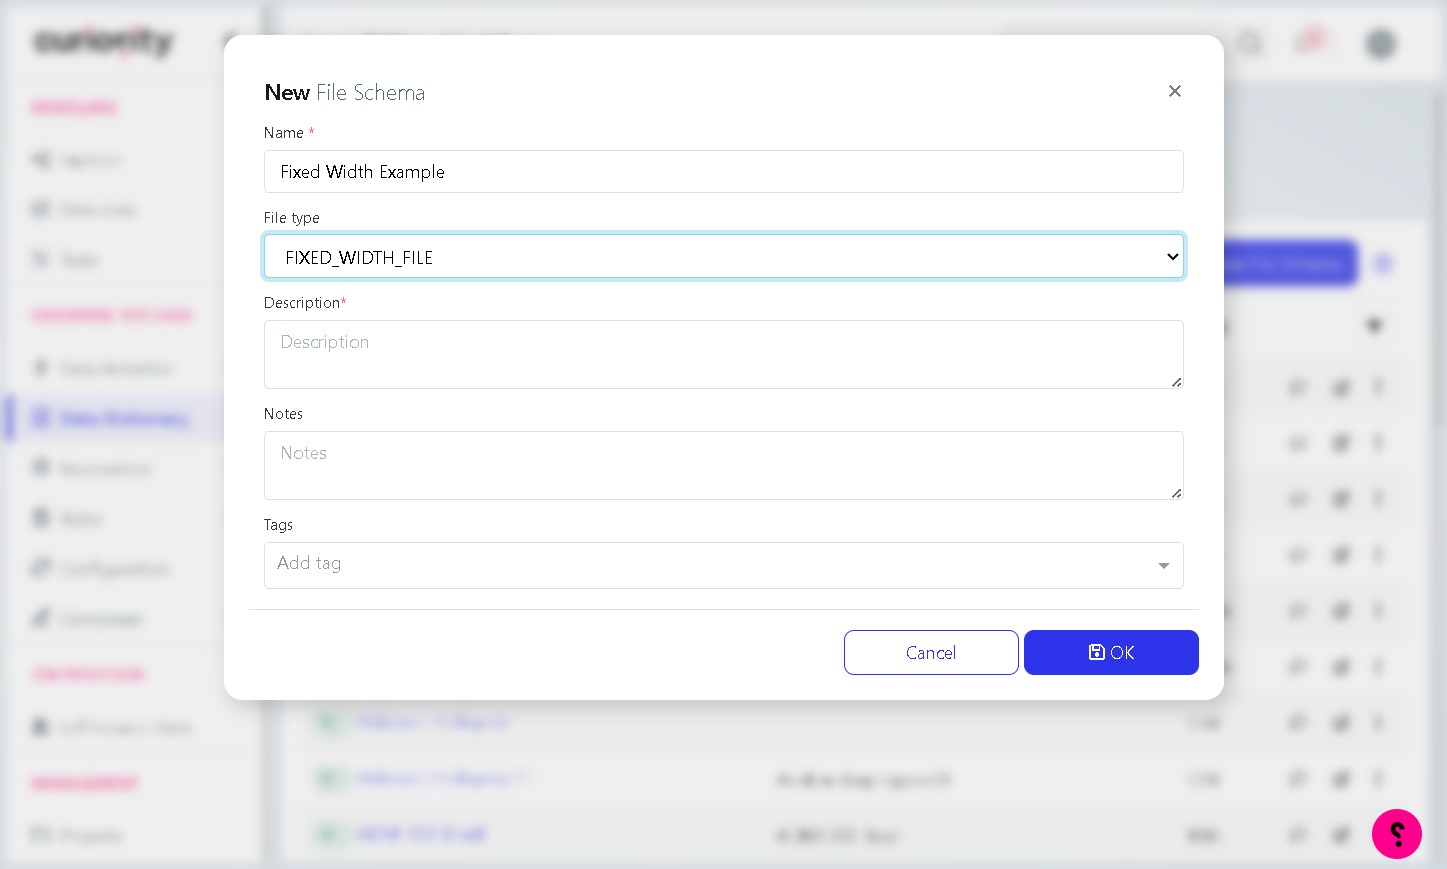
In the top-right corner of the File Schemas page, click the New File Schema button. The New File Schema dialog will open.

Step 3 Enter a name
Click the Name field and type a clear, descriptive name for your schema (for example, Fixed Width Example). This name will identify the schema in the list.
Step 4 Set the file type to FIXED_WIDTH_FILE
Click the File Type dropdown and select FIXED_WIDTH_FILE. This tells Curiosity that the schema describes a fixed-width format, where each column occupies a defined number of character positions.
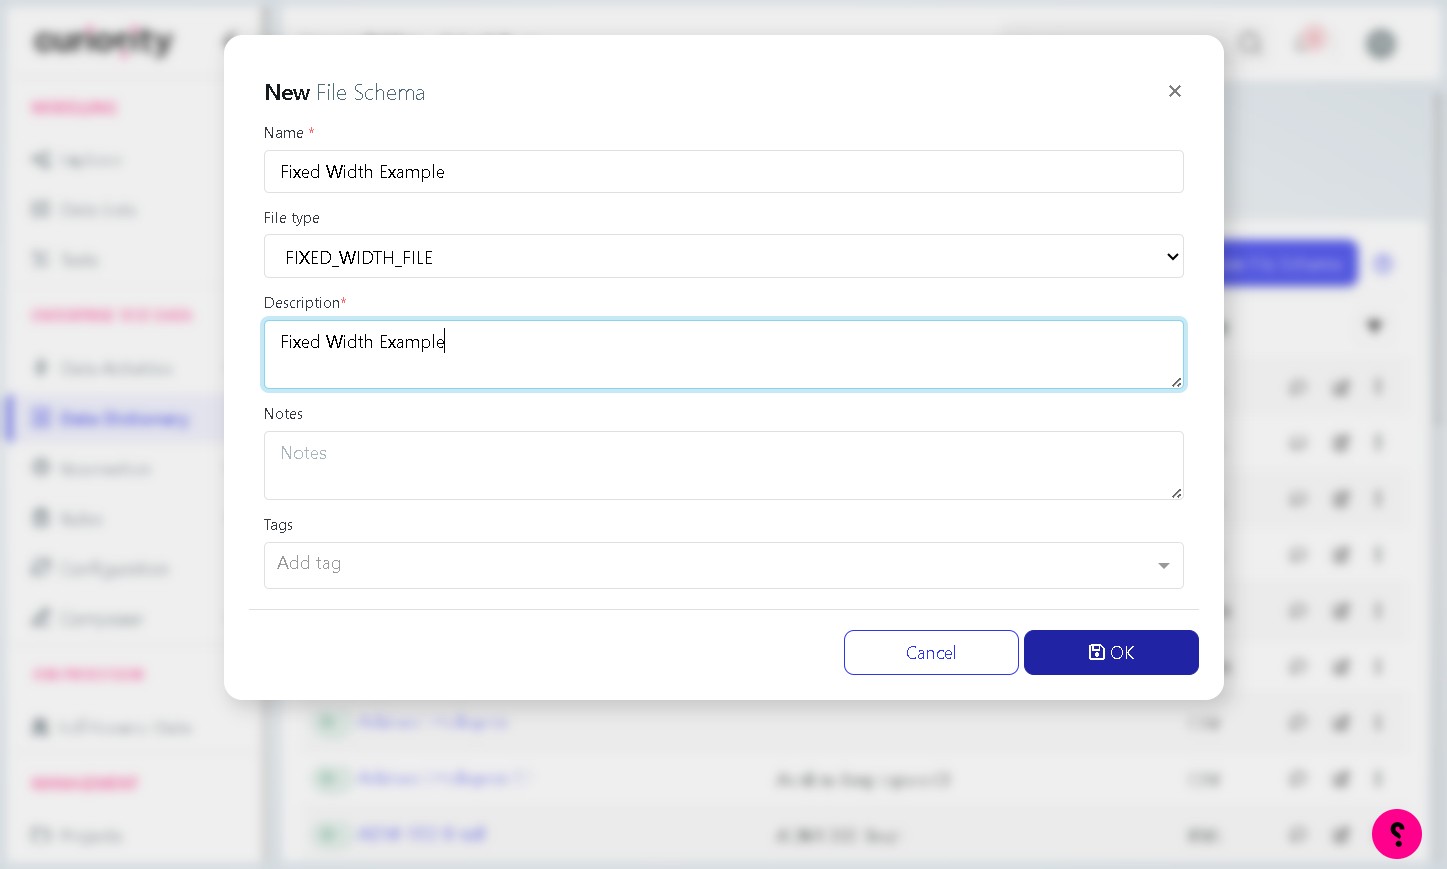
Step 5 Enter a description
Click the Description field and type a short explanation of what the schema represents. A good description helps other users understand the file structure at a glance.
Step 6 Save the schema
Click OK to save the new file schema. It will now appear in the File Schemas list.
Step 7 Open the schema details
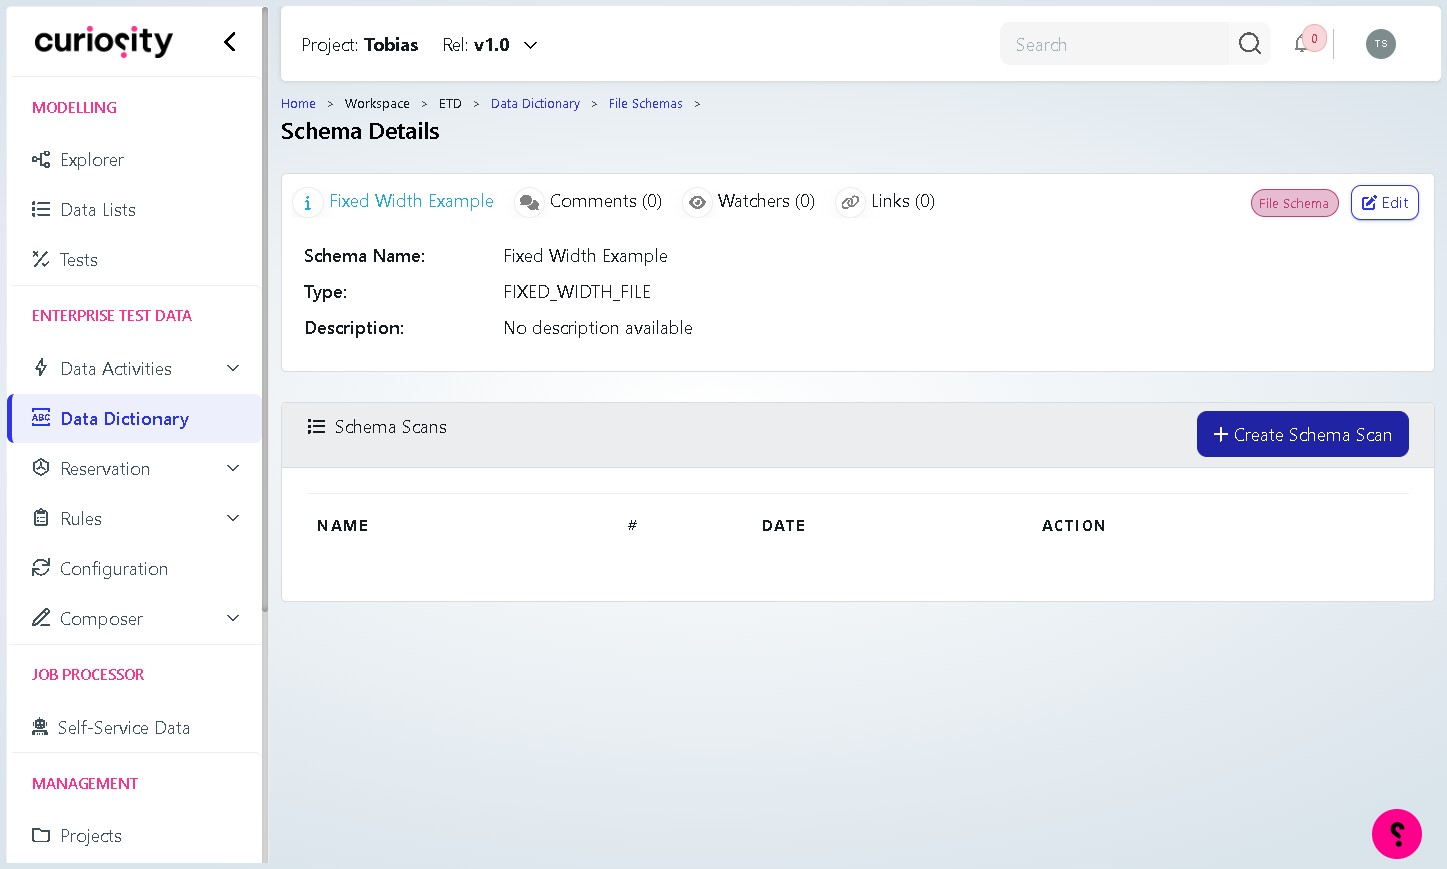
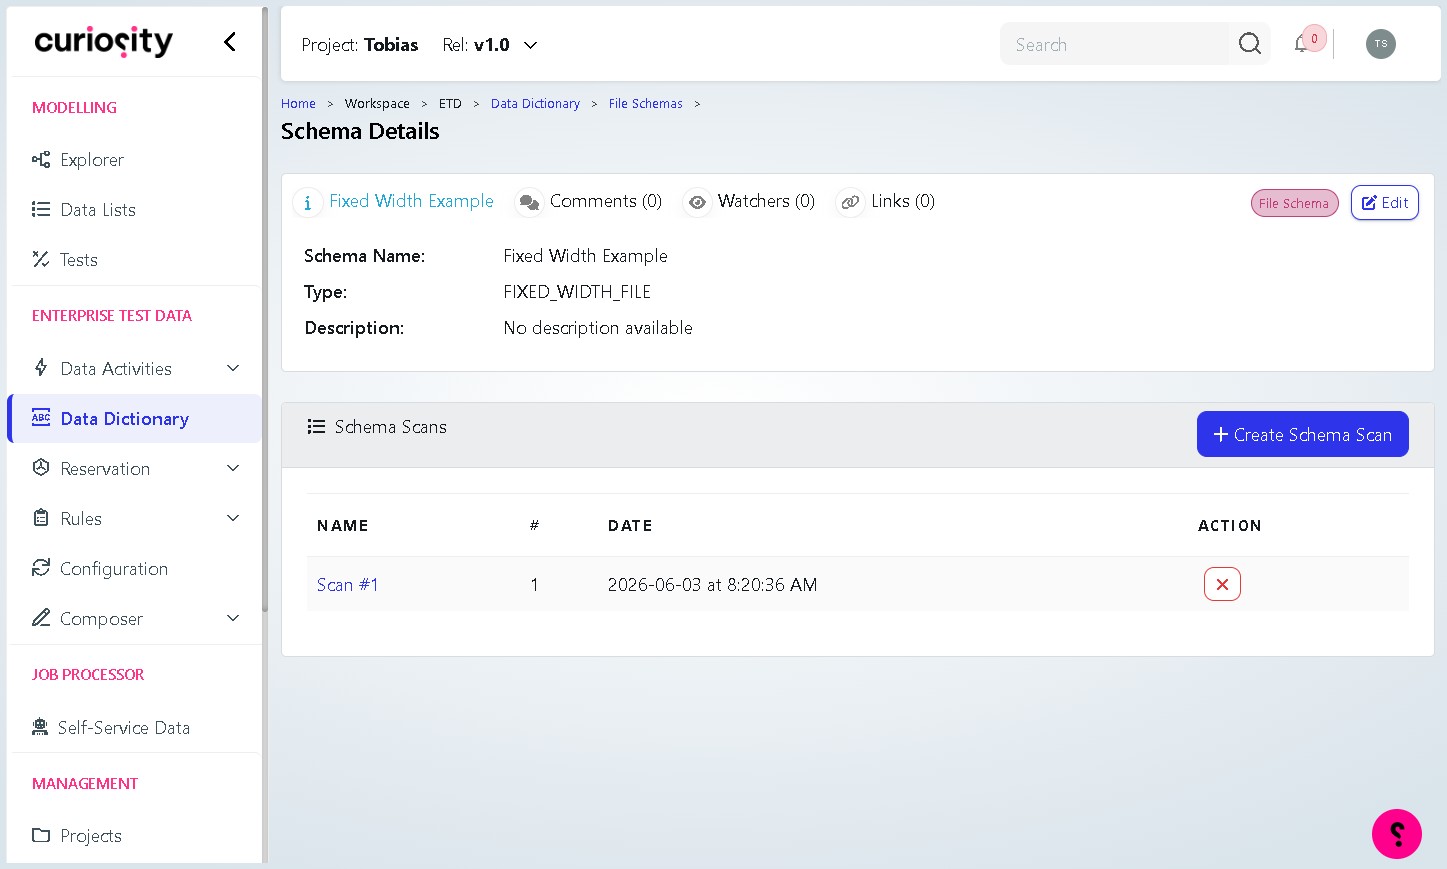
Find your new schema in the list and click on its name to open the Schema Details page. This page shows all scans associated with the schema and is where you will define its columns.
Part 2: Configure the Schema Scan
Step 8 Create a Schema Scan
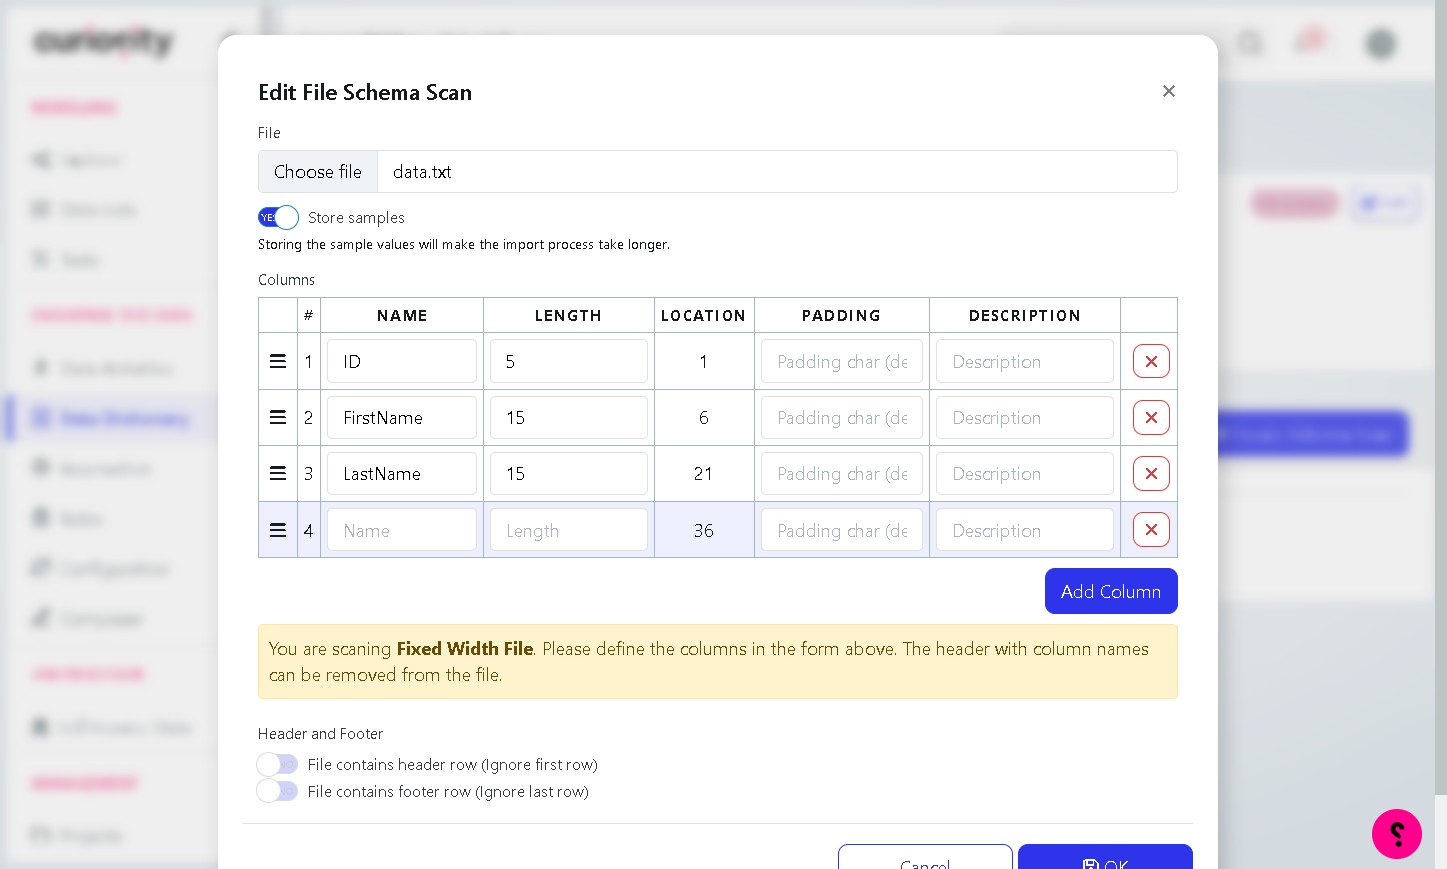
On the Schema Details page, click the + Create Schema Scan button. The Edit File Schema Scan dialog will open. A schema scan reads your uploaded file and maps its contents to the column definitions you provide.
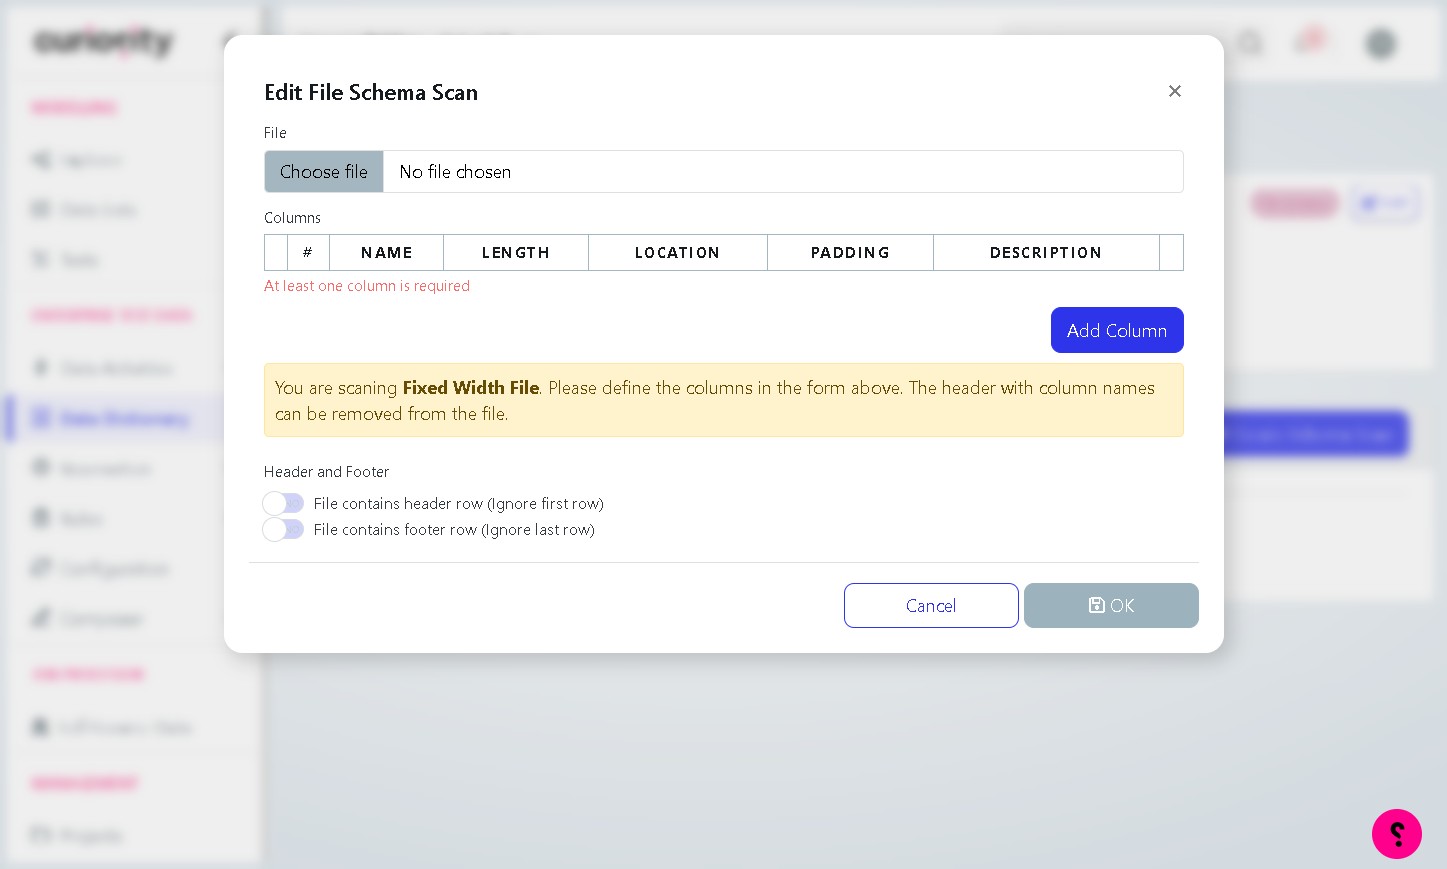
Step 9 Upload your fixed-width file
Click the Choose file button and select your fixed-width data file from your computer. The filename will appear next to the button once selected. For this scenario, the following file can be downloaded below: -
Note: Enabling the Store samples toggle will save sample data from the file, which can be useful for previewing and validating column definitions later. Be aware that this will make the import process take longer.
Step 10 Define the columns
For each column in your file, click Add Column and fill in the fields shown below. Location is calculated automatically — you do not need to enter it manually.
Field | Description |
Name | The column name. Use a clear, consistent naming convention. |
Length | The number of characters this column occupies in each row. |
Location | The starting character position of the column. This is calculated automatically based on the lengths of preceding columns, beginning at position 1. |
Padding | The padding character used to fill unused space in the column. Defaults to a space character. |
Description | An optional description of the column’s contents. |
Option | Description |
File contains header row | Tick this if the first row of your file contains column headings. Curiosity will skip this row when reading data. |
File contains footer row | Tick this if the last row of your file contains a footer or summary. Curiosity will skip this row when reading data. |
Step 11 Review your column definitions
Check that all columns have been entered correctly. Each row in the Columns table should show the column name, its length, and the auto-calculated location. Optional fields (Padding and Description) can be left blank if not needed.
In this scenario , the columns from the file above are as follows: -
ID, length 5
FirstName, length 15
LastName, length 15
Industry, length 20
Step 12 Import the file
Once you are satisfied with the column definitions, click OK. Curiosity will import the file and register the scan against your schema. The scan will appear on the Schema Details page with its date and number.
Part 3: Create the Data Dictionary Definition
Step 13 Go to Data Dictionary
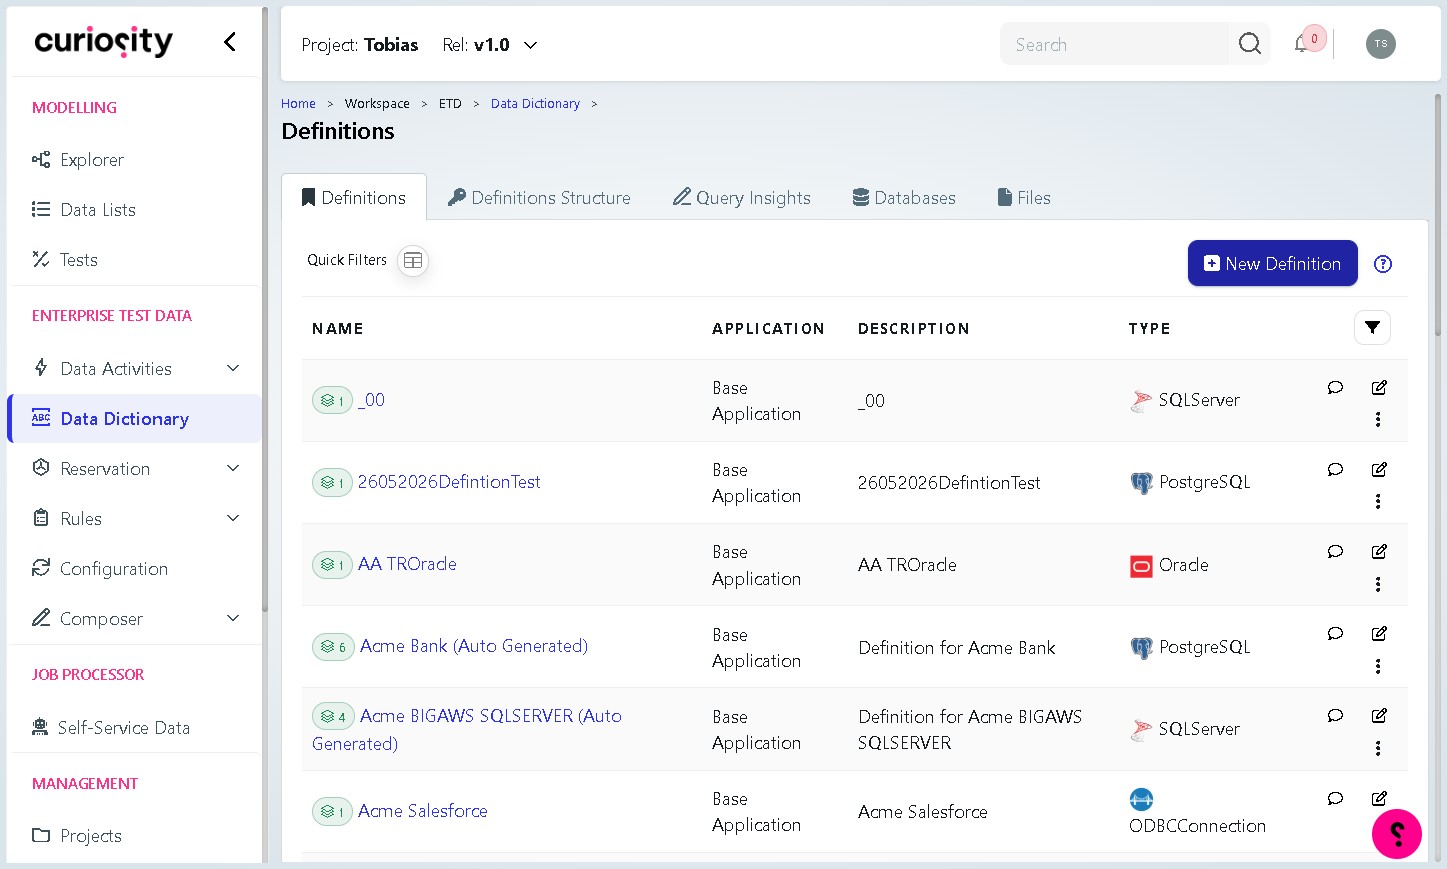
In the left-hand navigation, click Data Dictionary. You will be taken to the Definitions page, which lists all existing data dictionary definitions.
Step 14 Click “New Definition”
In the top-right corner, click New Definition. The Create Definition wizard will open.
Step 15 Enter a name
Click the Definition name field and type a name for your definition (for example, Fixed Width Example). This should match or relate to the schema you created earlier, so the two are easy to associate.
Step 16 Enter a description
Click the Description field and type a short description of what the definition covers.
Step 17 Select the File definition type
Below the Description field, three definition type cards are shown. Click the File card to create a file-based definition. This type registers the structure of a file in CSV, JSON, LIST, XML or FIXED_WIDTH format.
Option | Description |
Database | Creates a definition from a database structure, registering the schemas, tables, and columns of the selected database. |
File | Creates a definition from a file structure. Use this option for CSV, JSON, LIST, XML or FIXED_WIDTH files. |
Swagger | Creates a definition from a Swagger specification, registering the endpoints, requests, and responses of the selected API. |

Step 18 Click “Next Step”
Click Next Step to move to the Schema selection page.
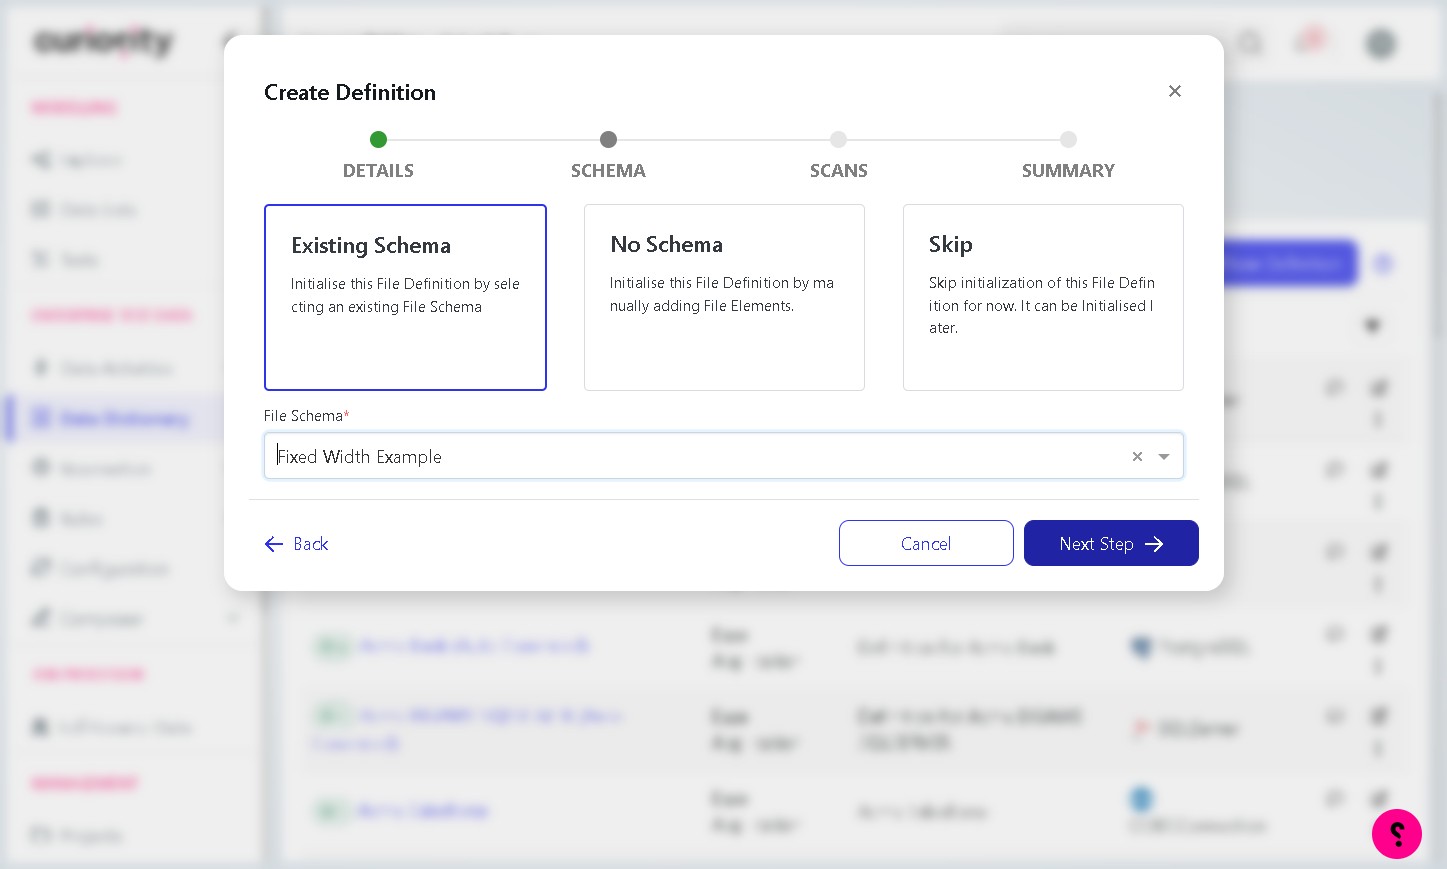
Step 19 Choose how to initialise the definition
On the Schema page, select how you want to initialise the definition:
Option | Description |
Existing Schema | Links the definition to a schema you have already created. This is the recommended option when you have completed Parts 1 and 2 of this guide. |
No Schema | Creates the definition without linking a schema. You can add file elements manually afterwards. |
Skip | Skips initialisation entirely. You can link a schema or add elements at any time later. |
Select Existing Schema to link to the schema created earlier.
Step 20 Select your File Schema
Click the File Schema dropdown and select the schema you created in Part 1 (for example, Fixed Width Example). Click Next Step to continue.
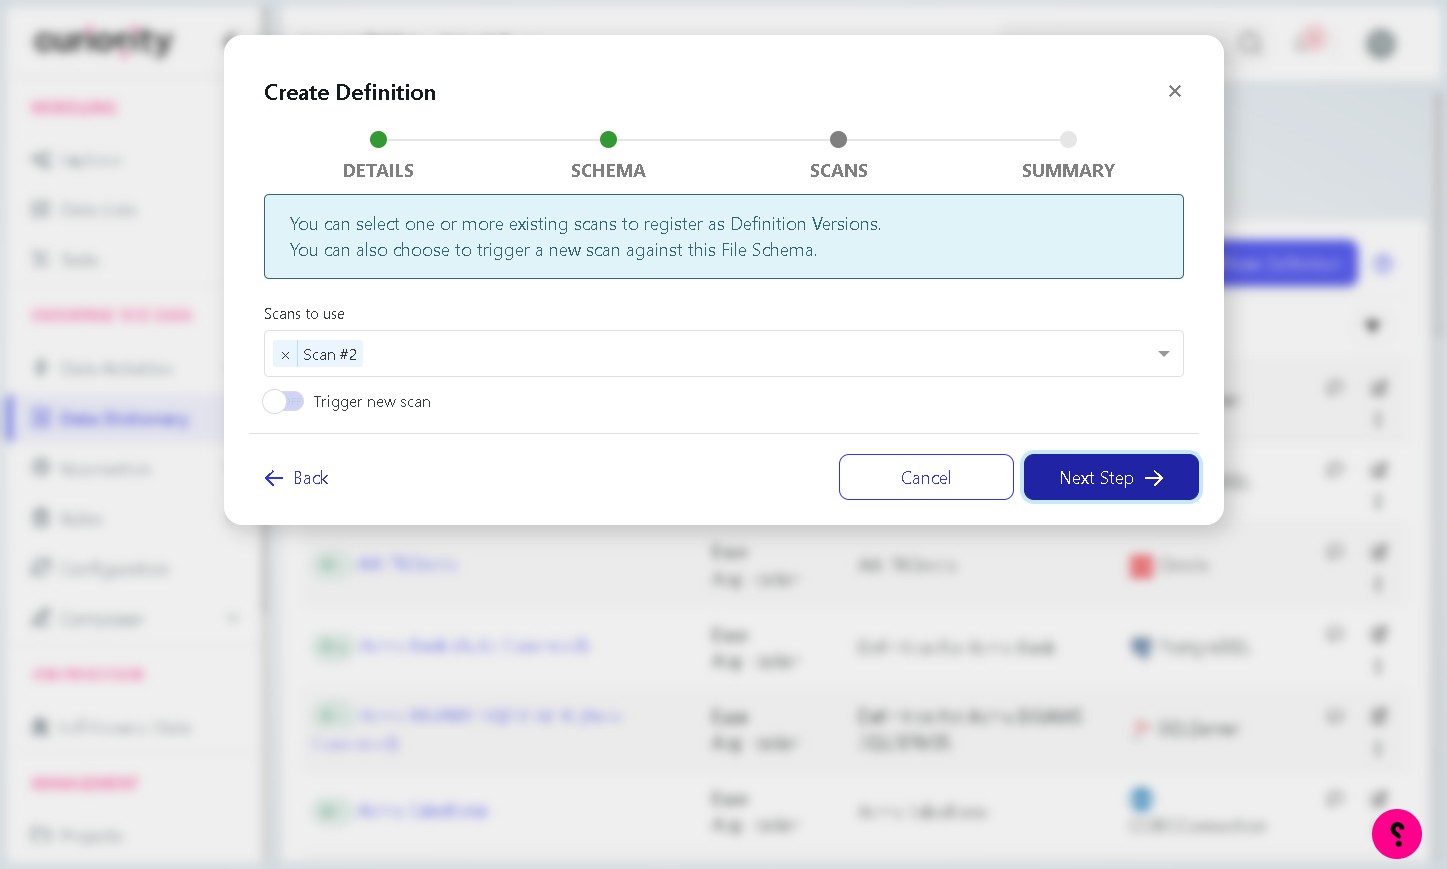
Step 21 Choose a scan
On the Scans page, Curiosity shows all scans registered against your chosen schema. By default the latest scan is selected. You can also select a specific earlier scan, or tick Trigger new scan to run a fresh scan before creating the definition. Click Next Step when ready.
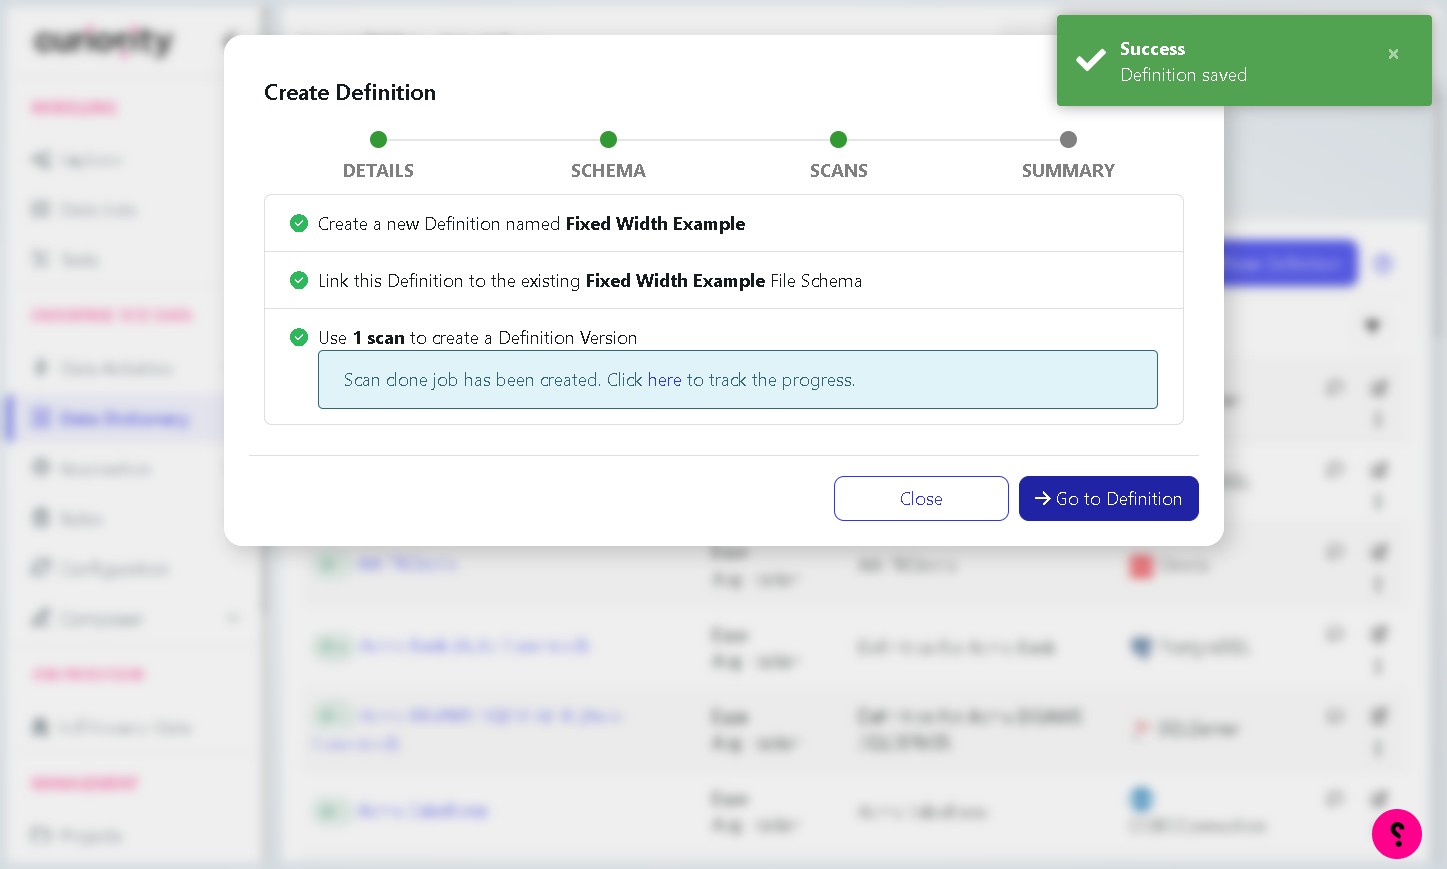
Step 22 Review the summary and finish
The Summary page confirms the actions that will be taken:
• A new definition will be created with the name you entered.
• The definition will be linked to your existing File Schema.
• The selected scan will be used to create the first definition version.
Click Finish to create the definition. A success message will confirm it has been saved.
Step 23 Open the definition
Click Go to Definition to open your newly created data dictionary definition. You will see its version history, linked schema, and all file elements derived from the scan. The definition is now ready for use.
Part 4: Open the Data Dictionary Definition
Step 24 Navigate to the definition
In the left-hand navigation, navigate to the Data Dictionary section and open the Definitions list.
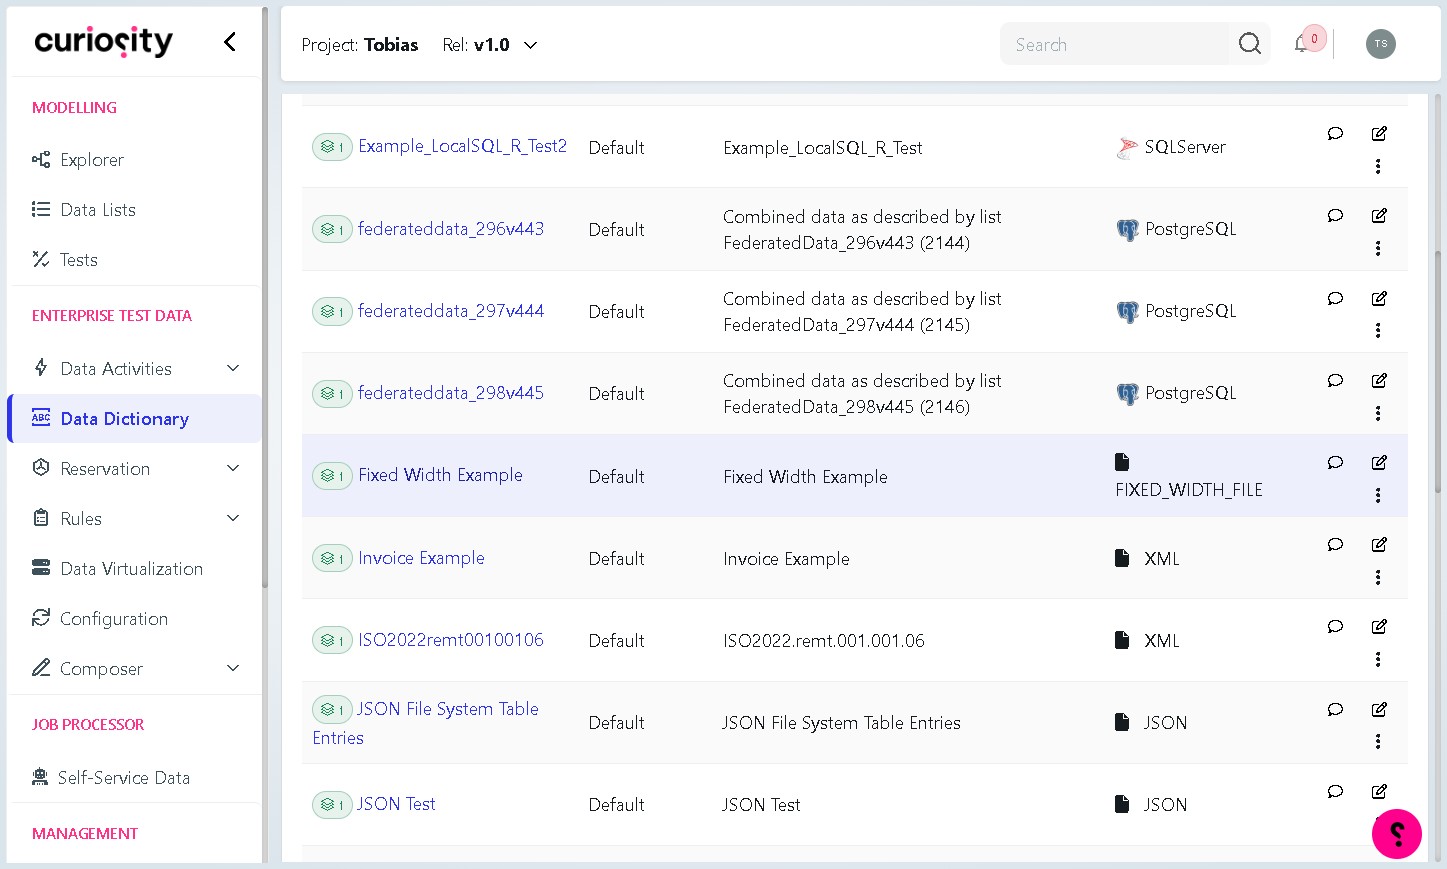
Step 25 Open the Fixed Width Example definition
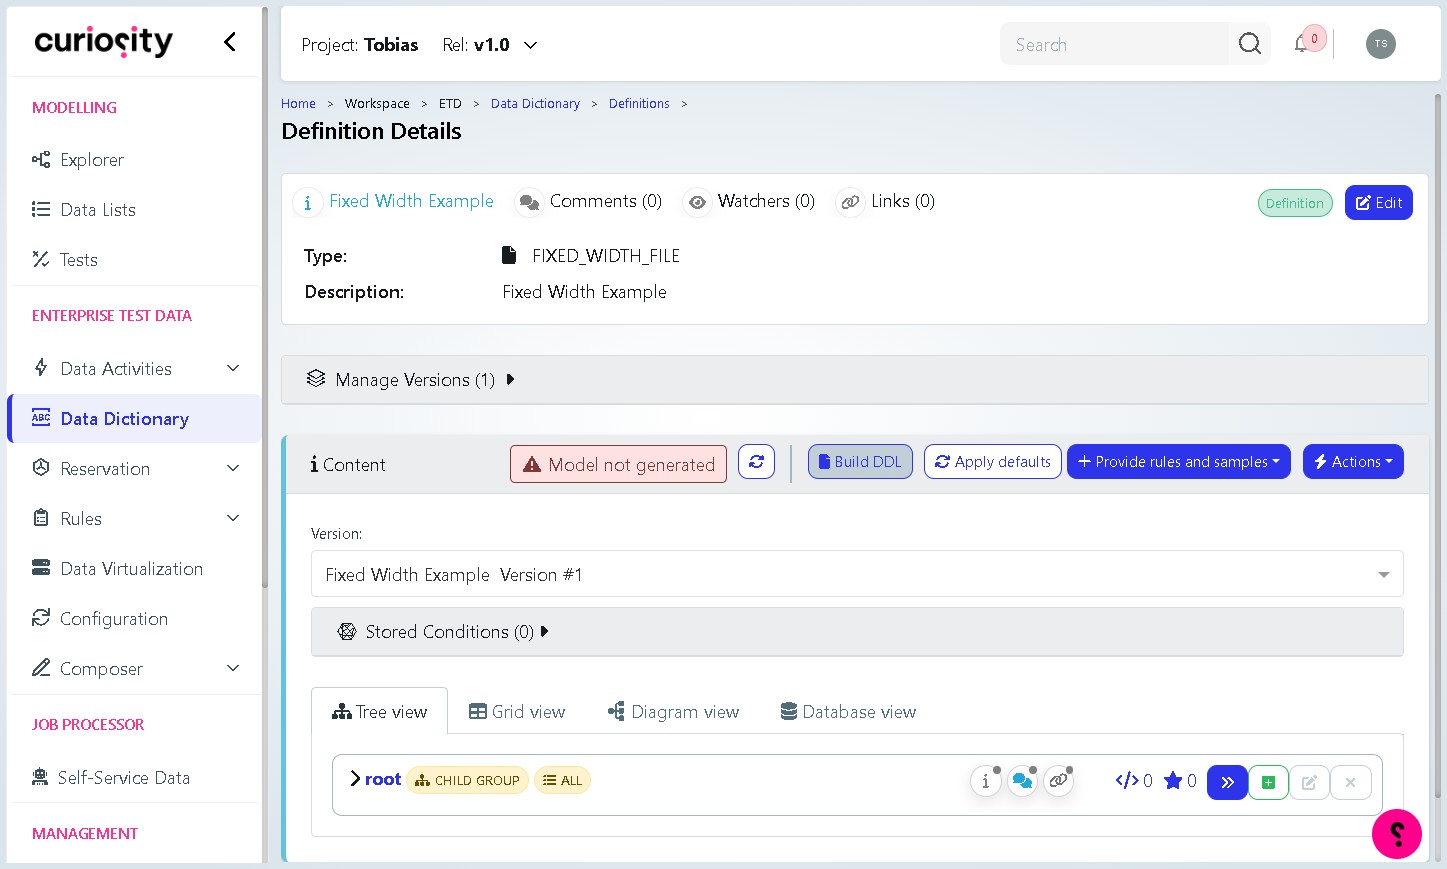
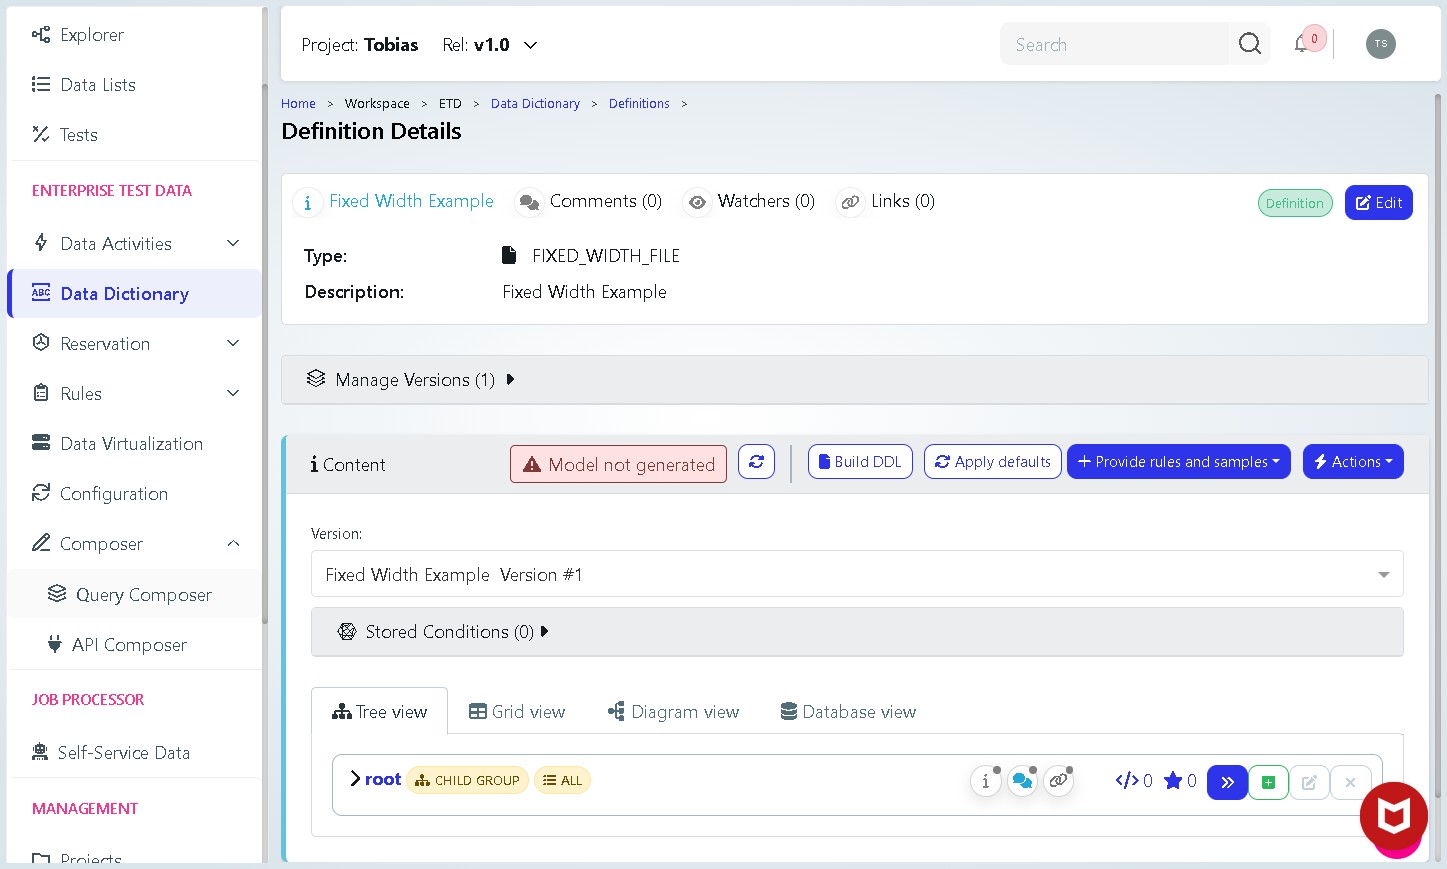
In the Definitions list, locate and click on the definition you want to query. In this example, click Fixed Width Example. This opens the Definition Details page, which shows the definition type, description, version history, and content tree.

Step 26 Build the DDL
On the Definition Details page, click the Build DDL button in the toolbar. This generates the Data Definition Language (DDL) for your definition — the SQL statements that describe the structure of your data.
Part 5: Open the Query Composer
Step 27 Expand the Composer menu
In the left-hand navigation panel, click Composer to expand it. Two options will appear beneath it.
Step 28 Click “Query Composer”
Click Query Composer from the expanded menu. The Query Composer page will open, showing a Connection panel on the left and a query editor on the right.
Part 6: Select a Connection and Run the Query
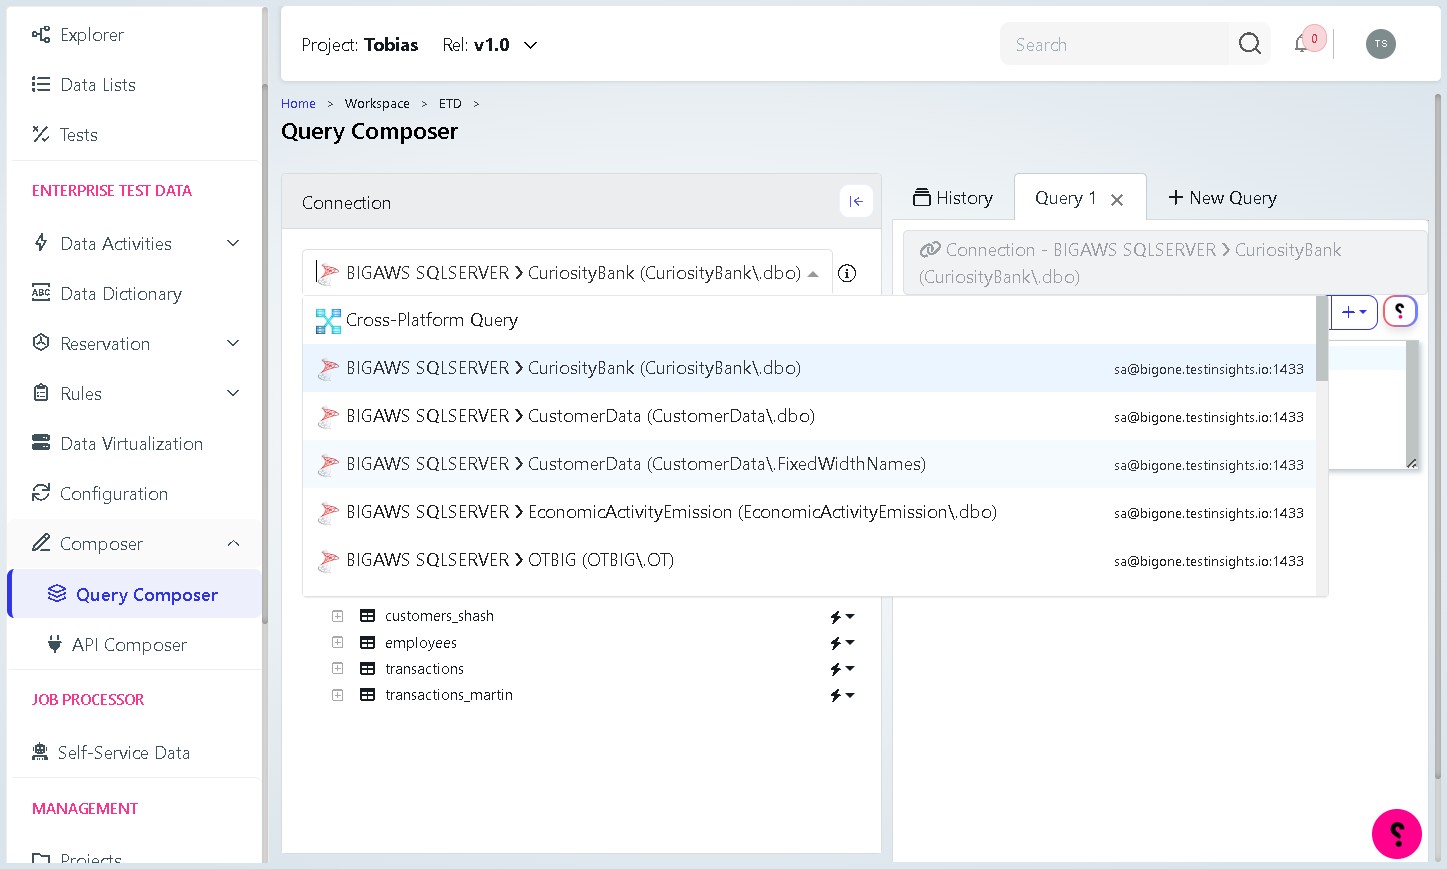
Step 29 Select your database connection
In the Connection panel on the left, a list of available database connections is shown. Click on the connection that corresponds to your dataset. Once selected, the connection is shown at the top of the Connection panel and the query editor updates to reflect the active connection. The left panel will also display the tables available under that connection, such as FixedWidthNames.
Step 30 Click inside the query editor
Click inside the query editor on the right-hand side of the screen. The editor is where you will type or paste the SQL query you want to run.
Step 31 Paste your SQL query
Press Ctrl + V (Windows) or Cmd + V (Mac) to paste your prepared SQL query into the editor. The query text will appear in the editor, ready to be executed.
Note: If you do not yet have a query, you can write one directly in the editor. The Query Composer supports standard SQL syntax for the connected database type.
Step 32 Execute the query
Click the Execute button in the top-right area of the query editor panel. Curiosity will run the query against the selected database connection and display the results below the editor.
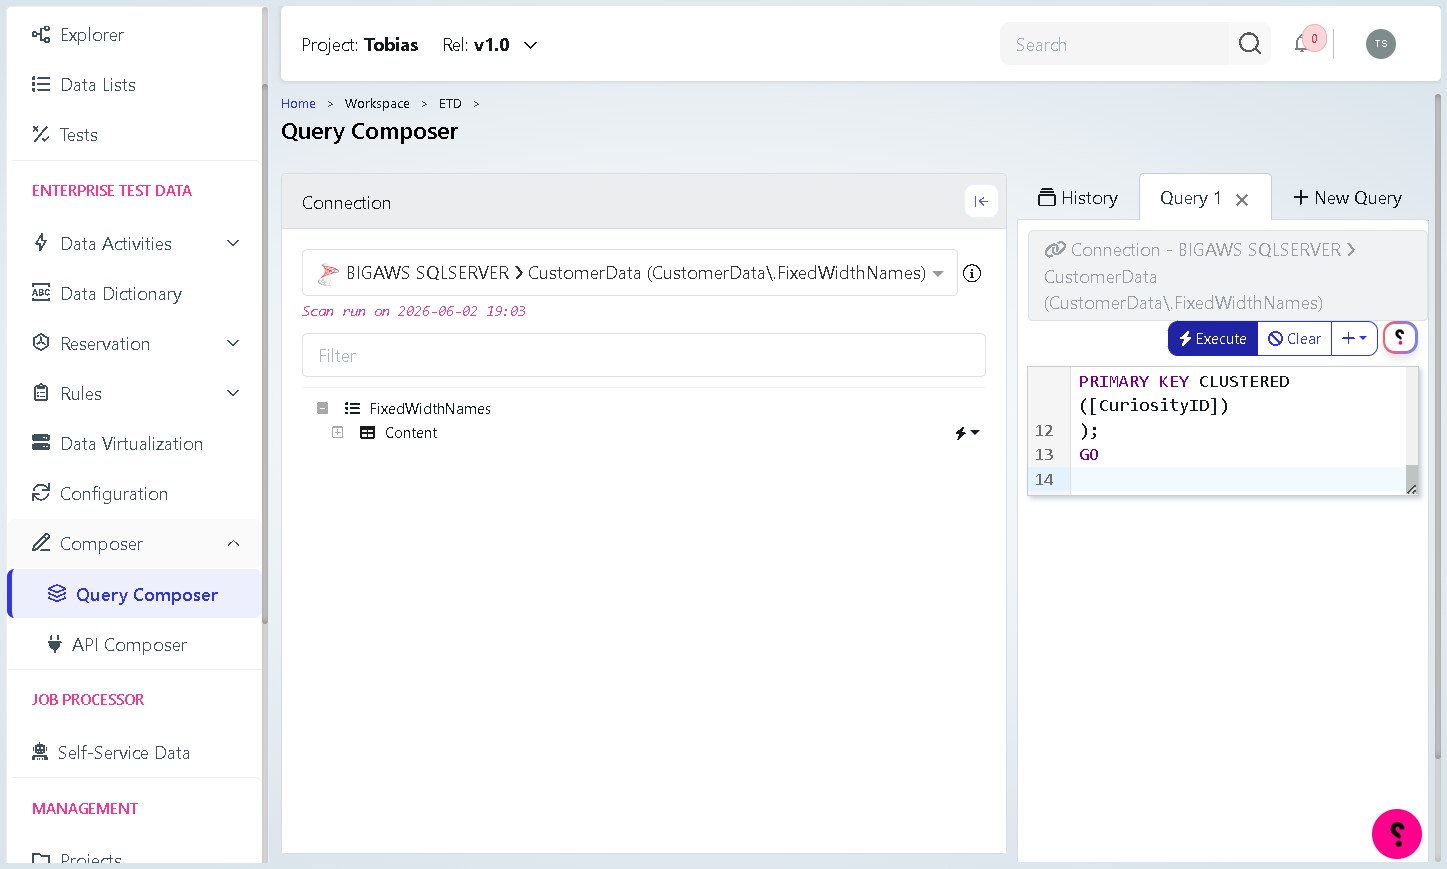
If the query is a DDL statement (such as CREATE TABLE), the output will confirm the statement was processed. For SELECT queries, the results will be shown in a table. This will create the necessary tables and structure in your database, completing the setup of your File Definition so it can be used in Data Activities such as profiling or masking.
Tip: Use the History button at the top of the editor to revisit previously run queries. You can also open multiple queries in separate tabs using the + New Query button.