In this article, learn how you can upload VIP flows as self-service, paramterized forms!
Step 1 - Save VIP Flow as a JSON
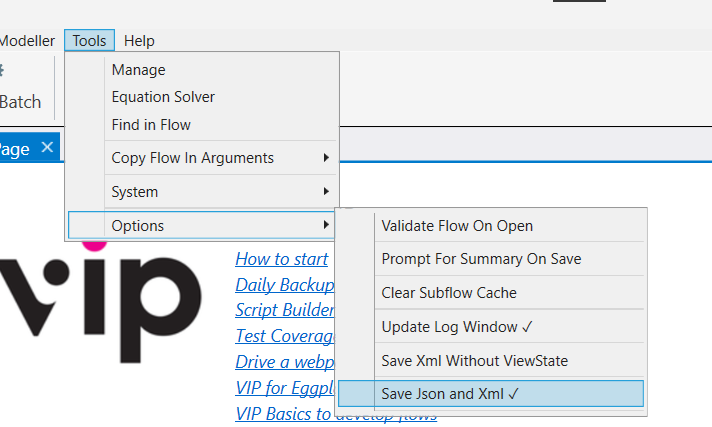
In VIP, go to Tools -> Options -> Save JSON and XML. This will save the VIP flow as a JSON file.

Step 2 - Upload JSON File into Enterprise Test Data
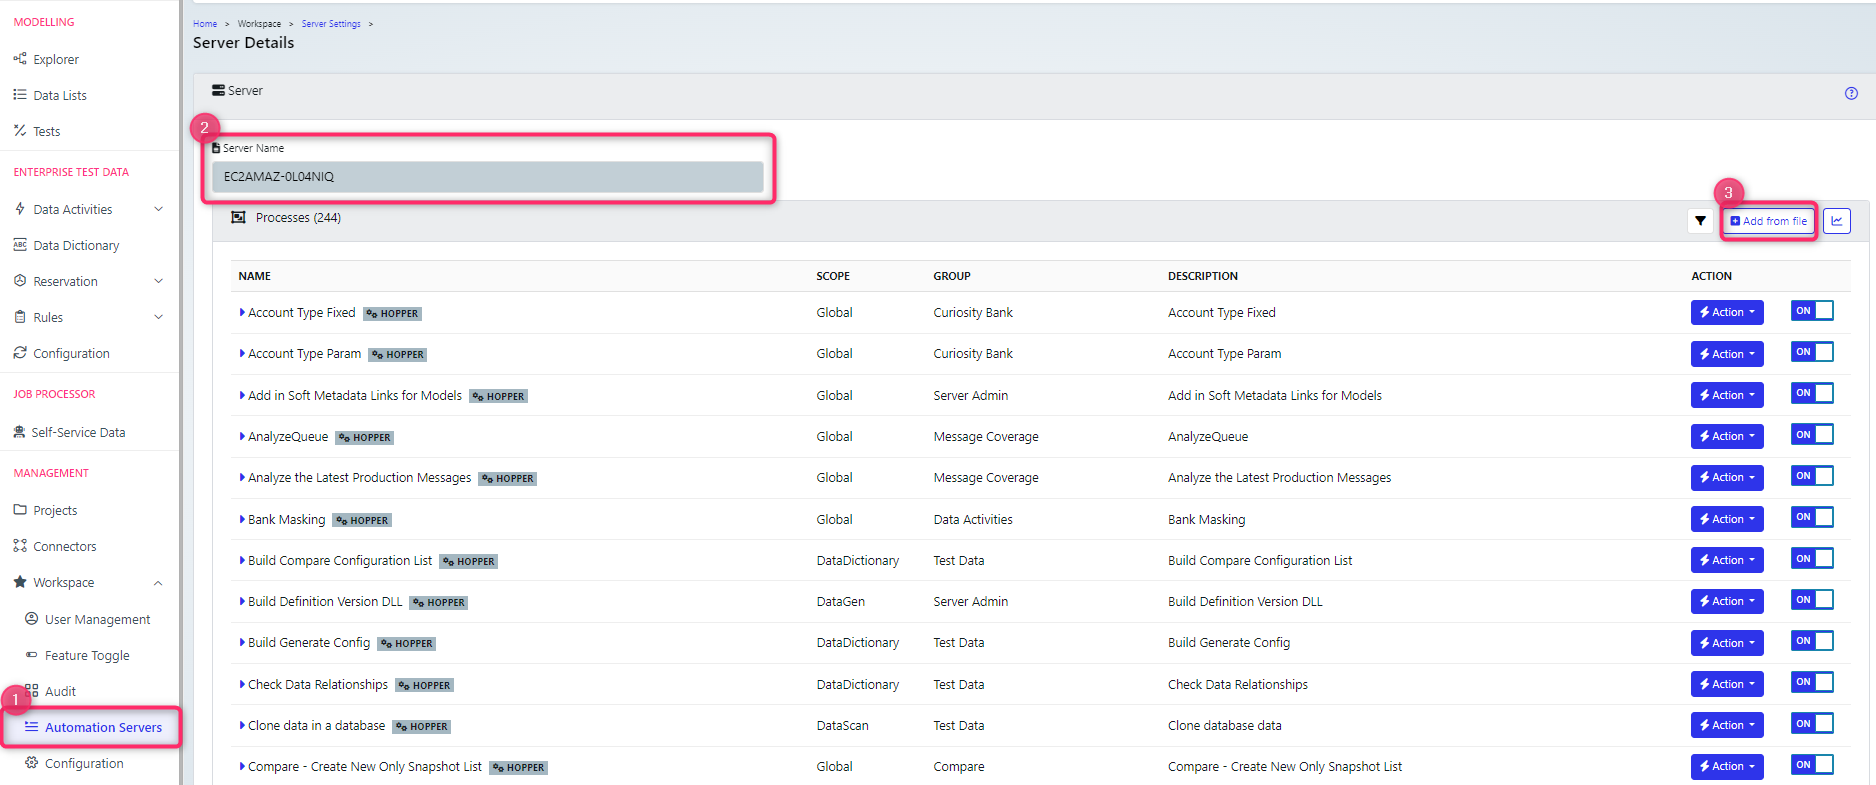
Inside of Enterprise Test Data, navigate to Management -> Automation Servers. Select the server that the file is saved in and that you will be executing the job on.
Click Add From File, then browse for the JSON file.

Step 2A - Provider Server Process Details
Enter in the following information:
- Location is the full path of the file on the server (ex: C:\exampleVIPflow.vip)
- Name of the job
- Description of the job
Step 2B - Hopper Details
Enter in the following information:
- Hopper type as GENERAL
- Hopper Subtype as the name of the job
Step 2C - Provide Process Parameter Details
Select from the provided parameters which you would like to expose in your form. To expose a parameter, toggle the Use in Form to YES.
Click Save.
Step 3 - Execute the Job
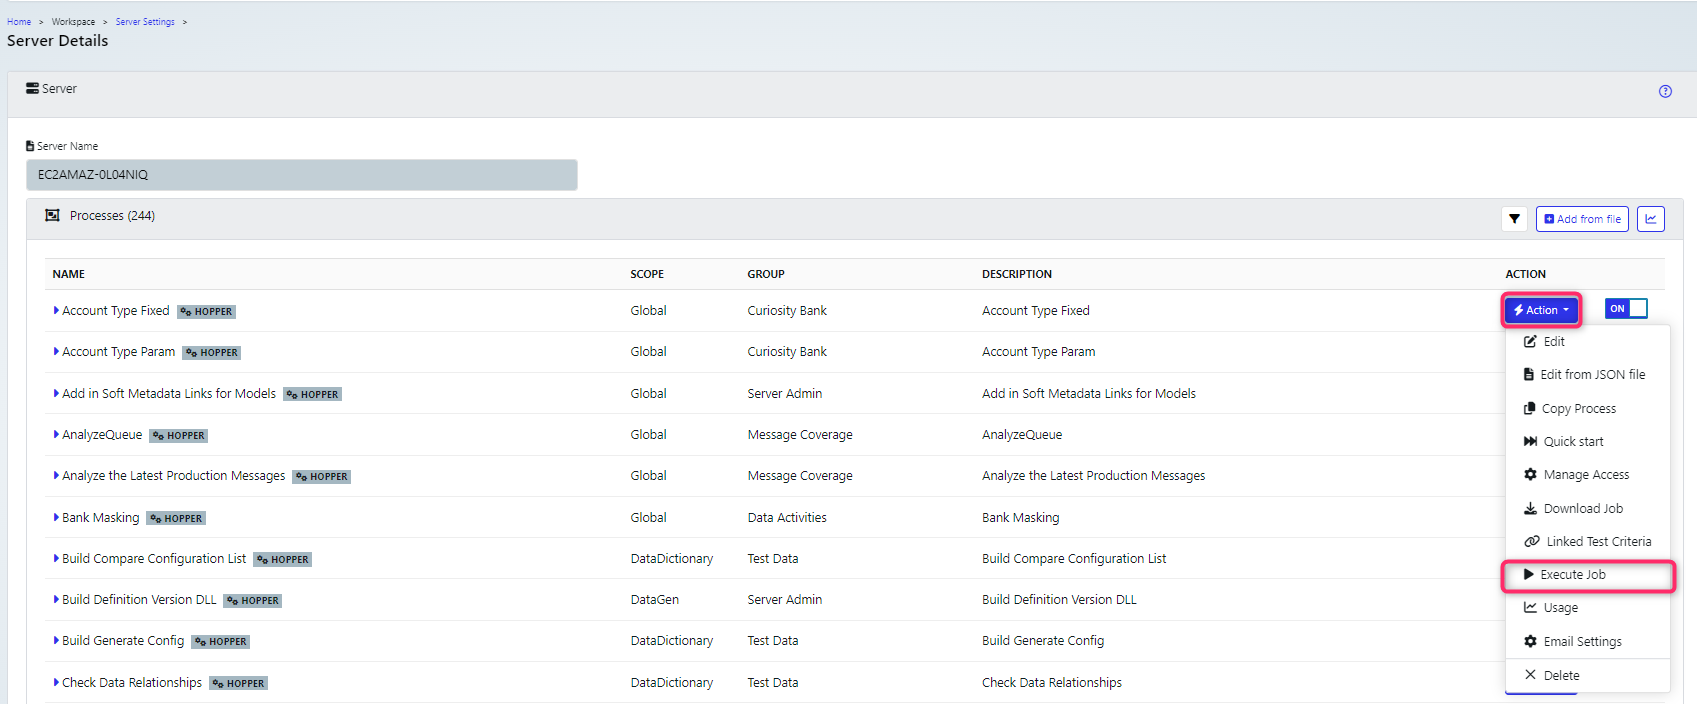
Navigate back to Management -> Automation Servers. You will now have your newly created job available as an option for execution
