Co-Pilot is a feature in Curiosity's Quality Modeller which leverages Generative AI which works alongside you to help create, understand, and refine models.
We've employed the Co-pilot feature for inputting commands to both generate and modify models. It serves as a handy tool for interrogating models with in-depth queries. Moreover, Co-pilot assists us in performing comprehensive model reviews and summarizing these complex models for simpler understanding. Lastly, an outstanding application of Co-pilot is its ability to transform these models into user stories, thus providing a more user-centric view of the model's purpose and function.
There are several core pieces of functionality within Co-Pilot:
1. Model Review, Summary, and User Story Creation
2. Refining and Updating Models
3. IntelliAgents
4. Generate Models from Images
Co-Pilot Basics
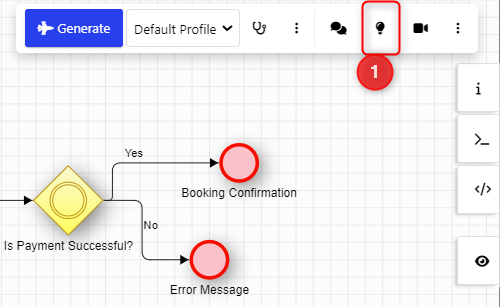
To open Co-Pilot, click on the lightbulb icon in the top right of the model canvas. Please note that you will need to have Modeller AI licensed and enabled to see this option and start using Co-Pilot.
This will open the co-pilot side toolbar with it's three basic user actions. Along with the option to expand or collapse the window, using the arrow on the left-hand side of the co-pilot dialogue box.
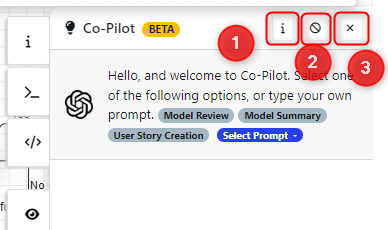
1. Open Documentation: this will take you to this documentation page.
2. Reset: this will remove all prompt history from the dialogue box.
3. Close: this will minimise the co-pilot screen. This does not terminate any existing running prompts.
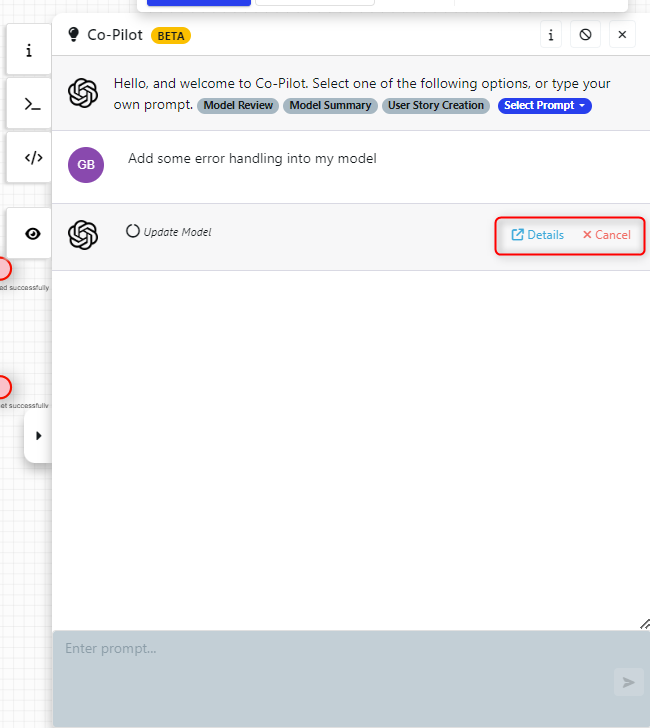
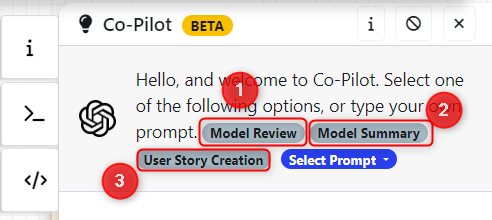
Additionally, Co-Pilot features a prompt window to enter the prompt with different options to allow the user to select the type of prompt.
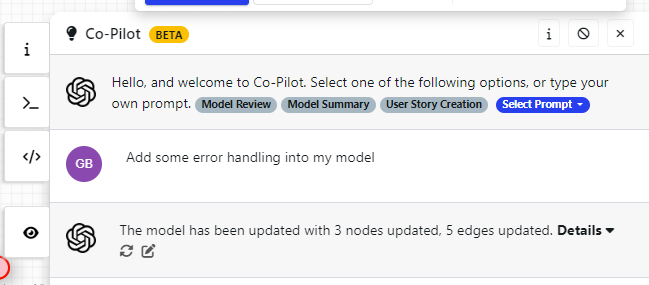
As the user enters their prompt, they will be able to send it to the underlying LLM. By default, the prompt will be auto-categorised into what Modeller AI thinks is being asked, in the example below, the user has asked co-pilot to add some error handling into my model, this has been identified as a 'Update Model' action and the model has been updated accordingly.
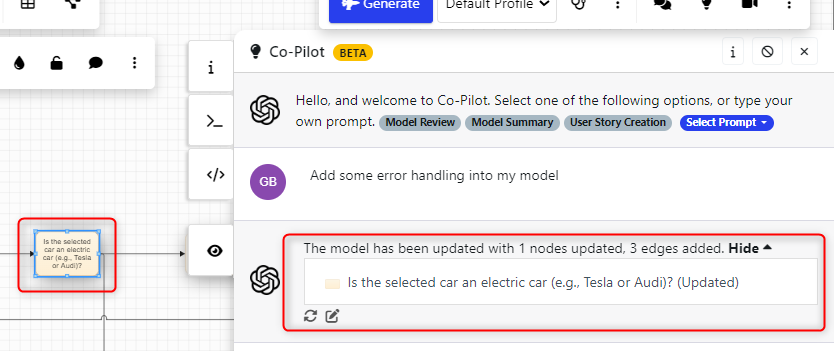
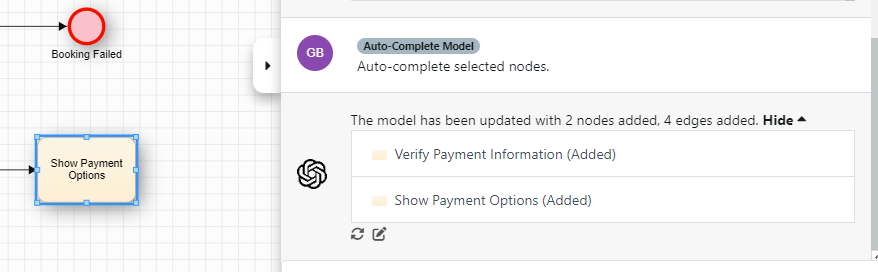
Expanding the details of co-pilot's response here unveils the added nodes, these can be highlighted to make the change more obvious. The prompt can also be reran or improved.
As the prompt is being processed, the user can open the job log or cancel the prompt. The box to enter a prompt will also be greyed out until the processing has finished.
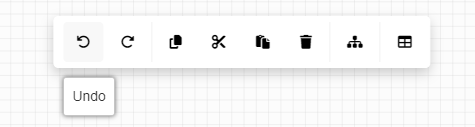
If you are ever unhappy with the AI response - press the Undo button and re run the prompt.
1. Model Review, Summary, and User Story Creation
There are three basic one-touch prompts that users can select. These options require a model to be built before, this could be from using Co-Pilot, ModelGPT, another source, or manually created.
***please note for legacy models, users may need to 'Save As a New Version' in order to use co-pilot***
a. Model Review: This provides a review of the model providing advice for missing information and the overall quality of the model that has been built.
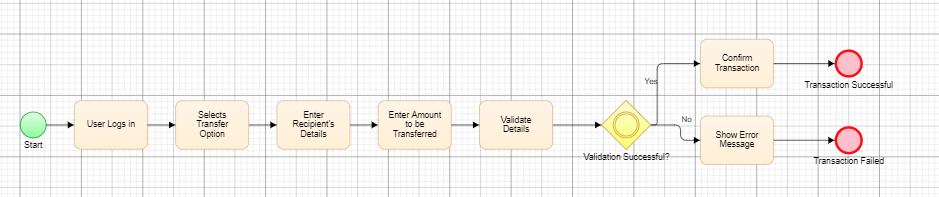
Co-Pilot comes back with the following response.
This flowchart appears to be complete and applicable for model-based testing. It details the steps of a banking transaction from start to finish and shows the logic of the process.

The logic represented includes: validating details, entering recipient's details, entering an amount to be transferred, selecting the transfer option, confirming the transaction, and displaying an error message if the validation fails.

To ensure this flowchart is complete, some additional scenarios should be considered. For example, it should include a scenario to handle the case when the user cancels a transfer or when insufficient funds are available for the transfer. Additionally, the flowchart should include a route back from the ‘Transaction Failed’ endpoint to start the flowchart again in case the transfer needs to be retried.
b. Model Summary: This summarises the model into a textual based description of the business logic, this is particularly useful for understanding if the model has been built correctly.
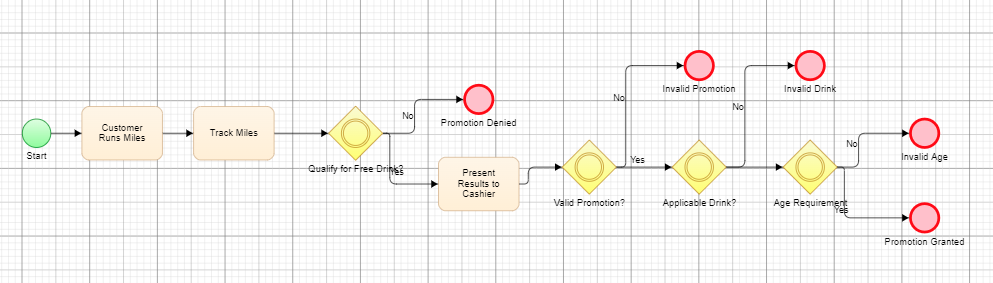
This comes back with the following response on summarising our model.
This flowchart describes the process of validating a customer's eligibility for a free drink promotion. Upon starting the process, it checks for the age requirement by asking if the customer is 18 years or older. If the customer meets the age requirement, the promotion's validity is checked. If the promotion is valid, then the customer is asked if they are eligible for the free drink. The customer must have run at least 10 miles per week and have proof of this when presenting their results to the cashier. If the customer qualifies, then the promotion is granted. Otherwise, it is denied. If the drink is not eligible for the promotion, then it is not granted.c. User Story Creation: This summarises the model into a standardised textual based description of the business logic.
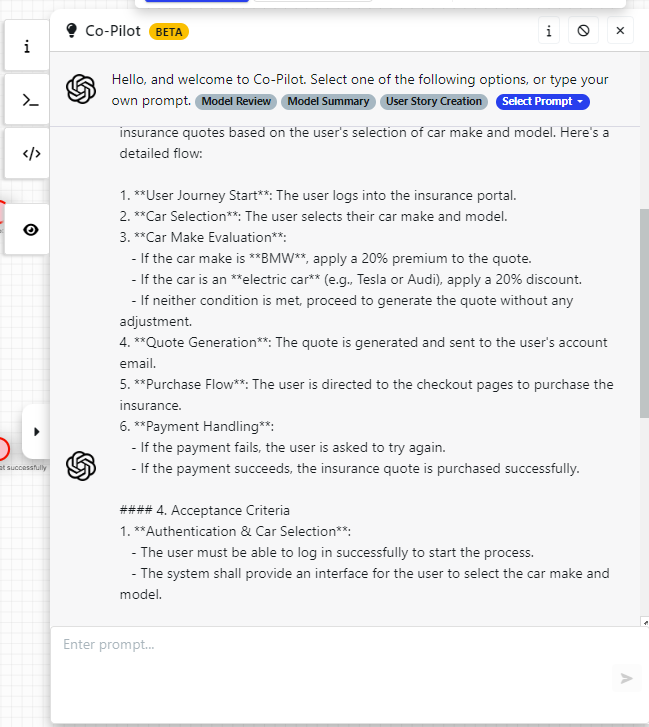
Here's an example of User Story creation for a model that explains a car insurance quoting service:
2. Refining and Updating Models
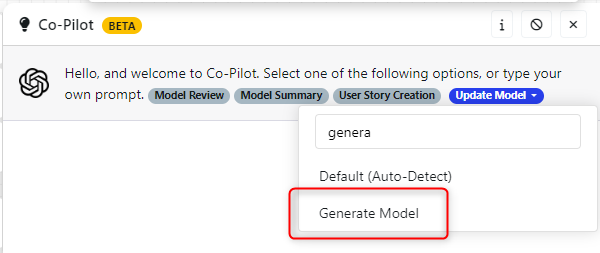
To select the type of prompt the user wants to use, select the 'Select Prompt' dropdown to view all of the options. This section will cover three of these options; Generate Model, Self-Improve Model, and Update Model.
a. Generate Model. This should only be used when the model canvas is empty and you are starting a new model. Here, you can provide text-based requirements for co-pilot to process and build a brand new model from, this is a similar alternative to ModelGPT - Create Models from Requirements.
Here is an example prompt: Create a model that represents a flight booking service using the following requirements. A user wants to book a flight. They enter the departure and arrival destinations, and choose a departure date and return date. The system shows available flights. The user chooses a flight and enters passenger information. They choose seats and any additional services. Then they proceed to payment. If payment is successful, a confirmation is sent. Otherwise, an error is displayed.
That produces the following model:

b. Self-Improve Model. This should only be used when you have a model in the canvas already. It allows the user to ask the AI to self-improve model, with some user feedback.

Here is an example prompt: Please improve this model with more edge cases
Which gives the following output, where you can see an overview of what has changed and the impact it had on the model.

c. Update Model. This should only be used when you have a model in the canvas already. It allows the user to tell co-pilot specifically what should be added to the model, the best use here is to provide new requirements to be overlaid onto the existing model.

Here is an example prompt: If the user selects a flight from London to the USA, ask the user to confirm they are happy to fill out a US pre-clearance form.
Which gives the following output, where you can see an overview of what has changed and the impact it had on the model.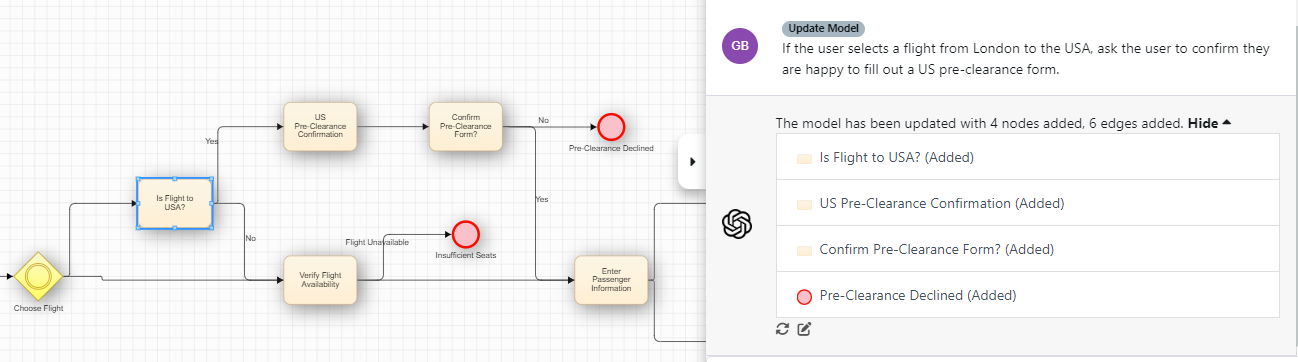
If you are ever unhappy with the AI response - press the Undo button and re run the prompt.
3. IntelliAgents
IntelliAgents are intelligent personas with specific specialities that can analyse a model to identify problems and gaps within the model. There are several IntelliAgents within co-pilot that can be used to give different types of model feedback; Accessibility, Auto-Complete, Compliance, Equivalence Classes, Localisation Analyst, Missing Scenarios, OWASP, Performance, Requirement Gap, Security, Subflow Expansion, Test Data, and User Experience.
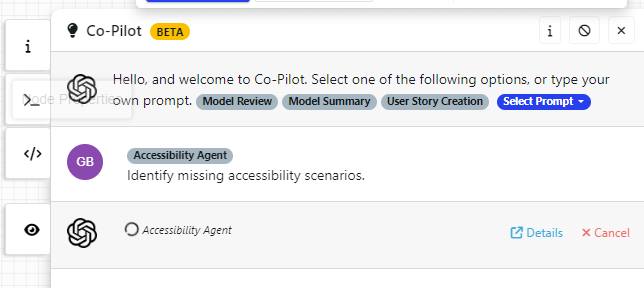
To use these, search for them in the Prompt selector. This is single-touch, so as soon as you select the agent the prompt will run.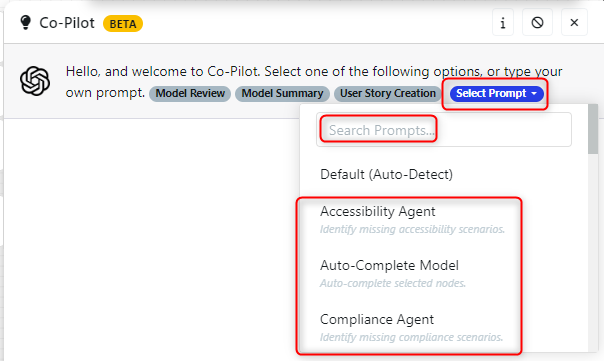 Here we have selected the Accessibility Agent and the prompt is in progress:
If you are ever unhappy with the AI response - press the Undo button and re run the prompt.
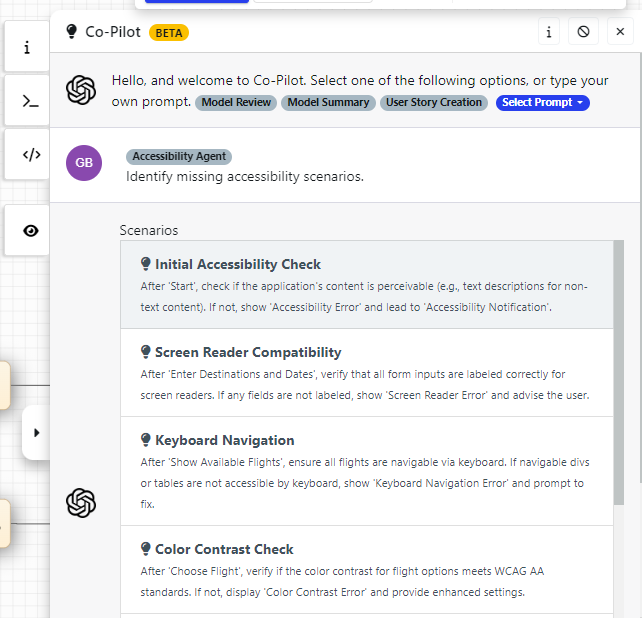
a. Accessibility.
The IntellIiAgents will return a series of accessibility related scenarios that it thinks is missing from the model, each scenario can be then applied to the model by selecting it from the menu.
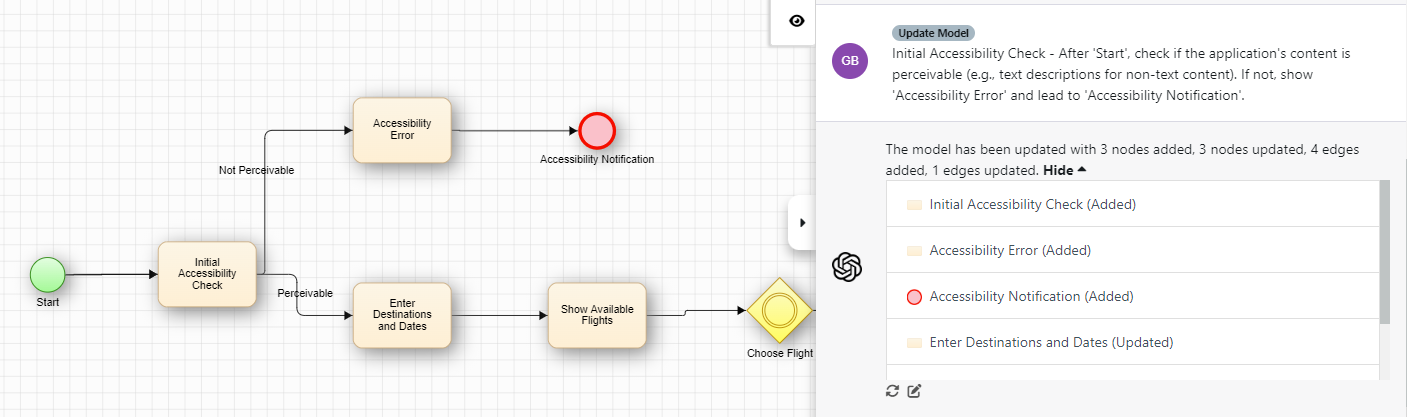
Here, an 'Initial Accessibility Check' suggested scenario has been selected and applied to the model.
b. Auto-Complete. This will evaluate what nodes are in the model already and apply new ones where most relevant.
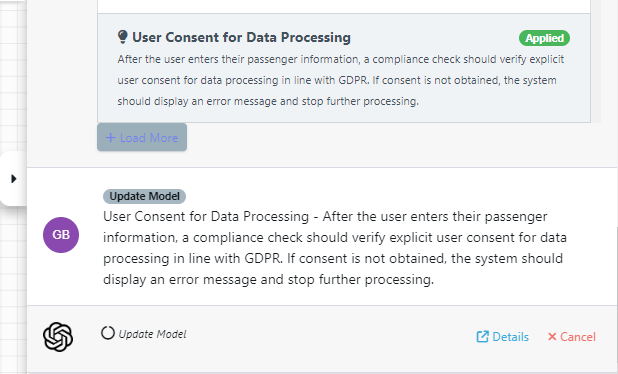
c. Compliance. Identifies missing compliance scenarios related to regulations specific to certain countries.
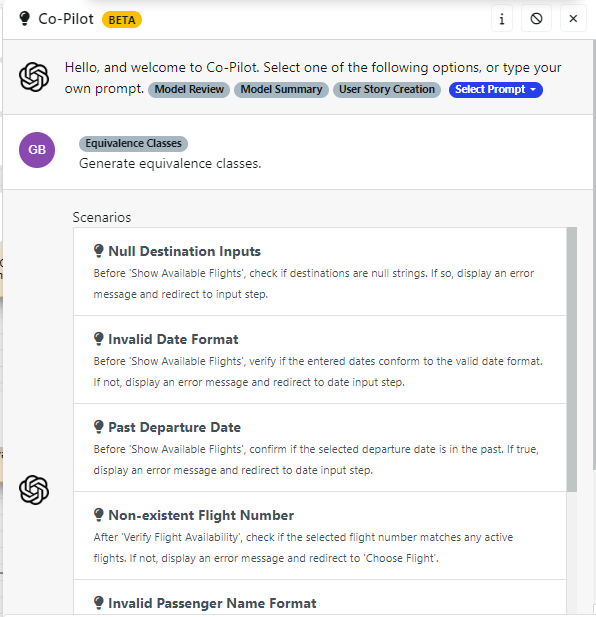
d. Equivalence Classes. Identifies missing equivalence classes, these are nodes in the model that could have different data options that have not been considered.
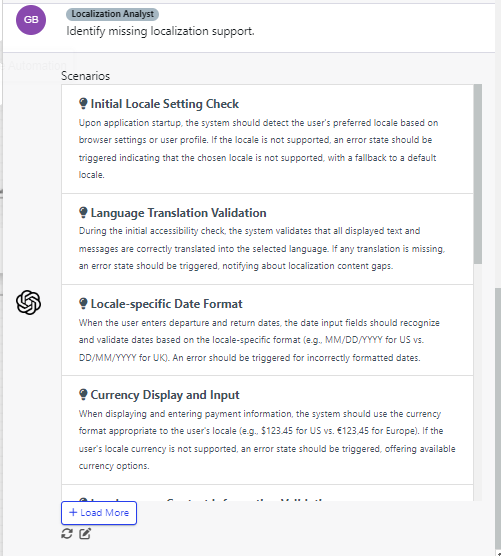
e. Localisation Analyst. Identifies missing scenarios based on language, locales, and region specific details.
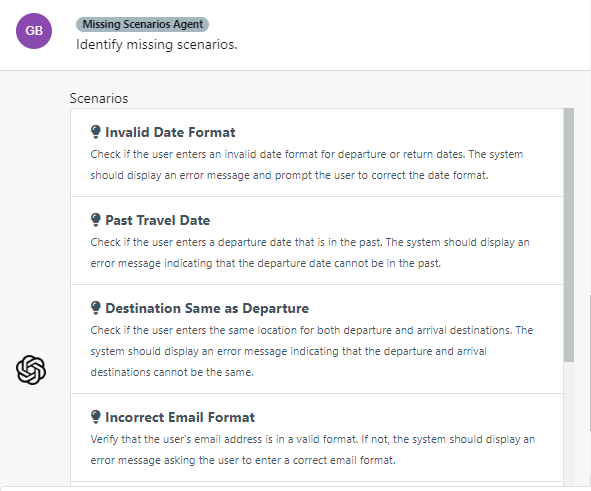
f. Missing Scenarios. Identifies missing scenarios based on the existing model.
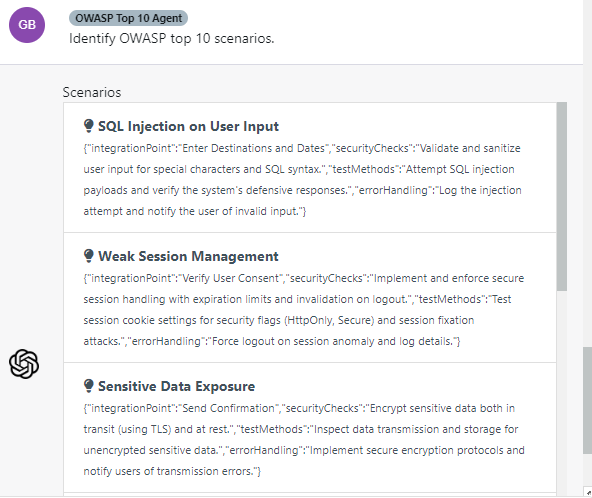
g. OWASP. Identifies missing scenarios from an OWASP professional, i.e someone who is a contributor to the Open Worldwide Application Security Project
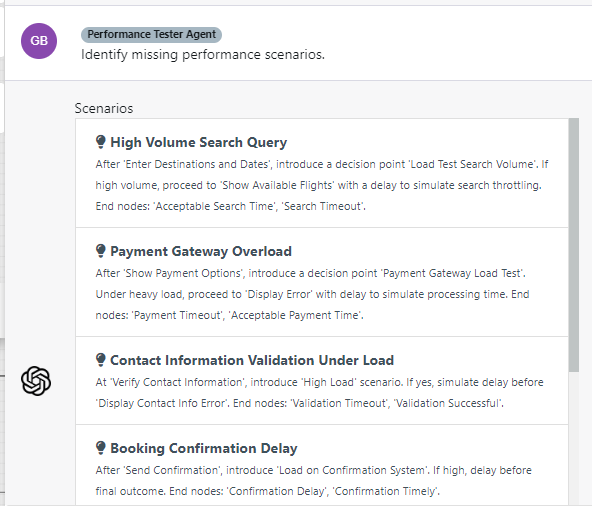
h. Performance. Identifies missing scenarios from a performance perspective, like loading times.
i. Requirement Gap. Attempts to predict what was missing from the initial requirement based on the existing model.

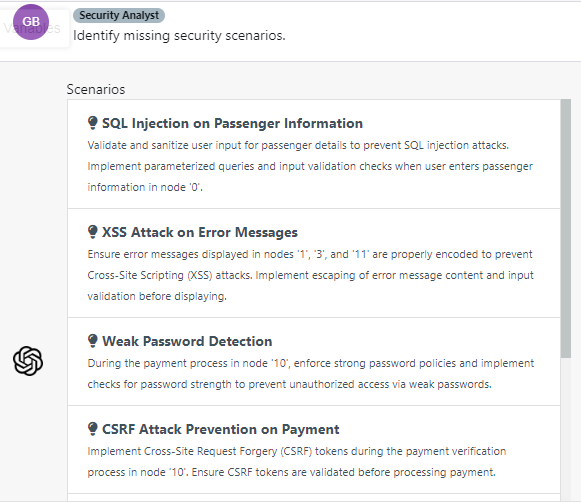
j. Security. Identifies missing scenario from a security perspective.
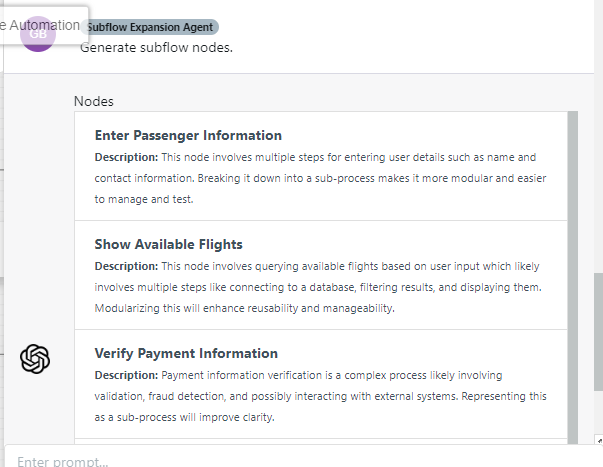
k. Subflow Expansion. Identifies collections of nodes in the models that could be grouped together into a subflow which will help with the optimisation and readability of models. Note that this won't create the subflows, but it will suggest subflows that could be created.
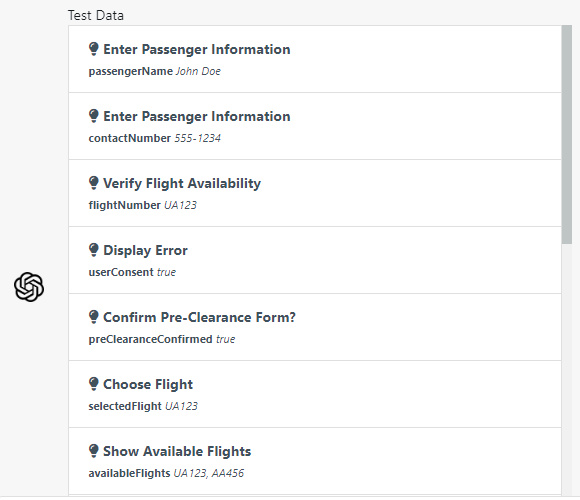
l. Test Data. Identifies nodes on the models where test data assignments are missing.
m. User Experience. Identifies missing User Experience validations a user may want to complete.
4. Generate Models from Images
a. Wireframe Image to Model. Converts an image of a wireframe into a model representation.
In the prompt selector, choose 'Wireframe Image to Model'.
 In the dialogue box, select the attach button to choose the image file. Once it has been attached, the button will go green, then enter your prompt. Here it is suggested that you briefly describe the wireframe and what it does, this will help with the accuracy of the produced model.

b. Screenshot to Model. Converts a screenshot of a flowchart into a model.