In this article, we'll cover configuring the AdventureWorks database in a Windows environment. For this tutorial we'll be using SQLServer Express, and SQL Server Management Studio (SSMS).
1. Install SQL Server
Download the relevant version of SQL server for your needs, and follow the default installation instructions.
1.1 Enable TCP/IP:
After successful installation, you need to enable TCP/IP on port 1433. Follow these steps:
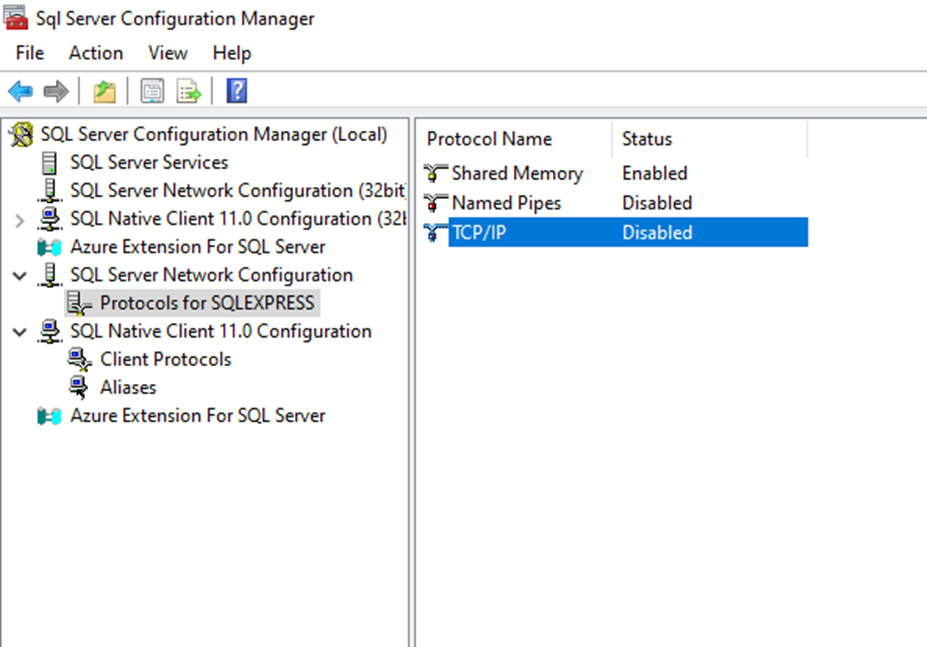
- Click 'Start' and search for 'SQL Server Configuration Manager'. Open it.
- In the left-hand pane, click to expand 'SQL Server Network Configuration' and then click on 'Protocols for SQLEXPRESS'.
- In the right-hand pane, right-click on 'TCP/IP' and select 'Enable' if it is not already enabled.
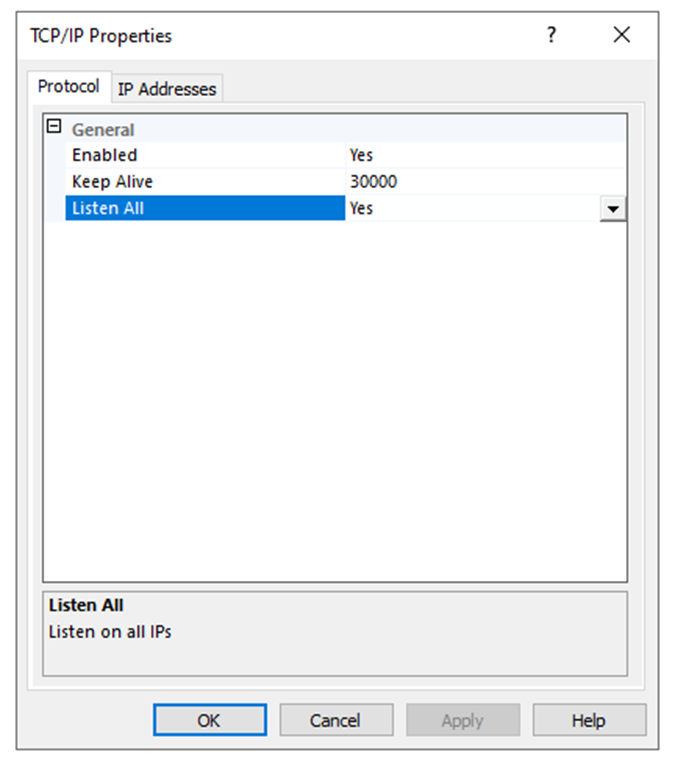
- Right-click again on 'TCP/IP', and select 'Properties'.
- Go to the 'IP Addresses' tab. In the IPAll section, clear the 'TCP Dynamic Ports' field. Then, in the 'TCP Port' field, input '1433'.
- Click 'OK' to apply the changes.
1.2. Allow SQL Server through the Firewall:
You need to add an exception to your Firewall to allow SQL Server access on port 1433:
- Open 'Control Panel' and go to 'System and Security', then click on 'Windows Defender Firewall'.
- On the left, click 'Advanced Settings'. This will open the Windows Defender Firewall with Advanced Security window.
- In the left pane, right-click 'Inbound Rules', then 'New Rule' from the context menu.
- In the New Inbound Rule Wizard, select 'Port' and then click 'Next'.
- Select 'TCP' and specify the port as '1433'. Click 'Next'.
- Choose 'Allow the connection' and click 'Next'.
- Leave all the profiles checked and click 'Next'.
- Give the rule a name (something like 'SQL Server') and click 'Finish'.
2. Install SQL Server Management Studio
1. Download the Installer:
Go to the official Microsoft Download page for SQL Server Management Studio and download the installer.
Make sure to choose the correct version of SSMS that is compatible with the SQL Server version you've installed. Download the latest stable release for the best results.
2. Run the Installer:
Once the download is complete, locate the downloaded .exe file in your downloads directory and double click it to start the installation process.
You might need administrative privileges to install software on your computer, so make sure you have the necessary permissions or the admin password.
3. Install SSMS:
The SSMS installation process is relatively straightforward. After running the installer, you'll see a screen where you can choose the installation location. You can leave this as the default setting unless you need to install it in a specific directory.
Click the 'Install' button to start the installation.
4. Follow the Installer Instructions:
The installer will show the installation progress. Once it's complete, it will let you know that SSMS has been installed successfully.
Click the 'Close' button to exit the installer.
5.Launch SQL Server Management Studio:
After your computer reboots, you can launch SSMS from your start menu, or by searching for 'SQL Server Management Studio' in your computer's search bar.
The first time you run SSMS, it will ask you to connect to a server. Use the server name 'localhost' if you installed SQL Server on your local machine, then enter your login details. If you configured SQL Server for mixed-mode authentication as per your previous request, you can log in with the 'sa' account and the password you set during SQL Server installation. Otherwise, use the Windows based authentication.
3. Configure Connection & Users
3.1. Enable Remote Connections:
- Open 'SQL Server Management Studio' and connect to your SQL Server instance.
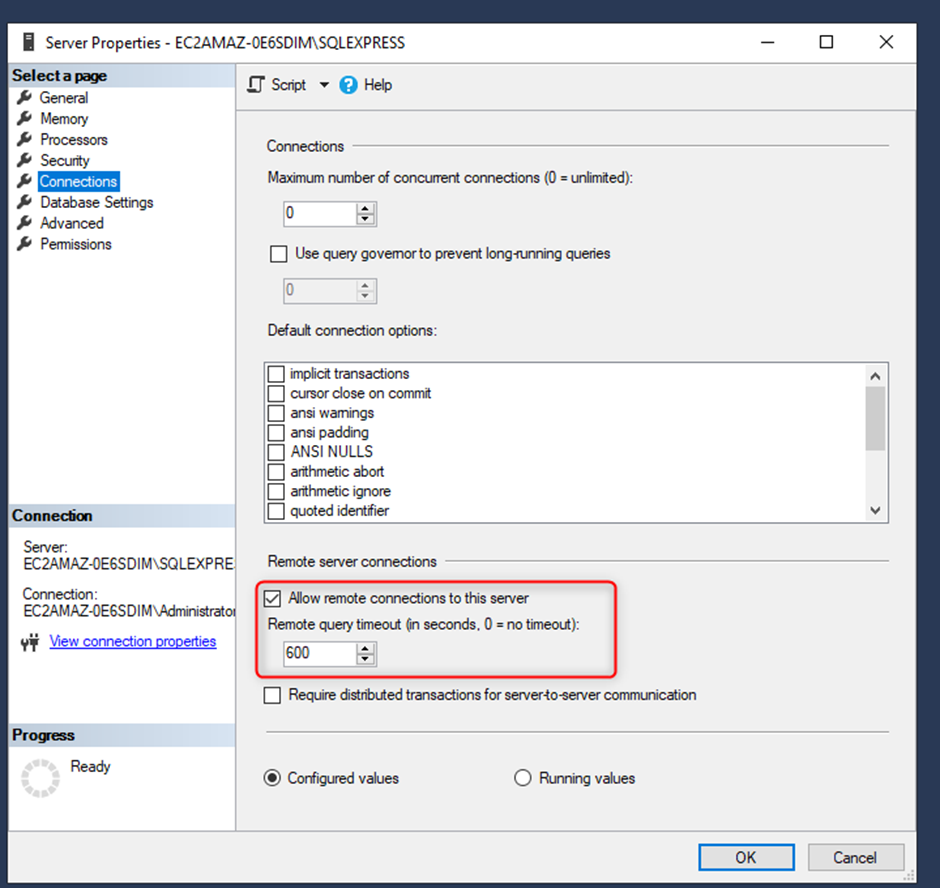
- Right-click the server in Object Explorer and click 'Properties'.
- Click on the 'Connections' page, and check 'Allow remote connections to this server'.
- Click 'OK'.
- Finally, you need to restart your SQL Server service for the changes to take effect. You can do this through the 'SQL Server Configuration Manager'. Go to 'SQL Server Services', right-click the 'SQL Server (SQLEXPRESS)' service, and then click 'Restart'.
That's it! You've successfully installed and configured SQL Server 2019 Express edition to accept TCP/IP connections on port 1433.
3.2 Add system admin user
- Open SQL Server Management Studio (SSMS):
- Launch SSMS and connect to your SQL Server instance using an account with sysadmin privileges.
- Expand the 'Security' Folder:
- In the Object Explorer pane, you'll see the 'Security' folder at the server level (not under any specific database). Expand this folder.
- Create a New Login:
- Right-click on the 'Logins' folder, then select 'New Login...'.
- Enter Login Name and Password:
- In the Login - New window that pops up, enter a name for the new login in the 'Login name' field.
- Under 'Select a page' on the left side, make sure 'General' is highlighted. In the 'Password' and 'Confirm password' fields, enter a strong password.
- Under 'SQL Server authentication', choose 'SQL Server and Windows Authentication mode' to ensure the new user can log in using SQL Server Authentication.
- Assign Server Roles:
- From the 'Select a page' pane, choose 'Server Roles'.
- Check the 'sysadmin' checkbox to grant this user full administrative rights.
- Apply the Changes: Click 'OK' to close the window and create the new login.
- Validate the New User: Expand the 'Logins' folder under 'Security' again and you should see the new login you just created.
The newly created user should now have full administrative access to your SQL Server instance, and should be able to connect to the SQL Server instance using SSMS with the credentials you just created.
4. Restore AdventureWorks Database
Download the AdventureWorks database and store it on your machine.
The following URL contains the packages - click here and download the relevant .bak file.

1. Open SQL Server Management Studio (SSMS)
Launch SSMS and connect to your SQL Server instance using an account with sufficient privileges (like a sysadmin account).
2. Start the Restore Database Process
Right-click on the 'Databases' folder in the Object Explorer pane and select 'Restore Database...'.
3. Select the Source for Restore
In the 'Restore Database' window, select 'Device' under 'Source' and then click the ellipsis (...) button.
4. Specify Backup File Location
In the 'Select backup devices' window that pops up, click on the 'Add' button. This will open the 'Locate Backup File' window. Navigate to the directory where your AdventureWorks .bak file is stored. Select the file and click 'OK'.
5. Return to the Restore Database Window
Back in the 'Select backup devices' window, you should see your selected .bak file. Click 'OK'.
6. Choose the Backup to Restore
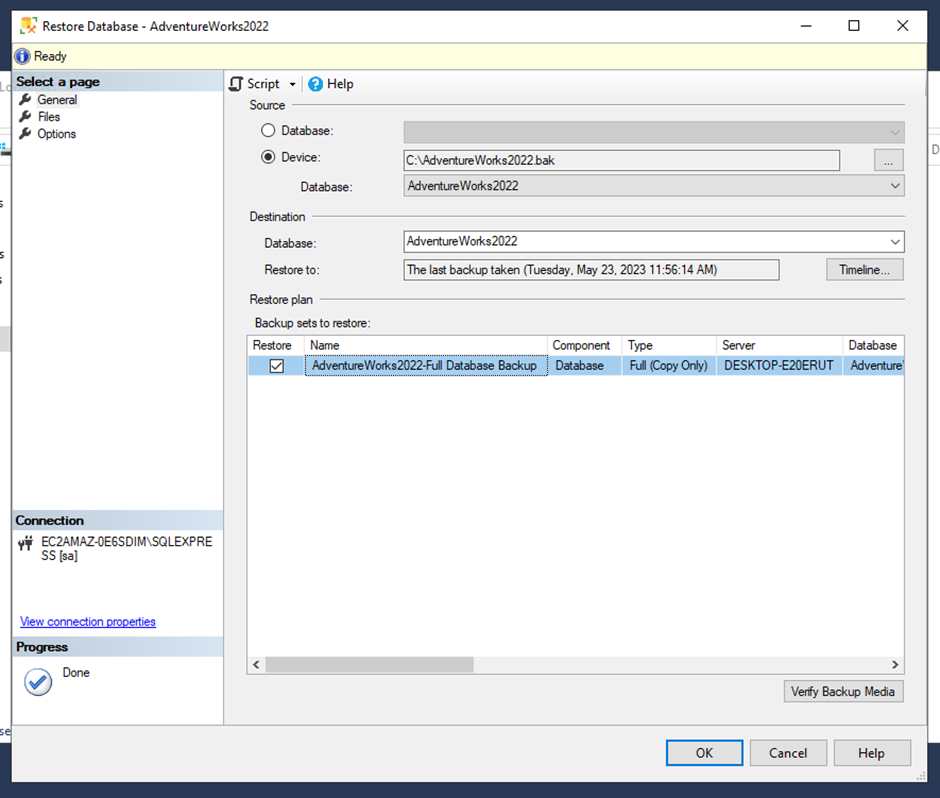
You'll be taken back to the 'Restore Database' window where you should see your .bak file listed. Under 'Select a page', click on 'Options'.
7. Configure Restore Options
In the 'Options' pane, you can keep the default settings. Generally, you'll want to make sure the 'Overwrite the existing database (WITH REPLACE)' checkbox is unchecked (unless you're trying to overwrite an existing AdventureWorks database). Confirm that the paths in the 'Restore the database files as' section are correct.
8. Start the Restore Process
Click 'OK' to start the restore process.
9. Wait for the Restore Process to Complete
You should see a progress window. Once the restore operation is complete, you'll see a message saying "The restore of database 'AdventureWorks' completed successfully."
10. Verify the Database Restore
The AdventureWorks database should now appear in the 'Databases' folder in SSMS. You can expand the database and its objects to confirm that tables, views, stored procedures, etc., were restored correctly.
Remember that restoring a database requires certain permissions and roles in SQL Server, including having the RESTORE DATABASE permission assigned to your user role.
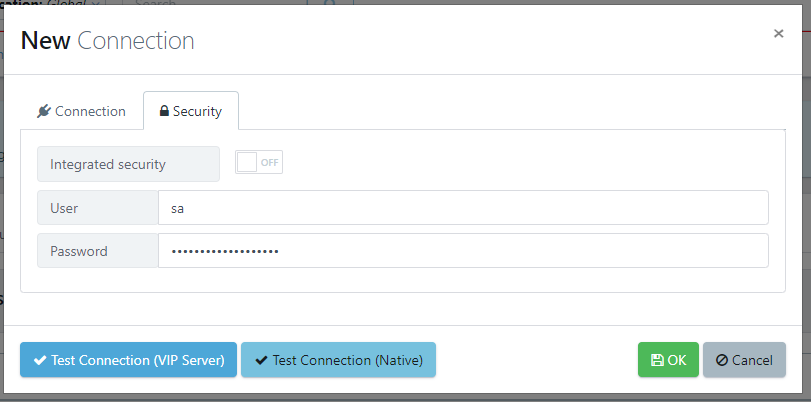
5. Connect From Enterprise Test Data
n the Enterprise Test Data instance we used the following settings for the Connection details.
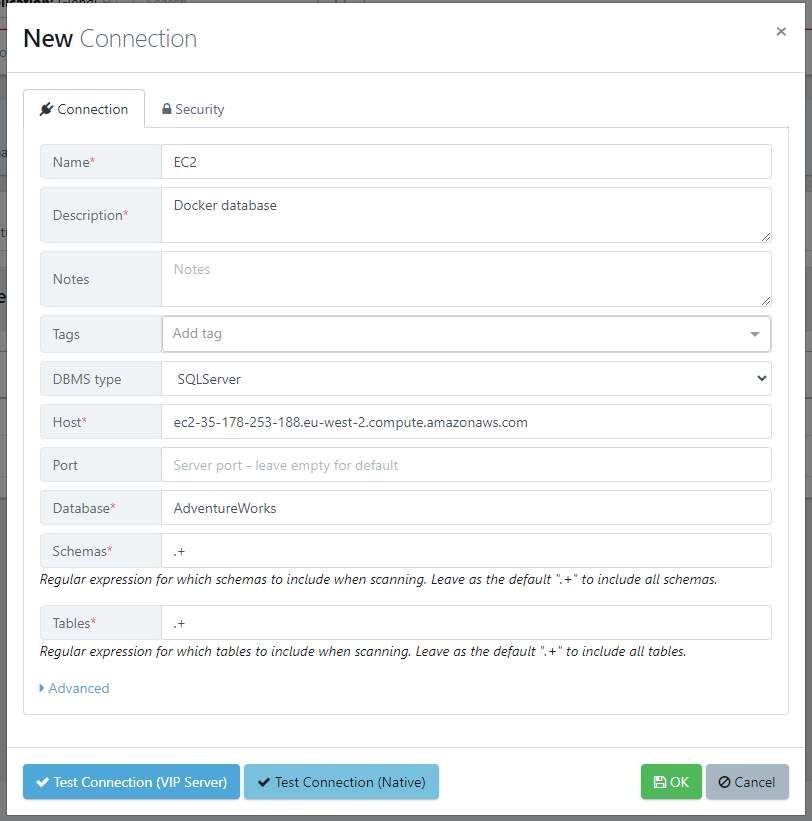
And for the Security tab.