Welcome to the Quality Modeller Quick Start Web Automation Tutorial series. In this series, we are going to take you through Creating a Project, Building a Model through Scanning an application, editing the model, and Creating & Running test cases all for a web application.
Watch the 4 tutorials to guide you in using QuickStart Web Automation in Quality Modeller.
Objectives: By the end of the series, you'll be able to:
- Create and/or edit an Automation Model
- Navigate the Quality Modeller UI
- Understand the directory structure in Quality Modeller
- Name and Configure a Project
- Identify Components and Actions
- Use the UI Scanner and Object Identifiers
- Modify Values
- Import Automation elements from the Automation Pane
- See the relevance of end-to-end scenarios
- Generate Test Cases
- Run, Execute and Review pass and fail tests
3-Minute Web Automation Example
Create a Web Automation Project
We'll be going over how to Create a Project for Web Automation in Quality Modeller. Initially having created a Workspace you will be able to add a Project from the Project and Releases Menu by clicking New Project, selecting Quickstart Web from our different types of Automation, in particular here we’re selecting Web Automation.
After the creation of your Project, you'll see that we've created all automatically three folders. The first folder here is related to two Scenarios, evidently useful for managing the end-to-end Scenario models. Then you've got the Components folder for model Components of the application along with any Automation Modules.
One layer into the Components folder we've automatically created an Actions folder, where a series of default Web Actions are to get you started with modelling and automating using Quality Modeller.
Tutorial Steps
Step 1 - For Quality Modeller to build the automation library and initial assets you need to set up a Project. So in the main portal click Create Project.
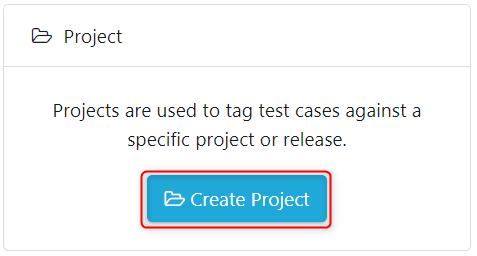
Name the Project, give it a description, and select next.
.png)
On the Next Step scroll and select the Web Automation Framework.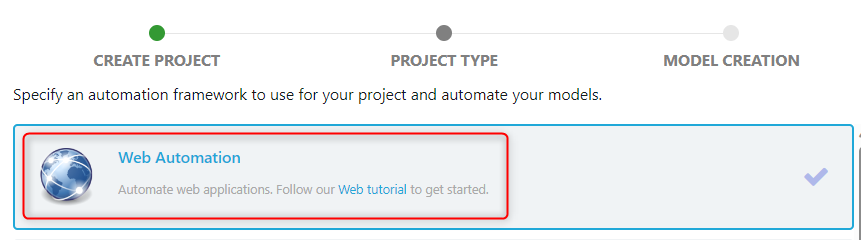 On confirming by clicking the green Create Project button the automation code with assets are built and a 'Project Type: Web' is started.

Now you'll see Quality Modeller spin up a ready to use Web Automation Project. Select the appropriate project from the context bar.

A folder labelled Components will be available which contains the Web automation actions.
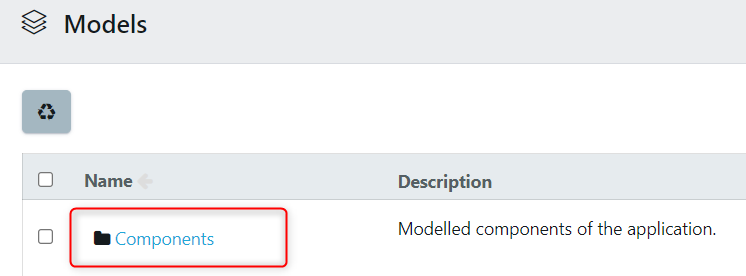
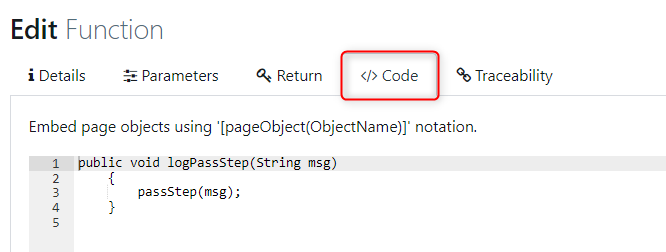
Step 2 - To see the underlying edit Functions, click on the Components folder > Actions. 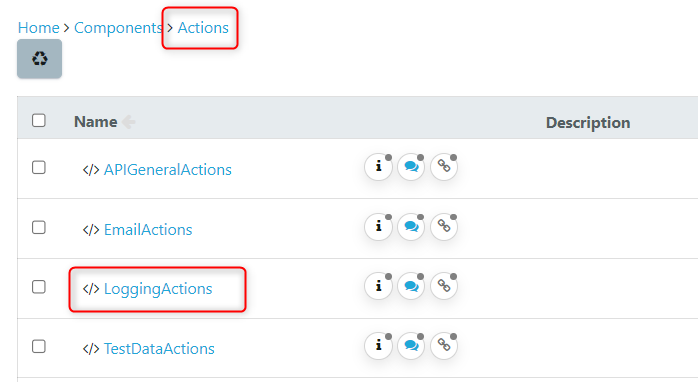
Click on LoggingActions > Pass Step as an example, and the underlying Edit properties include: Parameters, Return, Code.
Scan an Existing Application
Now to create a model using our Magenta demo website, along with our Quality Modeller UI Scanner web extension, easily added to a Chrome browser. Once installed, it can be used to scan the different elements of your webpage that you want to automate. The Quality Modeller UI scanner is an Accelerator for scanning existing web applications to quickly assemble and create Page Objects which can be added directly into your Automation framework.
Once we've scanned everything we need, we can come through, hit pause and upload this into our Workspace. As we upload this, we can select if we want to create a Model automatically. Upon upload, we've created three items within our workspace.
First, we have the Object Identifier for the page. Then we have our Automation Code for the page, and then we have our model for our Customer Login page, of which we open that up and see an initial model has been created. In the next clip, we'll be going through how to edit this model.
Build a Model
To edit and augment a model that has already been automatically created using our scanner, first, we need to take a look at our demo website, and you'll see that we have some demo credentials. One value for email and also a particular value for password, and these values are what we want to consider when we're creating our model. Start creating a model of the system under test (SUT), from which we can Generate the Test Cases and Run Automation scripts.
So pick up the Password field, and now inside your model make an edit to one of the Data Assignments. To do so, click on the Valid Password block, then click on the Test Data Assignment and paste in that value from the website, which now represents a Valid Scenario. Now, similarly for the Email field, we have a particular value that we need to input. So again, copy this over.
This now leaves us with a simple but representative model of our system under test (SUT) which we’ll use next see how to Generate and Execute Test Cases from this model.
Generate and Execute Automation
Now to Generate and Execute Test Cases from our model with the first step being to set the Coverage and naming convention, and we’ll hard code a Login, include the path number, which is the index of our path. Additionally, inside these settings, we can set varying Coverage Levels. Test Cases are equivalent to paths, or User Journeys through the model of a system under test (SUT).
In this example for simplicity, we’ll set the level to medium Coverage and then in the top left hit the Generate Tests Button. This prompts Test Cases to get generated, and here it’s created two paths: a negative Scenario and one for a positive Scenario. Hit Run and click on our Automation Code button to Create our Automation which Executes against that website.
Looking at the Run Results attached to our paths, you'll see that we've got all the relevant screenshots associated with that Test Case. Where there’s a failure, we see exactly what has gone wrong and why it's gone wrong.
Coverage techniques also help Generate the smallest set of Test Cases with the required level of rigour, from which these Test Cases are used to Run Automation Scripts, or trigger an execution.