Welcome to the Quality Modeller Quick Start Mobile Automation Tutorial series. In this series, we are going to take you through Creating a Project, Configuring a Connection, Creating & Editing a Model, and Generating & Executing test cases all for a mobile application.
Watch the 4 tutorials to guide you in using Mobile Automation in Quality Modeller!
Objectives: By the end of the series, you'll be able to:
- Create and/or edit an Automation Model
- Navigate the Quality Modeller UI
- Understand the directory structure in Quality Modeller
- Name and Configure a Project
- Identify Components and Actions
- Import Automation elements from the Automation Pane
- See the relevance of end-to-end scenarios
- Connect Modelling Waypoint and Task Block Nodes
- Connect with a Username and Access Key to Appium
- Generate Test Cases
- Run, Execute and Review pass and fail tests
3-Minute Mobile Automation Example
This video shows how we can go from nothing to very quickly building automation in Quality Modeller against mobile applications, in this example for an eCommerce application. By selecting the type of automation we're going to undertake, in this case mobile automation we then go into the explorer screen to create a new model for the log-in screen, and we have a function to open applications.
We also connect to a mobile provider, in this case, Sauce Labs, or any other cloud-based provider, along with using native Appium against emulated devices. This imports and takes screenshots of the application. To achieve that, add functions to start interacting with it, an example being to perform a click action to go and open the menu. Additionally, we can select the XPath in Appium Inspector, and equally enter a username and password field.
Quickly re-layout the model ahead of generating paths for a series of test cases, and then we can run them. This takes the tests, transfers them into code, and then runs them against our mobile devices that we've specified.
With the completed tests appear the different screen captures as the test has executed against the application.
Create a Mobile Automation Project
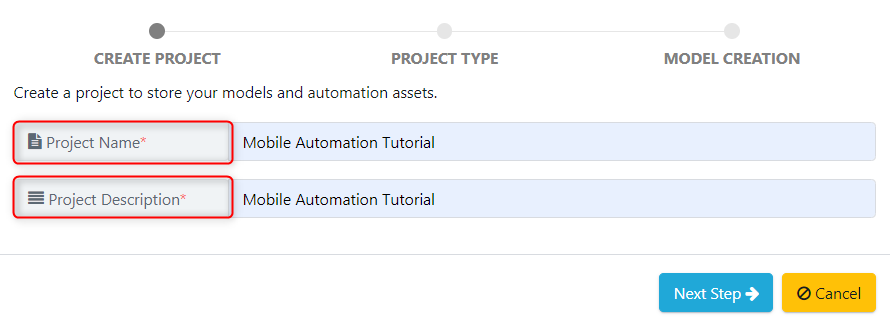
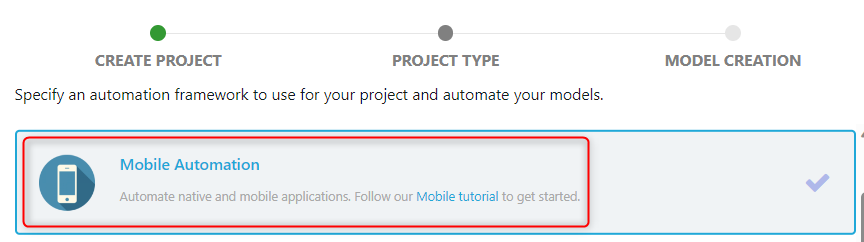
In this video, we'll be going over how to Create a Project in Quality Modeller. We'll want to navigate to our Project and Releases, click Add, and here we have an option to create a New Project. So go ahead and give it a name as well as a description. And underneath Project Configuration, we'll want to make sure to select Mobile Automation.
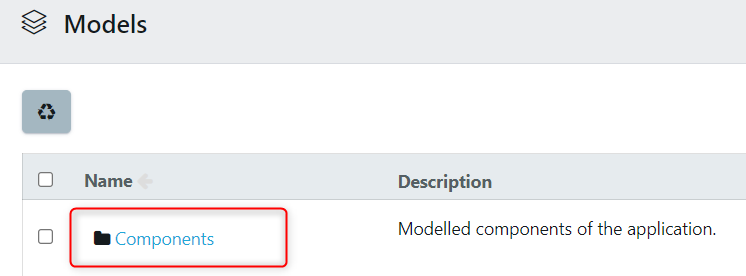
So, we already have our Mobile Automation framework set up for the purpose of Executing Test Cases immediately. Now if we navigate to our new project we'll there are four folders: Components in which there are a series of general Mobile Actions which are used to Generate our Automation later on. Additionally, we also have a folder containing some workable examples and a folder for accessing any end-to-end Scenarios.
We have our connections for both Appium and Sauce Labs too, which we'll be covering in the next episode, using a shopping App for both native and web scenarios.
Tutorial Steps
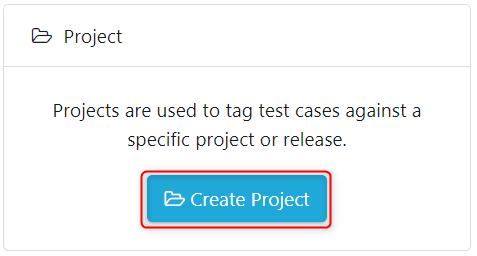
Step 1 - For Quality Modeller to build the automation library and initial assets you need to set up a Project. So in the main portal click Create Project.
Name the Project, give it a description, and select next.
On the Next Step scroll and select the Mobile Automation Framework.

Now you'll see Quality Modeller spin up a ready to use Web Automation Project. Select the appropriate project from the context bar.

A folder labelled Components will be available which contains the Web automation actions.
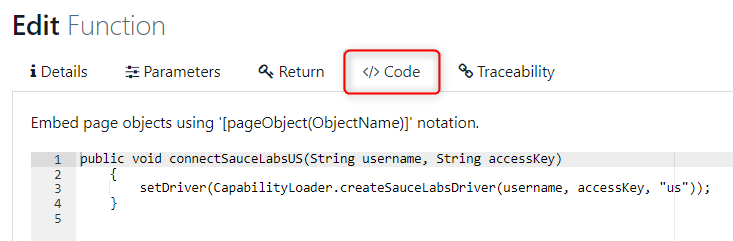
Step 2 - To see the underlying edit Functions, click on the Components folder > Actions.

Click on MobileGeneralActions > Connect SauceLabs (US Server) as an example, and the underlying Edit properties include: Parameters, Return, Code.

Configure a Connection
In this video, we'll be going over how to Configure a Connection for Mobile Automation for both Sauce Labs and Appium. Back inside our newly created project by navigating to the Examples folder and underneath Connections, where we'll see that we have an example model for both Sauce Labs and Appium.
Taking the Sauce Labs Model as a simple Automation model, we can now connect to our Sauce Labs account. Then looking at the Automation Waypoint, underneath the Automation panel, we can see the parameters that we need to enter in order to connect. In this case, the Username and Access key and the Appium connection is exactly the same model. But for this tutorial, rather than providing these parameters, we’ll input a remote URL.
For the model generally, we can see that we're just going to capture a screenshot and interact with an element as a way to do a bit of a sanity check and make sure our connection is working. So here we can go ahead and Generate our Test Case and Run this to see where the execution was successful. Under Run Results, see it by clicking the element and then capturing a screenshot. Now with that all configured, we're ready to go ahead and build out the rest of our models.
Create and Edit a Model
In this video, we'll be covering how to Create and Edit a Model for Mobile Automation using e-commerce application example and go through a couple of Test Cases in order to add an item to a shopping cart, and choose either the colour or how many of each item we want. We use Task Blocks to model out the logic of the system, and blue Automation Waypoints contain the Identifier and Automation code necessary in order to Execute Test Cases.
So from here we won't worry about the colour or how many of the t-shirt we want, but just want to add it to our shopping cart by dragging over a new Task Block and connecting our t-shirt Waypoint to that, remembering to rename it ‘Add to shopping cart’, ready to add Automation.
In the Project Explorer in the Components folder we can see those Mobile General Actions, click on an element, and import, which prompts us for a Locator. This is when we can switch over to Appium to can see the T-shirt that we want to add. Quality Modeller may prompt you to fix the formatting automatically, agree and click save. Rename the new element accordingly.
We can link up this Test Case to the end of our Model, and if we generate some new pathways, we'll see that it's now including the T-shirt. Alongside this Test Case there are eight other pathways that run through the model. And we can next add this to a larger end-to-end scenario.
Generate and Run Tests
Now to Generate and Execute Test Cases for Mobile Automation in a Master Model that contains all the components we need to buy an item through our application which is seen as in Subflows which help componentise and make end-to-end Scenarios more understandable, from which we can Generate some Test Cases, in the example 22 paths are generated.
Taking a look at our tests, we could see it going through each of our pathways in the system. And with our pathways selected, we can now go ahead and Run our Automation to see that our 22 tests executed with 20 passes and two failures.
The Run Results show screenshots that Quality Modeller takes while interacting with the application. And by scrolling down, we can see the test that failed and why. In this example, it looks like it was having trouble connecting to a remote session.