In this video, we illustrate how to lookup data from a list and inject it into fields within Quality Modeller.
Create a List
To create a list, navigate to the Master Data Management section and select Data Dictionary. In the Data Dictionary menus there is a tab called ‘Lists’ where you can create, manage, and view all lists.

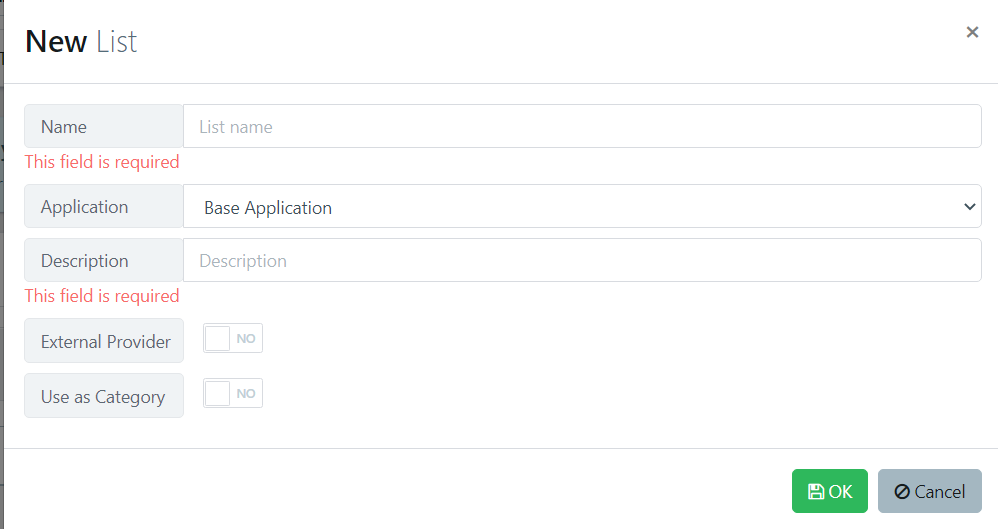
To create a new list, click the ‘New List’ button in the top right. To edit an existing list, first search for it using the filter option, then you can open it by clicking on the name of the list.

Fill out the form with the relevant information.

- Name - Give the list a name
- Application - Select the registered application that the list is relevant to
- Description - Give the list a description
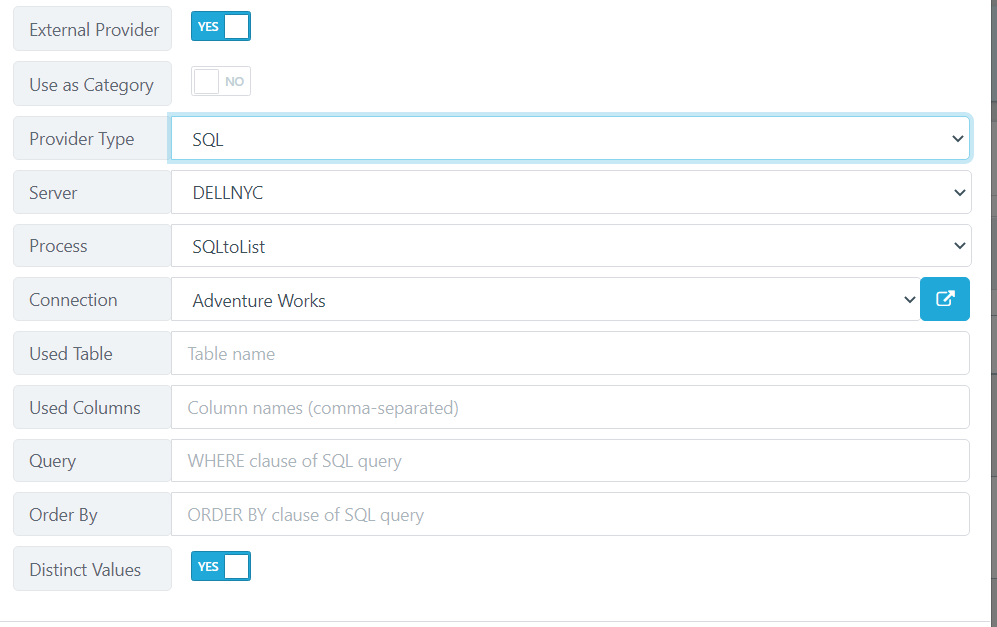
- External Provider - Select if the list should be automatically imported from an external provider
- Provider Type - allows you to select where the data to be imported is coming from.
Data Sheet: Here, you select the data sheet you want from inside Quality Modeller.
 SQL: Here, you select a SQL server database that you have already defined in your workspace. It comes with the usual querying options you would expect with SQL.

VIP Flow: Here, you can select a VIP (RPA workflow engine) flow to load the data into a list.

Use as Category - Select if the list should be used as a category for Test Data Generation and Masking.
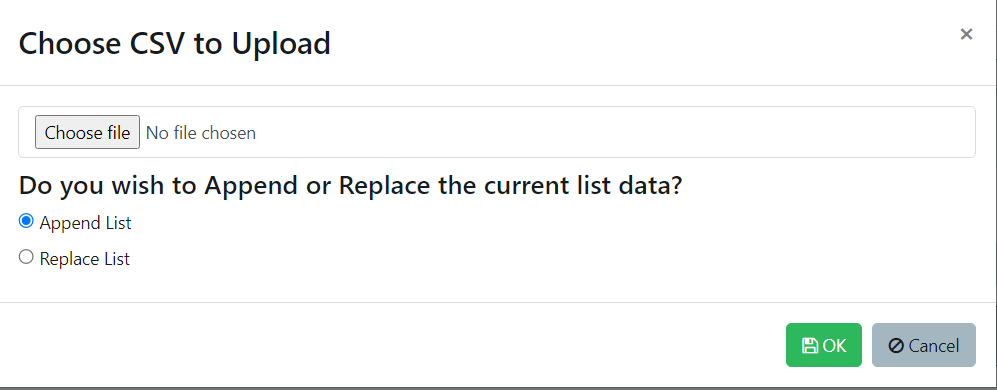
When the list is created without using an external provider, a list with one empty column is created. Rows, columns, and data can all be added manually if required. However, if you click the ‘Upload’ button, this allows a CSV file to be imported.

To append a list, the rows in the list must match the rows in the CSV. If replacing a list, this doesn’t matter because the whole list will be replaced with the contents of the CSV.
Reference List from Model
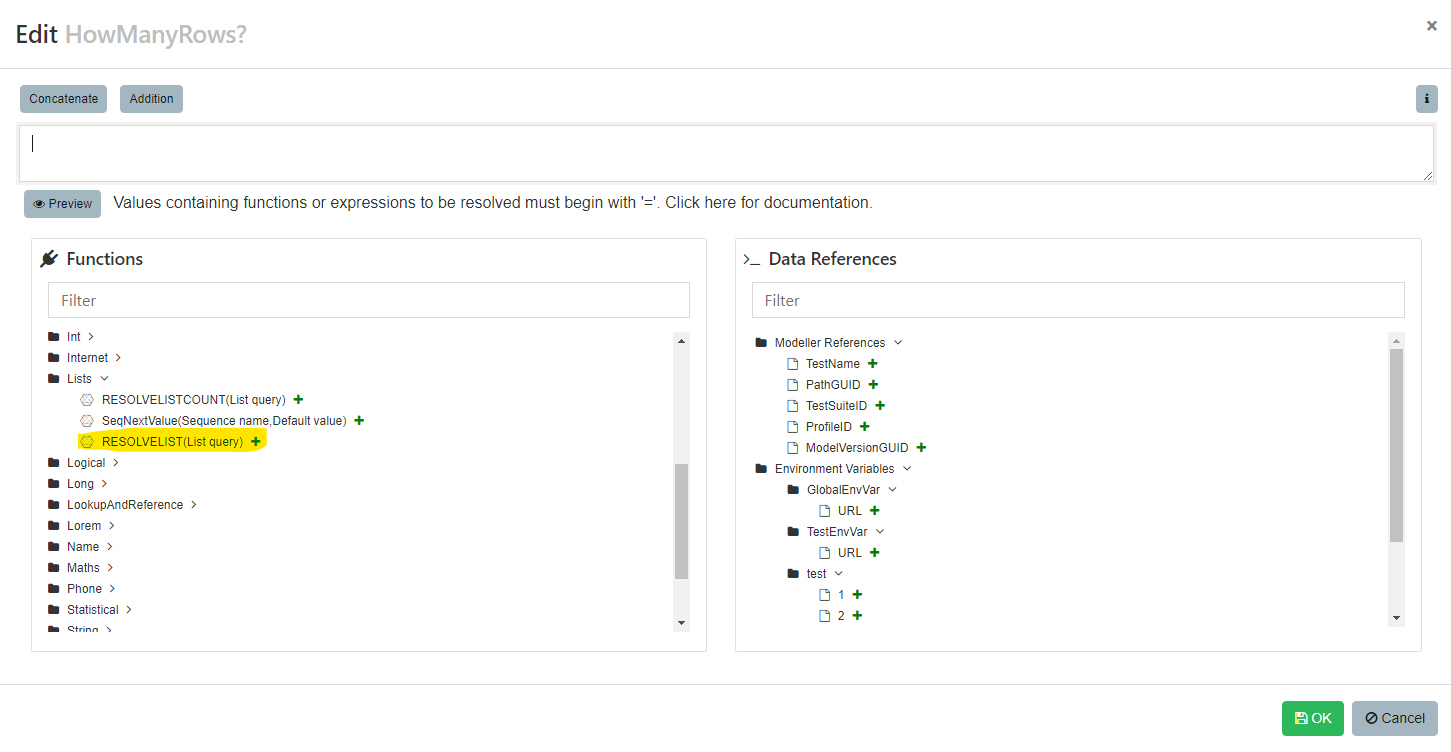
To find the List Resolver, open a test data assignment and inside the left-hand menu select the ‘LISTRESOLVE’ function. This will open the List Resolver wizard.

Rulesets
Find more information about how these work here. In the below example, we are telling the resolver to only consider rows where the FirstName does not equal 'George'.

Used (Grouped) Columns
Imports and groups the columns that are used within the resolver. In the below example, the FirstName, LastName, and Email columns are grouped so that when the function resolves it will always return values for the three variables from one row in the list.

Column to Use
Allows you to specify the column that you want to fetch the data from; this will map to a test data variable inside the model.

Distinct On
Define which columns should return different values every time the function resolves.

Order By
Define which column should be used to order the data and if it should be ascending or descending.

Limit
Limits how many rows of data the resolver function will pick from. I.e if it is set to 5, then the resolver will only ever fetch values from the first 5 rows in the list, unless overriden by the next field, ‘Start Offset’.

Start Offset
Offsets the resolver by specifying on which row you want to start picking data from, this can be used in conjunction with Limit.

Random
Whether you want to randomly pick rows from a list or start from the beginning.

Note that in the resolver function, you will see ‘NotFound’ and ‘ResolveError’; these are used for logging.