In this documentation article, learn how to perform in-browser automation execution with Quality Modeller.
To get started with in-browser automation execution, you must first create a Quality Modeller Project which uses the QuickStart Browser automation framework.
To do this, first create a new Project by navigating to the Project & Releases section of Quality Modeller and hitting the New Project button.


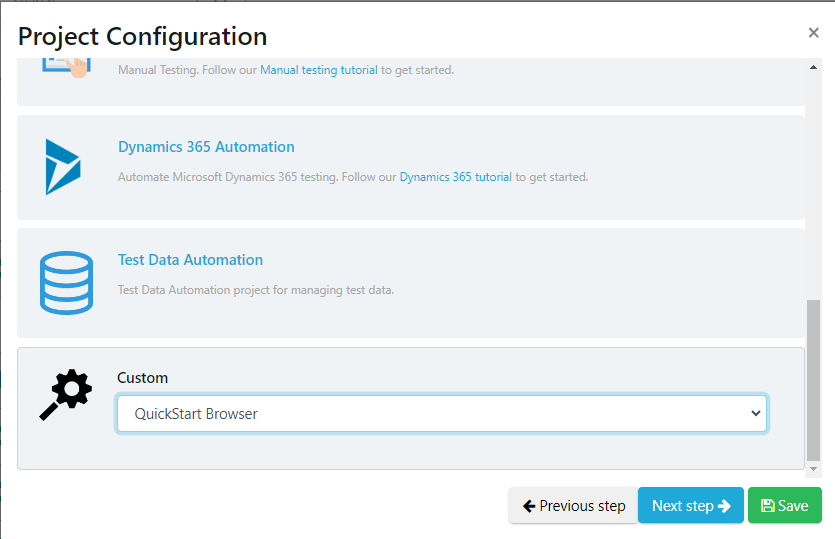
Complete the Project details fields as necessary (example below):
.png)
Select ‘QuickStart Browser’ from the drop-down section under Custom Frameworks, then click ‘Save’ to create the project. This will have created your new project, which you will be able to see in the Project & Releases view in Quality Modeller.
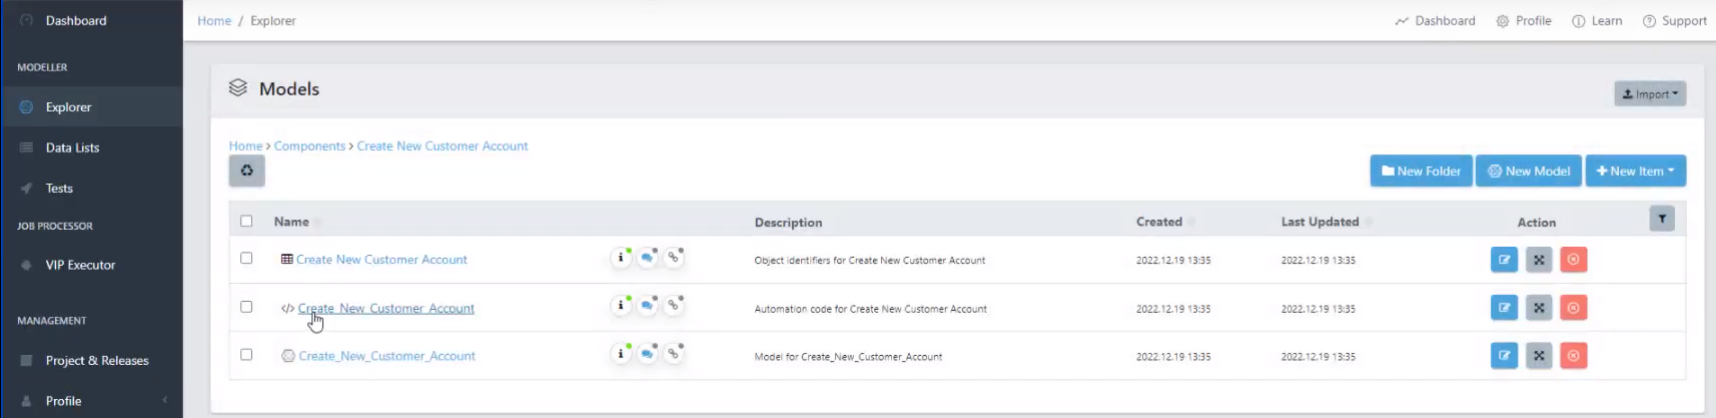
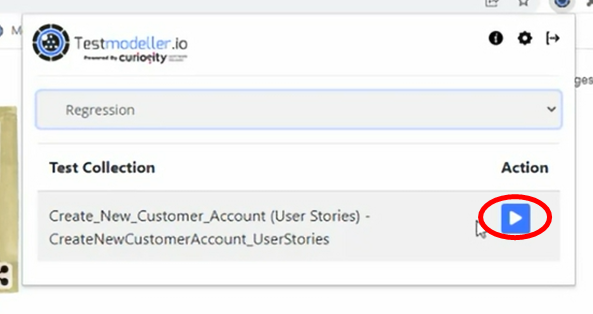
If you then navigate to the Explorer and open your Components folder, you will find a collection of WebUI Actions as shown below:


You can now also use the Quality Modeller UI Scanner to scan a web page and create a model to then execute automation using the Browser Automation framework you set up for this project. To learn more about the UI Scanner check out this documentation: Quality Modeller's UI Scanner
Here's an example scan we did in the demo. 
.png)
If you have completed a scan of your site, and saved the scan in your Components folder, navigate to it in Quality Modeller. Here you will be able to see the scanned objects and the model that was created from your scan.
Opening the scanned object collection will showcase all the scanned elements in a Module Collection: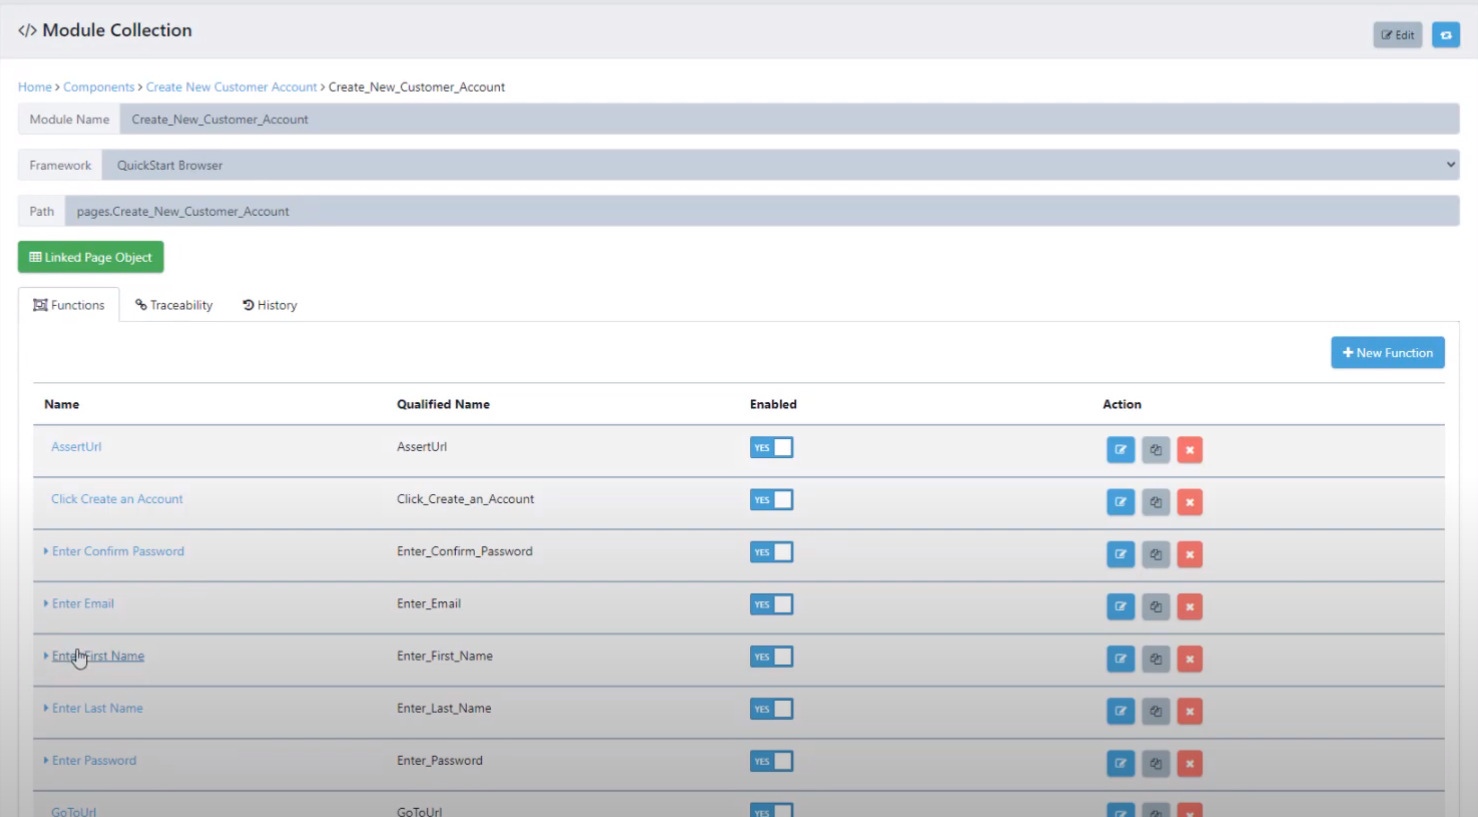
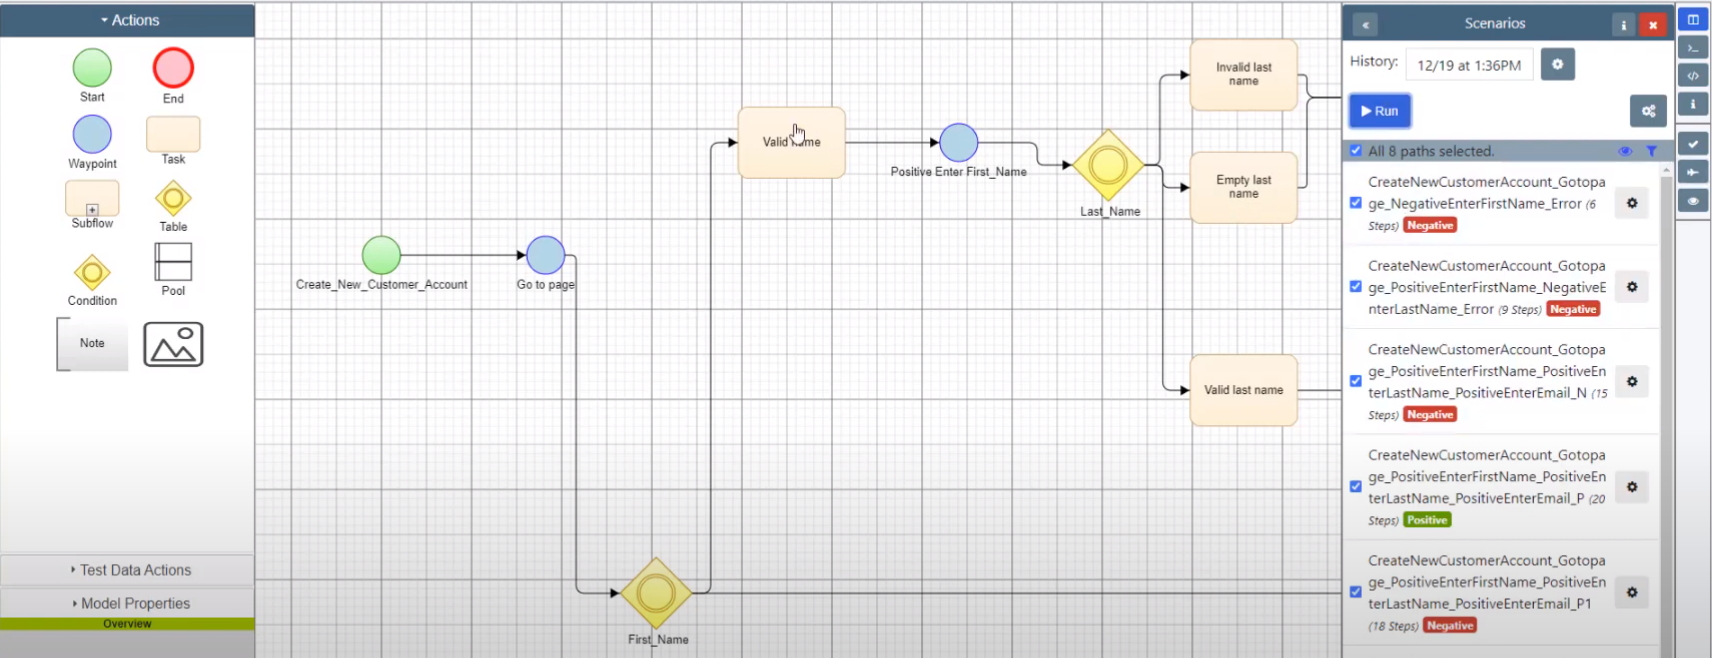
If you open the model, you will be able to generate paths and run automation from those paths. To do this, hit the generate button and then the run button, this will open the Export Paths window.
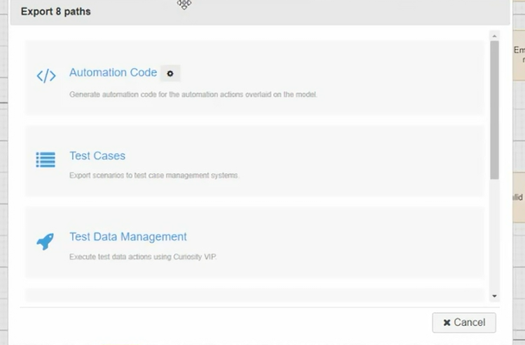
In the Export Paths window, select Automation Code, and then under the Publish tab select Regression as the Publish option, and hit execute:
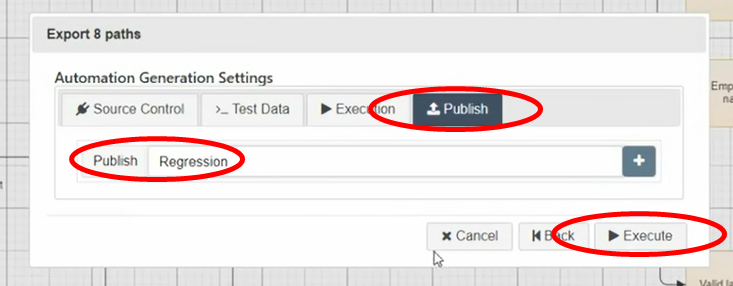
You can now go back to the UI Scanner plug-in in a new tab. Find the project and select ‘Execute test’:

You can then select the Test Regression from the drop-down menu. Then select execute:
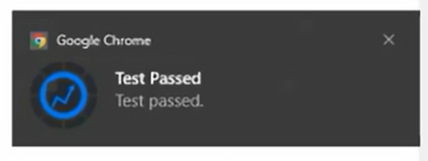
Quality Modeller will pick up the test and start to execute them. You should see the following notifications pop up and begin to run through the test steps:

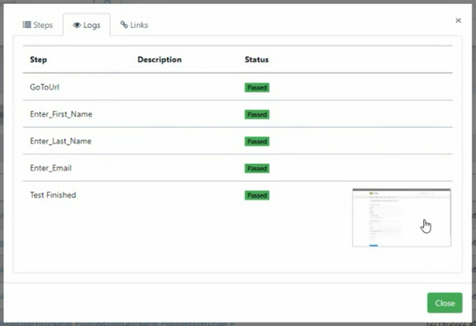
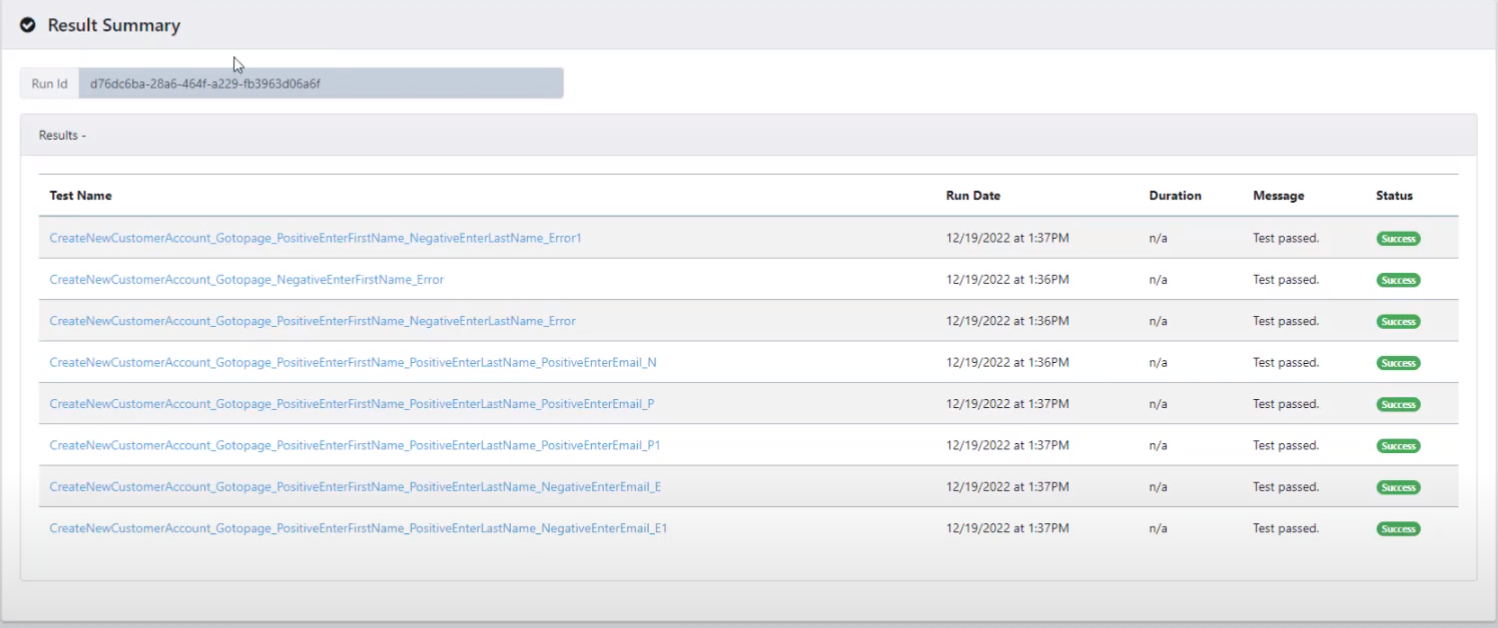
If you keep your eye on the page you are testing, you will be able to see each test case whilst they are running. Once this has finished, a new tab will open showing the ‘Result Summary’:
If you open up one of the test cases, you can see the ‘Steps’, ‘Logs’ and ‘Links’ – including any screenshots taken along the way: