Pre-requisites
4 pre-requisite Objects are required when configuring the Data Find and Reserve from a List.
- A Data Definition for a file, in this case, a Data List in the TDA Portal.
- Here you can find the guide for creating a definition for a file, follow this example and select List as the file type.
- Your target data uploaded into a Data List.
- Test Criteria (created in the Data Activity window), which produces a Ruleset
- Allocation Pool (initialised in the Data Activity window), which produces a Starter Allocation List
These 4 Objects get listed in the spanning Components panel of the Data Activity window alongside the outcome of a Find Submit Form. The Definition and Test Criteria help initialise the final Object.
Step 1 - Set up the Prerequisites
Before creating the Find and Reserve Data Activity, you must set up the aforementioned prerequisite objects.
Step 1a - Upload Target Data
First, you will upload the target data into a Data List inside the TDA portal.
Follow this tutorial to import and create a Data List from a CSV.
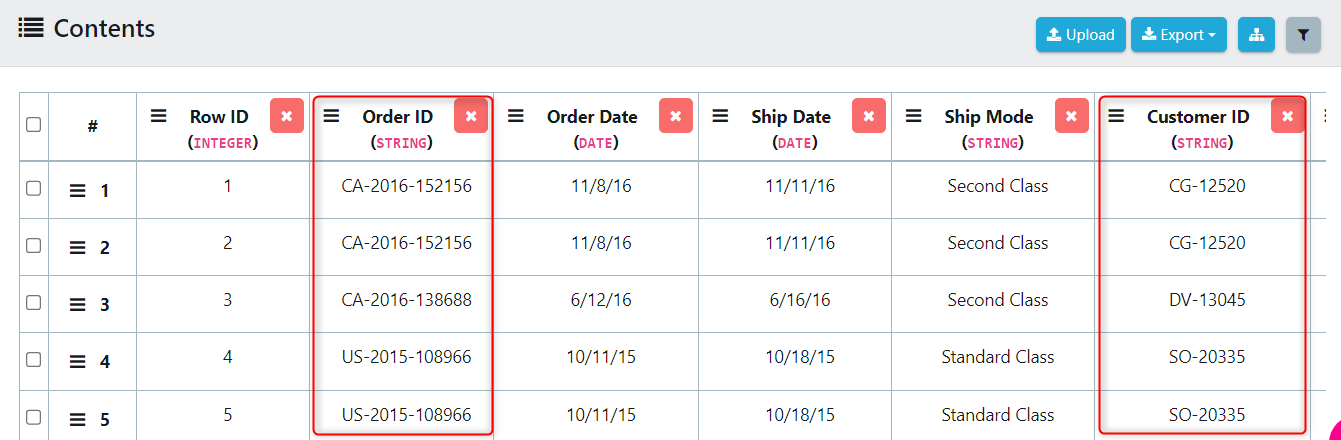
This contains information about received orders for a commercial homeware shop. In this scenario you will be returning the Order ID and Customer ID, filtering using three inputs. Segment, which is the consumer segment the order originates from, Category, the product category that has been ordered, and Quantity, the amount of the item that has been ordered.
Step 1b - Create a Data Definition
Next, you will create a Data Definition for the uploaded list, here you can find the guide for creating a definition for a file, follow this example and select List as the file type.

Step 1c - Create a Test Criteria
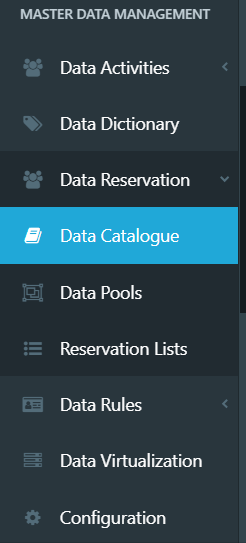
Next, you will set up a Test Criteria. The Test Criteria allows you to create a set of rules that can be applied to the Data Activity to ensure you can configure the Find job correctly. On the left-hand side menu, navigate to Data Reservation and select Data Catalogue.
Test Criteria are held within a Data Catalogue, if you do not have a Data Catalogue you can create one here by pressing New Catalogue. Once you have a Catalogue, open it by selecting the name.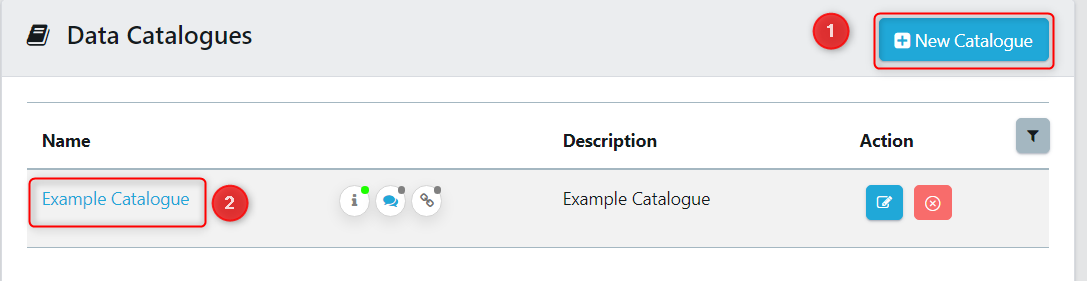
Here is where you will store the Test Criteria you need to Find and Reserve data. To create a Test Criteria, select New Test Criteria.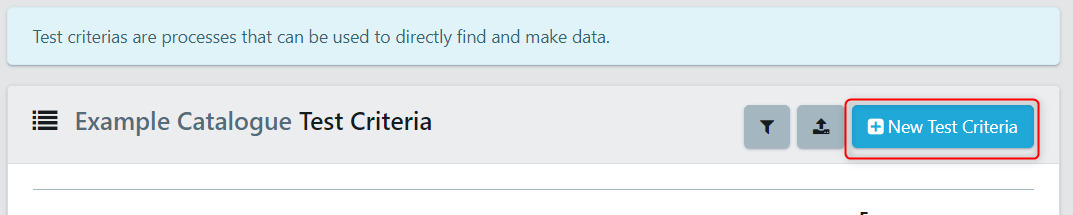
This opens the Test Criteria editor. In the Details tab, populate the three required fields.
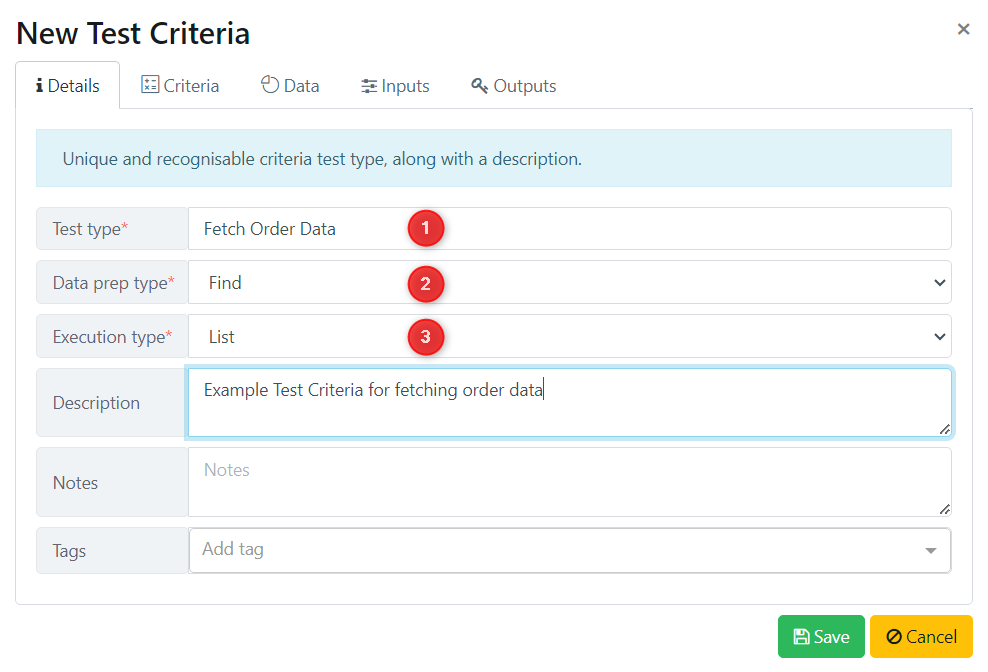
Complete the fields as above for this tutorial.
- Test Type: This is the name of the Test Criteria, it should succinctly describe what the criteria searches for. It is important that you give this a recognisable name because this will go into a list of many criteria within a Data Catalogue.
- Data Prep Type: This defines whether you want to run a Find or Make process.
- Execution Type: Specifies what type of execution language you would like to use.
In the Criteria tab, complete fields as below for this exercise:
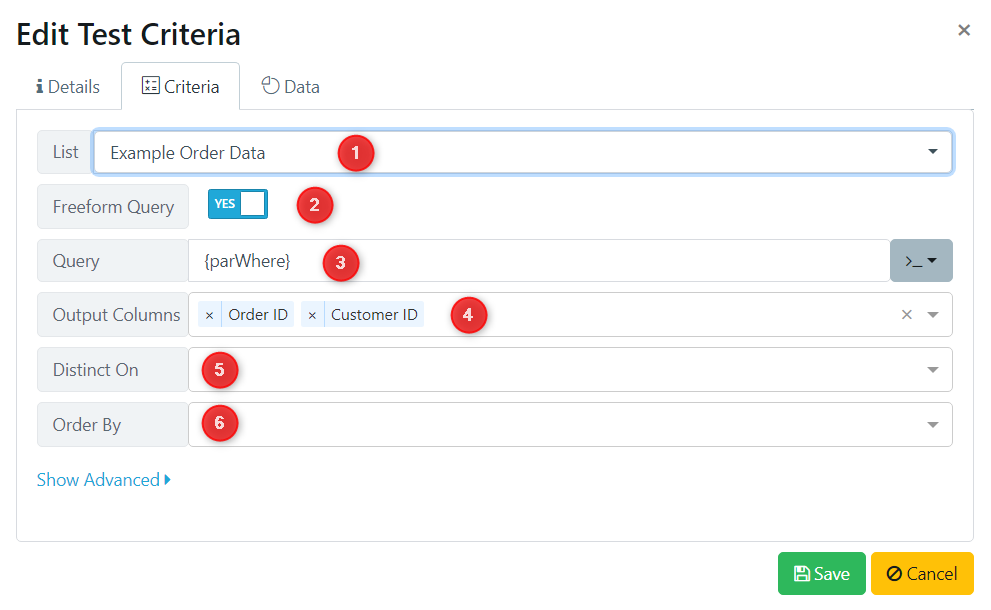
As explained above, in this example you want to return the Order ID and Customer ID based on particular data points for each order.
- List: The target data list you want to fetch data from.
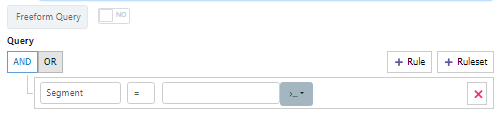
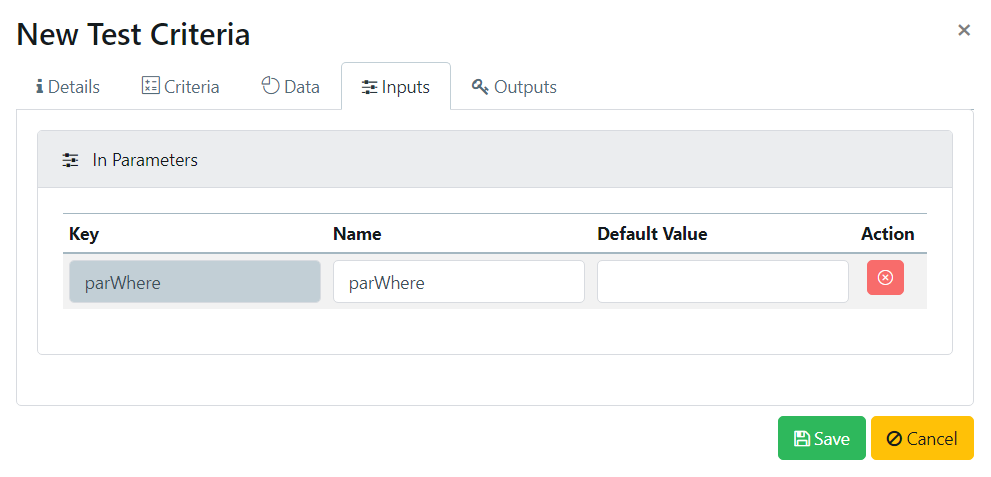
- Freeform Query
- If yes, you will see the above screen where you can set a template {parWhere} to be overridden later.
- If no, you will see this screen where you can build a query using an editor.
- Query: Where you can set a query template.
- Output Columns: The output columns from the find job, in this example you are returning Order ID and Column ID.
- Distinct On: Keeps only the first unique row.
- Order By: Used to sort the results in ascending or descending order.
In the Data tab, complete the fields as below for this exercise. This step sets the defaults for how this Test Criteria is processed by the job engine and these settings can be overridden in later steps.
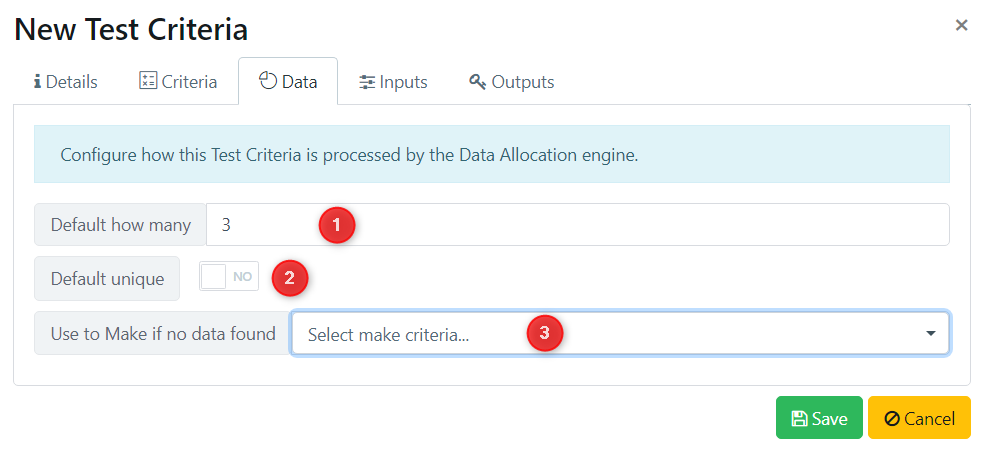
- Default how many: If no extra configuration is done to the test criteria, this is how many rows the criteria will return.
- Default Unique: defines if the data to be returned must be unique or not
- Use to Make if no data found: allows you to select a data generation workflow to fill any missing data.
Next, you have the inputs and outputs tabs. These will have been auto-populated by what you set in the Criteria tab.
In the inputs is where you will find the query, because you have entered '{parWhere}' the query set up has been deferred to later steps. If in the Criteria tab, you selected 'No' to freeform query and created a query using the wizard, you will see your query inputs here.
The Outputs tab contains the two Output columns you selected in the Criteria tab. These will be the returned data points when you run your Find and Reserve job. In this case, Order ID and Customer ID.

Step 1d - Create an Allocation Pool
An Allocation Pool allows you to divide found data into different data pools. This means that once you reserve some data for your tests and place it in a pool, no other tests within that pool can use the reserved data until it is released.
To create one, from the left-hand side menu select Data Reservation and Data Pools. Then, press New Pool to create a new Allocation Pool.
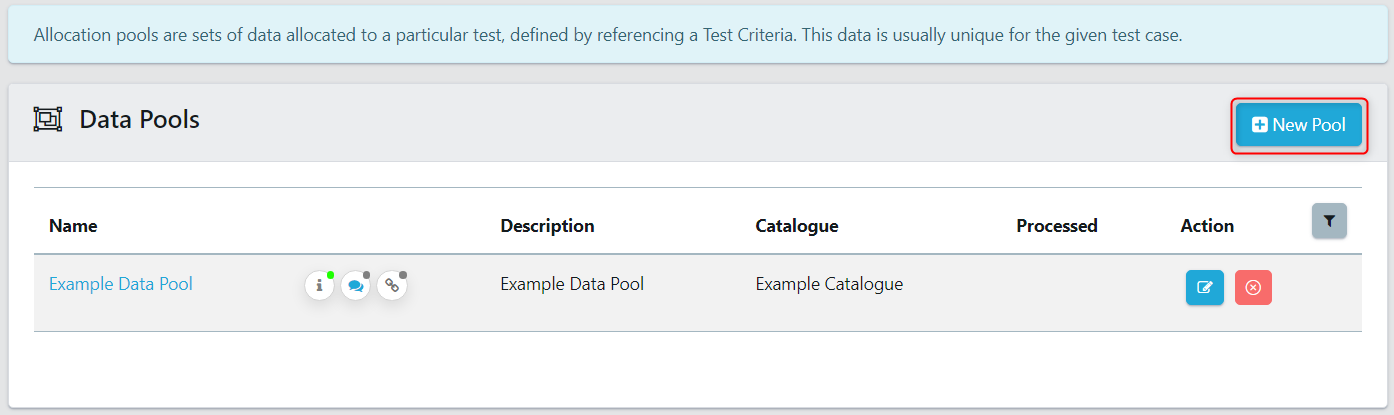
An Allocation Pool records executions of Test Criteria and manages execution results of Find and Reserve jobs and it must be initialised for later use. To initialise it you must define an Allocated Test, to do this open the Allocation Pool and select New Allocated Test.
In the Details tab, fill out the required fields as below. Ensure you select the Test Criteria you set up earlier.
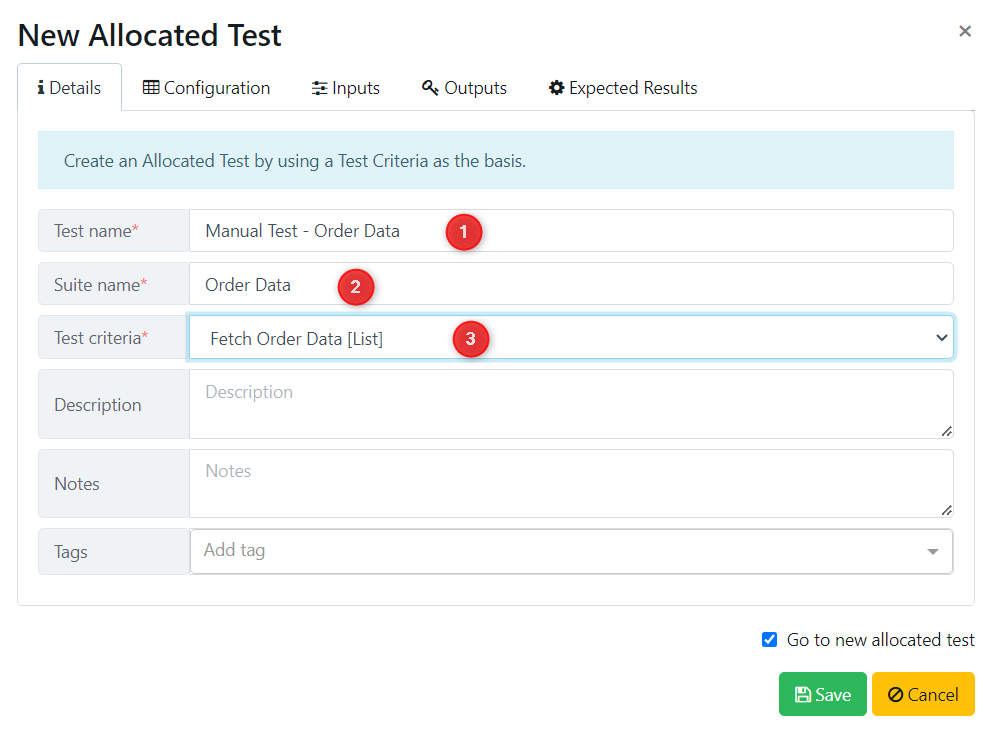
- Test Name: the name for the standalone test.
- Suite Name: the suite name for this standalone test.
- Test Criteria: the test criteria created in the previous step.
In the Configuration tab, fill out the details as below. Because you are just initialising the Allocation Pool and testing that the Test Criteria is set up correctly, select to return just one row of data and keep the Uniqueness toggle off.
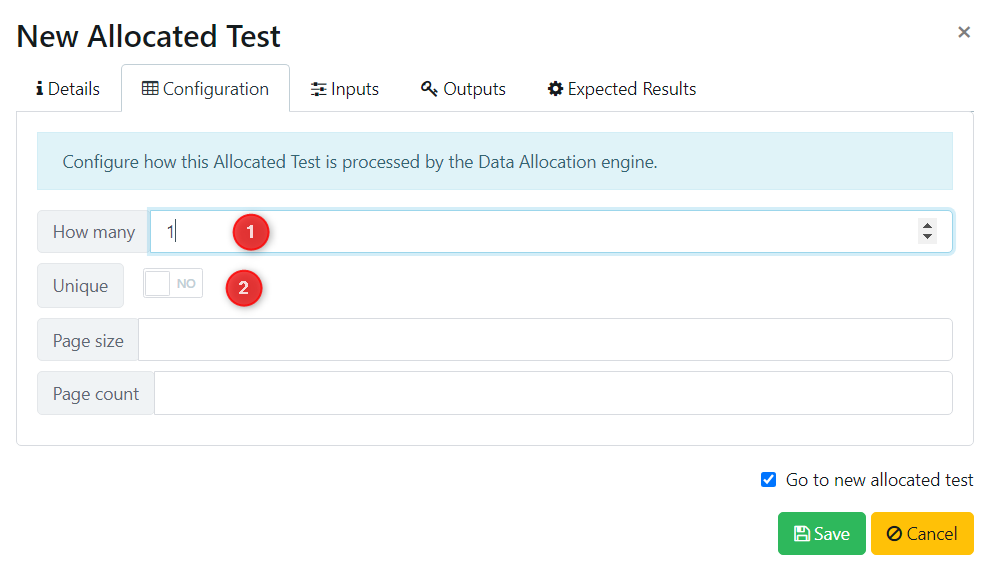
- How Many: how many rows the criteria will return for this test.
- Unique: defines if the date returned needs to be unique for this test.
In the Inputs tab is where you will configure the query for this manual test, enter the following: Category = 'Furniture' AND Quantity = 3 AND Segment = 'Consumer'.
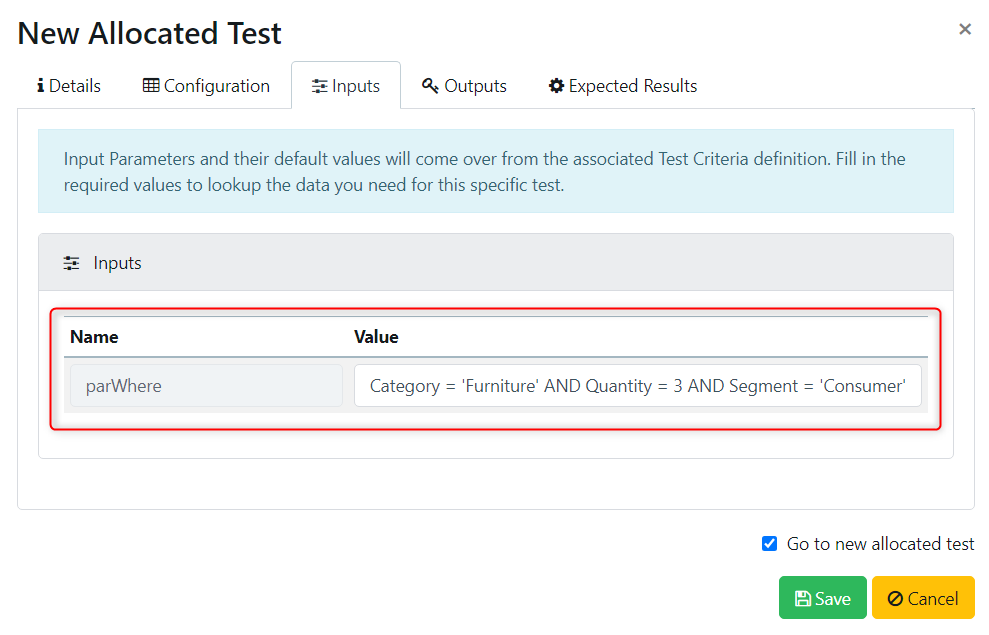
Press Save and then run your new Allocated Test.

Once the job is complete, navigate back to your Allocation Pool and you will see the found data next to your Allocated Test.
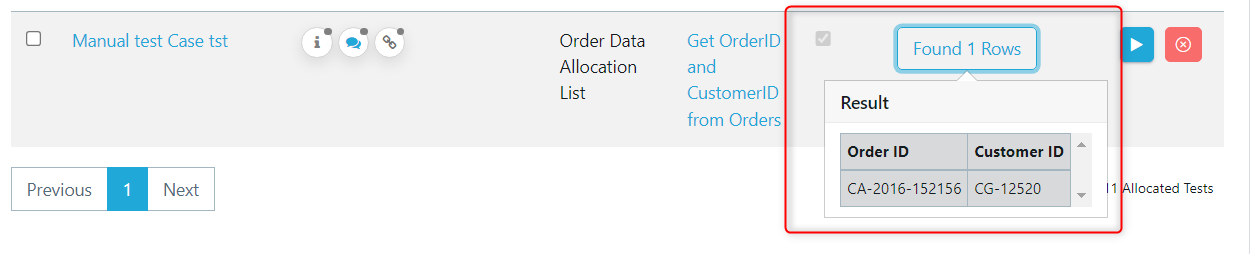
Note: An Allocation Pool can manage one or more Starter Allocation Lists.
Step 2 - Create a New Data Activity
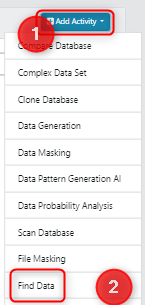
Navigate to the Data Activity explorer and create a new Find Data Activity.
Complete the required fields, Name and Descriptions, and any optional fields like Application, Notes, and Tags. Press save and you will now have a blank Data Activity.
What’s on the screen? You’ll see it’s divided into Components (where you’ll see each component appear and can be actioned once it’s been added), an editable Properties Configuration panel, and below which is Add Components (blue) and Actions (green).
Step 3 - Attach the Target Data List and Definition
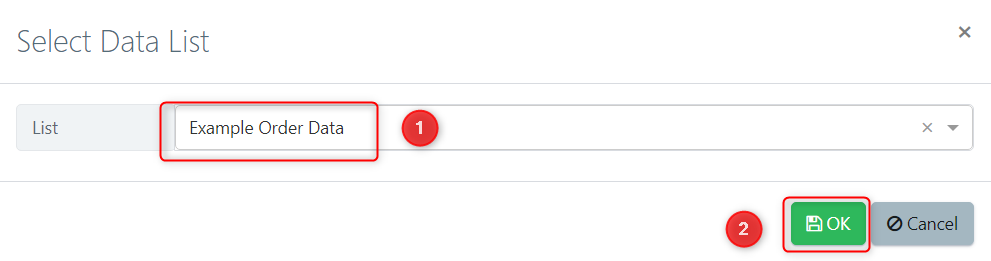
The first component to add is the target Data List that will be searched as part of the activity. Scroll down to Add Components and select Attach List to be Searched (Mode LIST only).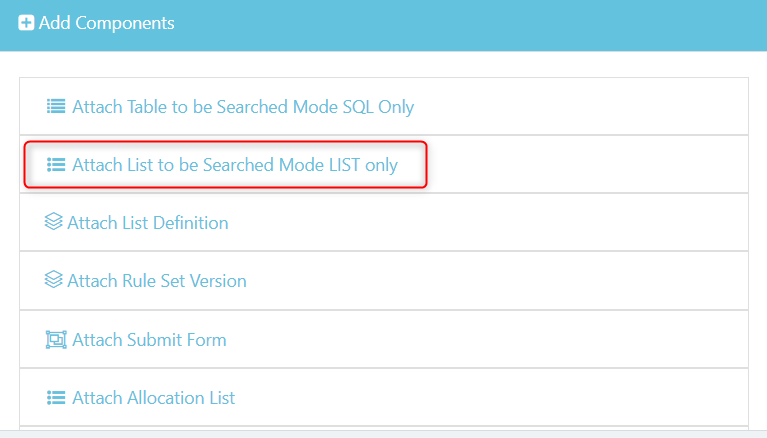
Select the Data List you added earlier and press Okay.
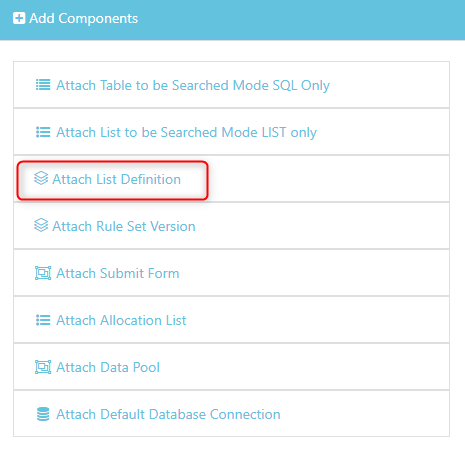
Navigate back to the Activity and add the List Definition from the Add Components menu.
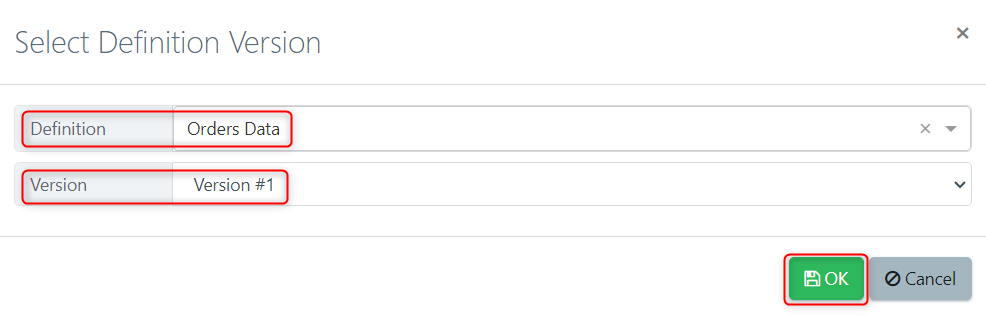
Select the definition you set up in the prerequisite steps and the associated version, in this example it will be Version #1, but if you have multiple versions of a definition here is where you can selected alternatives.
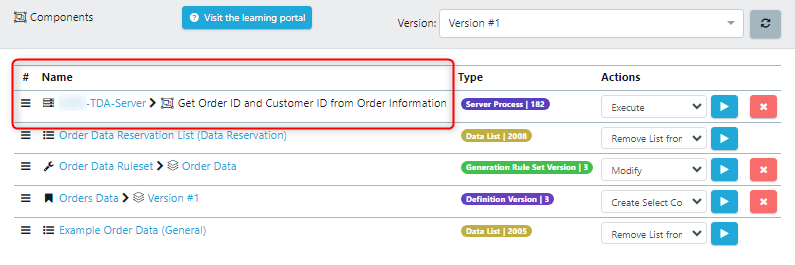
Navigating back to the Data Activity, you will see the following two components have been added to the component list.

Step 4 - Create and Edit a Ruleset
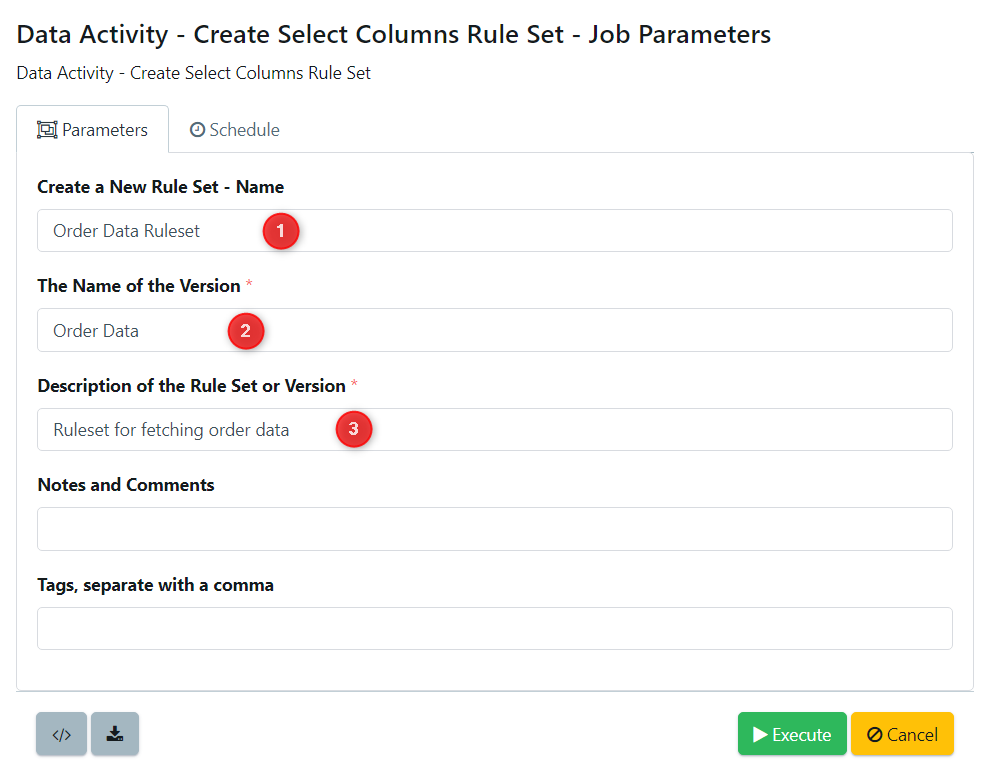
Now you will create the ruleset that will drive the Find and Reserve process. First, you must create it by selecting Create Select Columns Rule Set from the Actions dropdown, then press Execute.

Fill out the Ruleset and Version Name and Description, remember to keep it memorable and related to the Order Data scenario.
Once this job completes, navigate back to your Data Activity and you will see that the following Ruleset has been attached to the components list. You now need to edit this, from the actions dropdown ensure Modify is selected and then press execute.
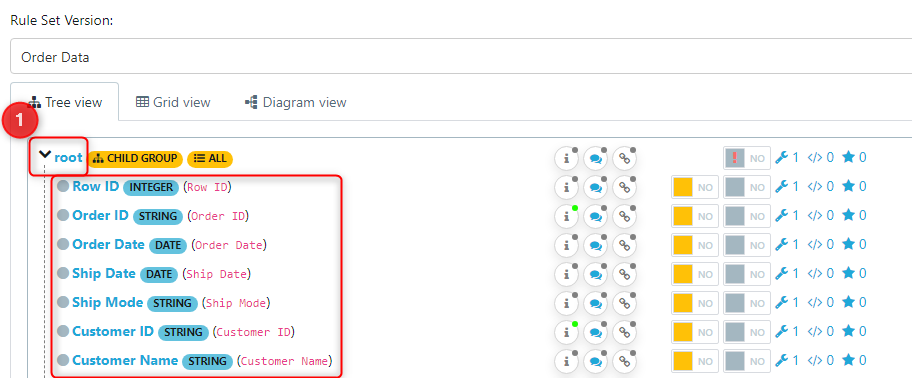
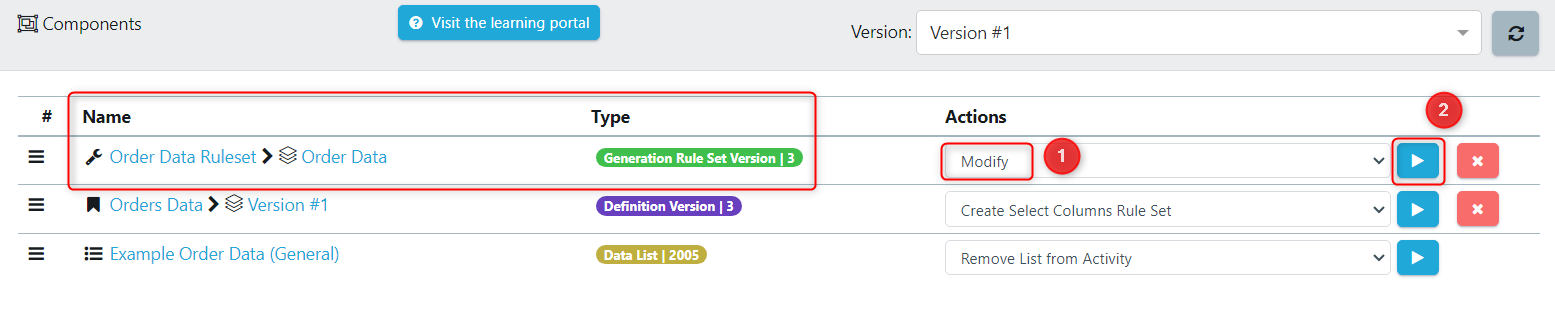 This opens the ruleset, scroll down the the Rules section and expand the Root and you will the structure (schema) of the Data List which has been created by scanning the file in the prerequisite steps
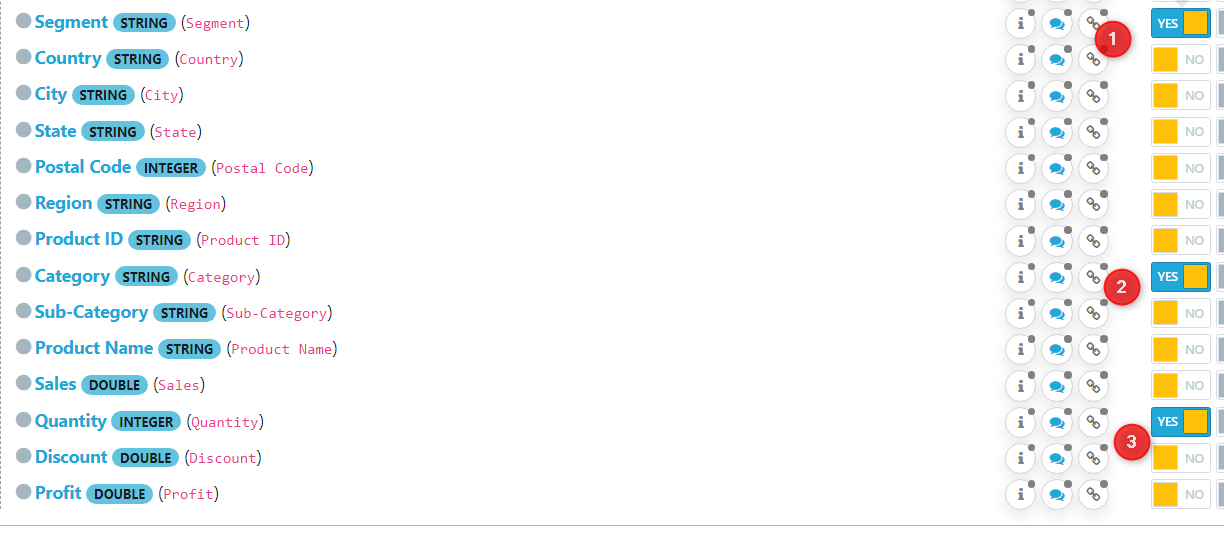
On the right-hand side, there are several editable columns to be considered. Rulesets are also used for Data Generation and Masking activities, so for this example the only column you need to edit is shown below, Expose in Template.
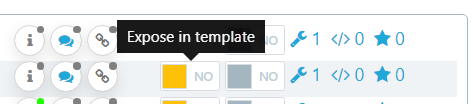
This toggle defines if this data attribute will be used to filter returned data, in this instance the data to be returned is Order ID and Customer ID as defined previously, and the data attributes that will be used to filter are Segment, Quantity, and Category. If you remember back to when you configured the Test Criteria, you set the query to a generic '{parWhere}' clause. This step is the beginning of how you populate the Where clause ready to be used in a self-service form. Set the Expose in Template toggles to 'On' for Segment, Quantity, and Category as shown below.
Step 5 - Create an Allocation (Reservation) List
An Allocation (Reservation) List is one of the methods teams can use to get a high-level overview of what data is being used by which tests and which testers. It provides a list of requests with the returned data and associated reservation logic.
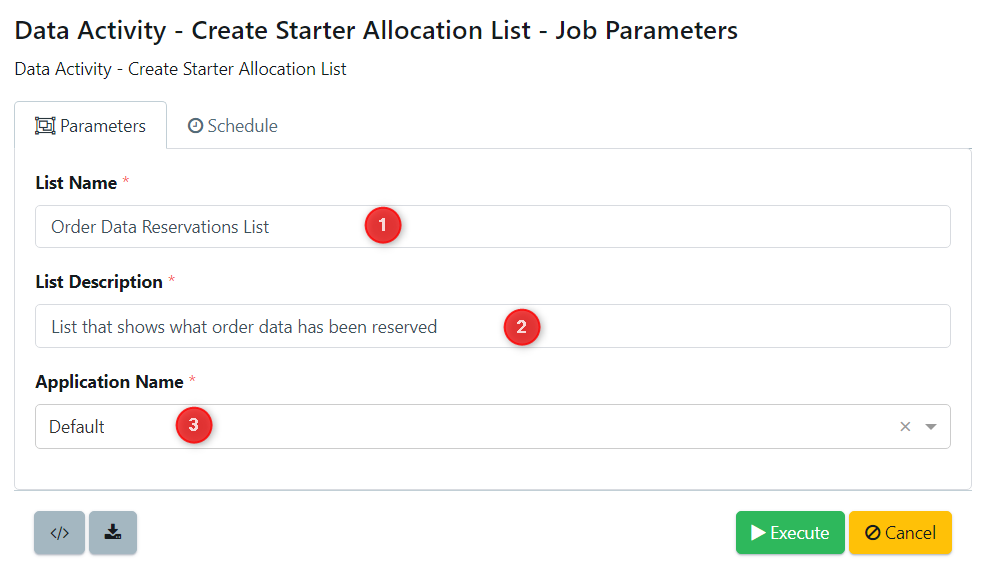
To create this Reservation List, navigate to the Actions tab and select Create Starter Allocation List and complete the required fields as below.
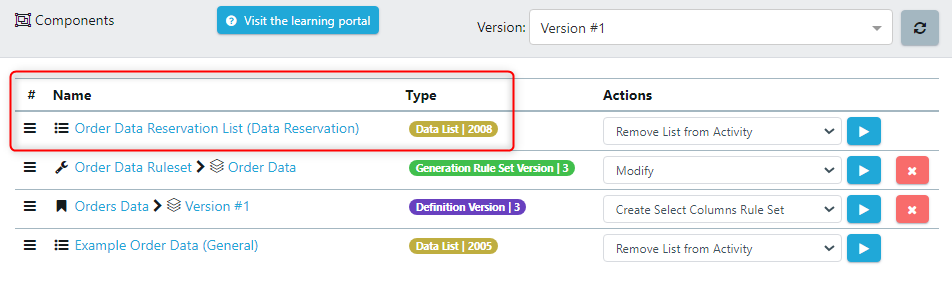
Once the job has completed, you'll see the reservation list will be added in the components list.
Now you have added the ruleset, it is time to apply some data rules.
Step 6 - Configuration Settings
Now you have added nearly all of the components to the component list, it's time to look at the six core configuration settings.
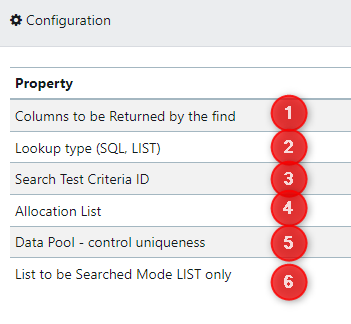
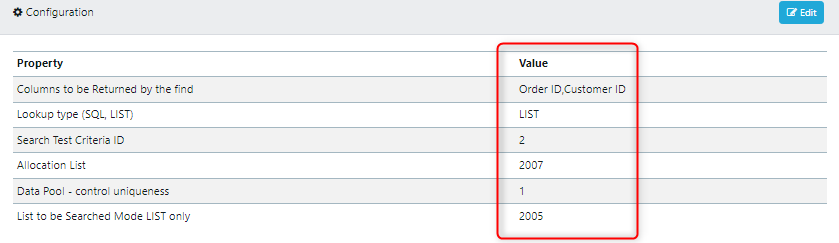
- Columns to be returned by the find: Order ID,Customer ID
- These are the columns that you want the job to return to use in your tests, separated by a comma.
- Lookup type (SQL, LIST): List
- This refers to the query type, in this case you are using the List type.
- Search Test Criteria ID: 2
- This is the ID of the Test Criteria you set up in the pre-requisites. To find this, navigate to Data Reservation in the left-hand side menu, then Data Catalogues and open the target Test Criteria. You will find the ID in the slug of the URL.

- This is the ID of the Test Criteria you set up in the pre-requisites. To find this, navigate to Data Reservation in the left-hand side menu, then Data Catalogues and open the target Test Criteria. You will find the ID in the slug of the URL.
- Allocation List: 2007
- This is the ID of the Allocation (Reservation) List, similarly to above, you can find this in the slug of the URL when you select the data list. In the left-hand side menu, select Data Reservation and open the Allocation (Reservation) List set up in previous steps.

- This is the ID of the Allocation (Reservation) List, similarly to above, you can find this in the slug of the URL when you select the data list. In the left-hand side menu, select Data Reservation and open the Allocation (Reservation) List set up in previous steps.
- Data Pool - control uniqueness: 1
- This is the ID of the Data Pool you set up in the pre-requisites. You will find the ID in the slug of the URL when you select the data pool. In the left-hand side menu, select Data Reservation and open the Data Pool set up in previous steps.

- This is the ID of the Data Pool you set up in the pre-requisites. You will find the ID in the slug of the URL when you select the data pool. In the left-hand side menu, select Data Reservation and open the Data Pool set up in previous steps.
- List to be Searched (Mode LIST Only): 2005
- This is the ID of the source Data List, this will be searched using the criteria that has been set up. You will find the ID in the slug of the URL when you select the data list from the Modeller section of the left-hand side menu.

- This is the ID of the source Data List, this will be searched using the criteria that has been set up. You will find the ID in the slug of the URL when you select the data list from the Modeller section of the left-hand side menu.
NOTE: the exact IDs may be different for your example, depending on what assets exist in the workspace already. If they don't match, follow the guides in this step to get the correct IDs.
To configure these, select the edit button and ensure the fields are completed as below.
Step 7 - Create the Submit Form
You have now completely configured the activity. Now it is time to create the submission form to run the job. Under the Actions tab, select Create Find Submit Form.
The first three fields to consider are the Name and Group of the submit process, items one and two below. You can also choose to update an existing process in item three.
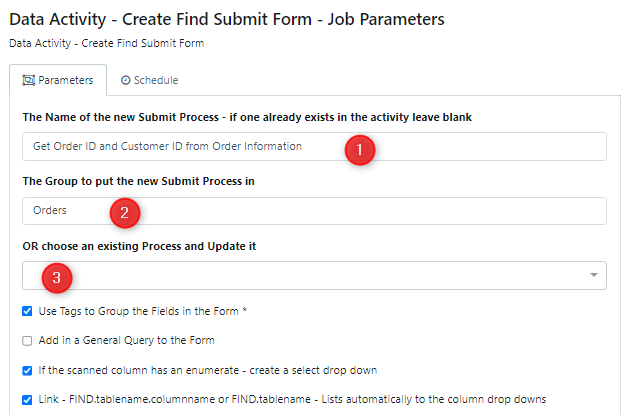
The next three fields to consider are the Allocation Project Name, this can be left as default. For field two the alternate option is to specify a date that the data should be released and in field three is where you can set the date.
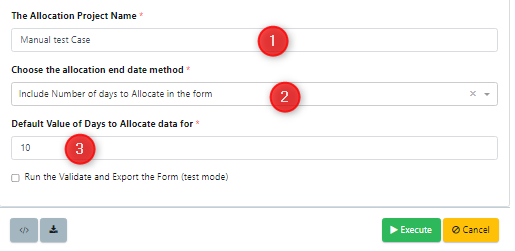
Note: There are other advanced settings in this form that are not considered in this example.
Hit execute and once the job completes, you will see the submit form has been added to the components list.
Step 8 - Run the Find and Reserve Job
The Find and Reserve job has now been fully configured and you can now run this. First, press Execute and your submission form will pop up with parameters to populate.
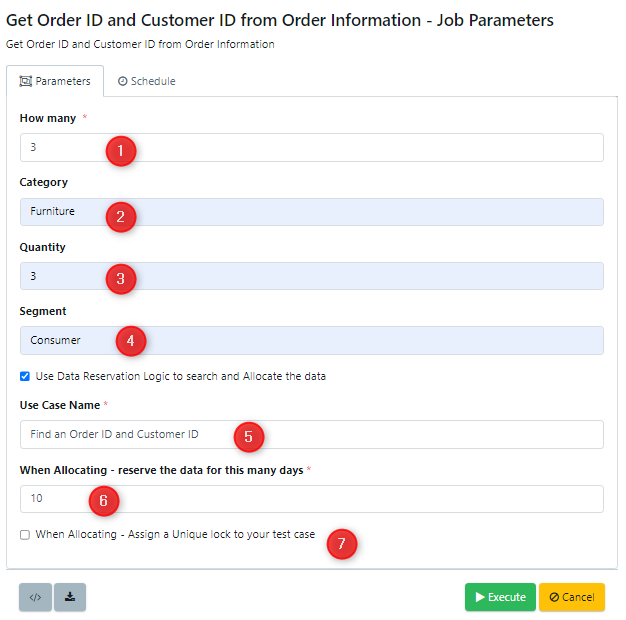
- How Many: how many rows of data to return.
- Category: filters the returned data by records that only include the specified category.
- Quantity: filters the returned data by records that only include the specified quantity.
- Segment: filters the returned data by records that only include the specified segment.
- Use Case Name: the name of the use case
- When Allocating - reserve the data for this many days: how long should the data be reserved for.
- When Allocating - assign a unique lock to your test case: if data should be reserved, if left unchecked then data can be used by other tests and testers.
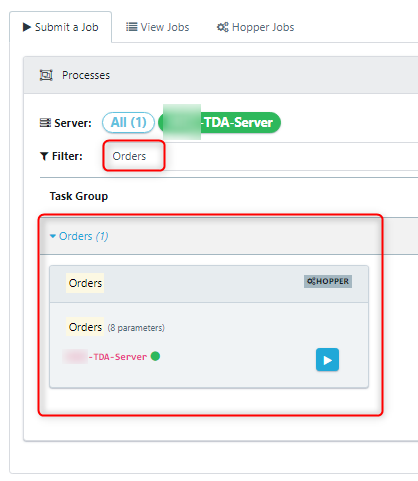
The alternative way to run the Find and Reserve job is to navigate to the VIP Executor menu and search for the form by entering the name of the form into the filter.
When the job completes, you will see the found data in the Allocation List.
General info on running Jobs for Data Activities
A database activity is created by adding components into the activity including and not exclusively: a Definition version, Submit form, and - specifically for a Data Find & Reserve, Data Activity - an existing Starter Allocation List. Also see the available specific Actions, including but not exclusively, for a user to - specifically for a Data Find & Reserve, Data Activity - to generate a form to Snapshot a database.
Note: A Data Activity job can be executed from within the Data Activity space or from the VIP Executor (where a user normally requests jobs). The user then sees a spreadsheet to show the differences in rows of inserted or edited data before and after a test has finished.