Welcome to the Quality Modeller QuickStart Katalon Automation Tutorial series. In this series, we are going to take you through Getting started, Scanning a Webpage, Building a Model and Running Automation all for Katalon Automation.
In this tutorial, learn how to integrate Quality Modeller into Katalon Studio to generate rigorous test automation scripts.
By integrating Katalon with Quality Modeller, you will be able to build a visual image of how the application works and in turn increase cross team collaboration and visibility.
Watch the 4 tutorials to guide you in using QuickStart Katalon Automation in Quality Modeller.
Create a Project
In this tutorial we'll be setting up the Katalon Automation incredibly quickly with Quality Modeller. Creating a new Katalon project in Quality Modeller imports the basic action pack from Katalon to get started with your web and api testing.
Tutorial Steps
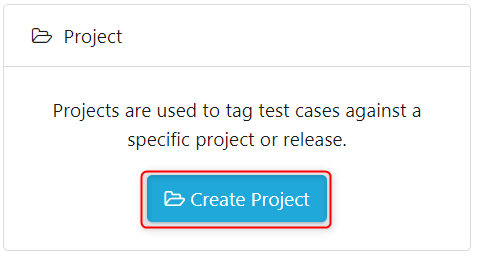
Step 1 - For Quality Modeller to build the automation library and initial assets you need to set up a Project. So in the main portal click Create Project.
Name the project, give it a description and select next.
.png)
On the Next Step scroll and select the Katalon Automation Framework.
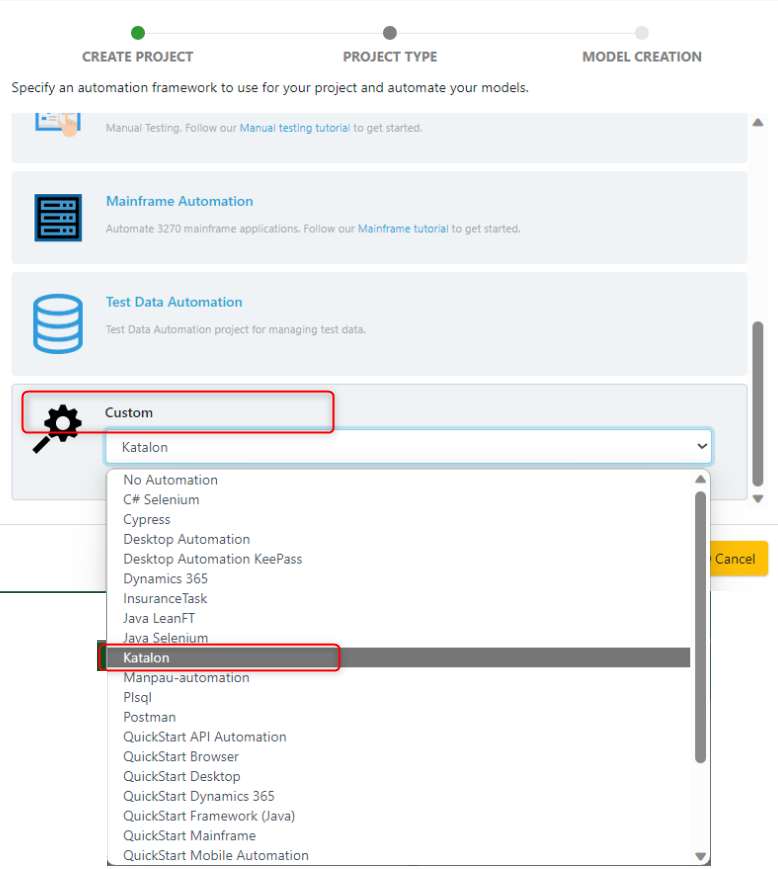
On confirming by clicking the green Create Project button the automation code with assets are built and a 'Project Type: Katalon' is started.
.png)
Now you'll see Quality Modeller spin up a ready to use Katalon Automation Project. Select the appropriate project from the context bar.

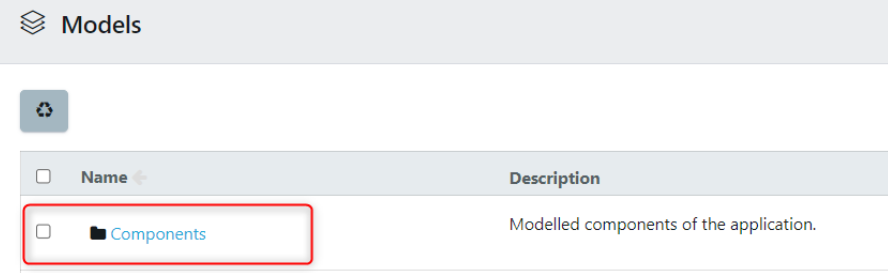
A folder labelled Components will be available which contains the Katalon automation actions.
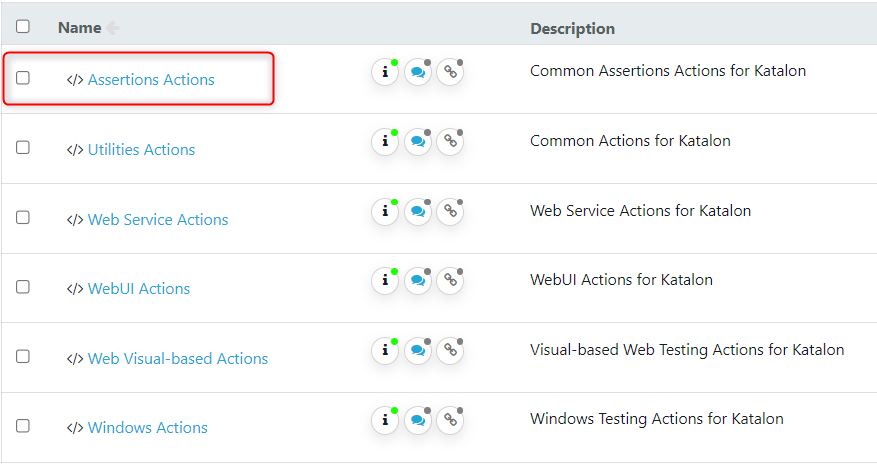
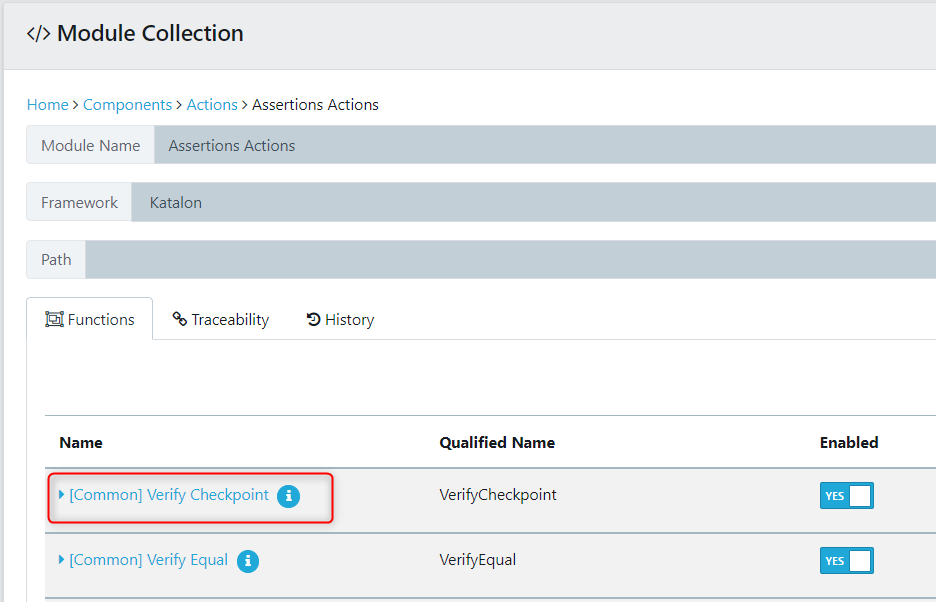
Step 2 - To see the underlying Functions and embedded code in our Module Collection, click on the Components folder > Actions.
.png)
Click on Assertions Actions as an example.
Within Assertion Actions, click '[Common] Verify Checkpoint'.
The underlying code is found in the Edit properties: Code tab.
.png)
Scan a Webpage
Next up we'll be scanning a webpage using the Katalon recorder. This creates an object repository which we can synchronise and import into Quality Modeller. This exposes and makes available all of your scanned objects from Katalon into the model.
Create a Model
After we have imported some page objects, and associated actions we can utilise them to build an automated model. This involves overlaying automation actions and building a visual flowchart of the expected behaviour of the system under test.
Run Automation
The final instalment in this series is to generate the perfect test suite (minimum number of tests, which maximise coverage). The tests generated can be exported to Katalon automation code and then integrated into your Katalon project for execution.