Welcome to the Quality Modeller QuickStart Desktop Automation Tutorial series. In this series, we are going to take you through Getting started, Modelling out combinations, Generating & Running test cases and Publishing a test suite all for Desktop Automation.
Watch the 4 tutorials to guide you in using QuickStart Desktop Automation in Quality Modeller.
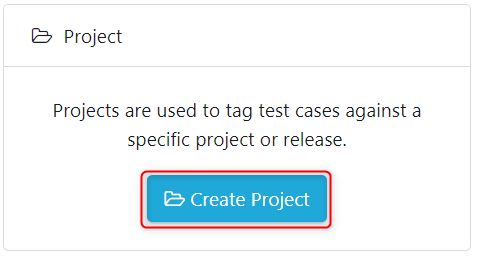
Create a Project
In this series of four clips about Desktop Automation you’ll see how choosing the specific framework spins up a library of desktop actions, and which interact with any desktop application, for instance clicking, entering text, and the like. In the first clip, then we’ll set it up as a project.
Tutorial Steps
Step 1 - For Quality Modeller to build the automation library and initial assets you need to set up a Project. So in the main portal click Create Project.
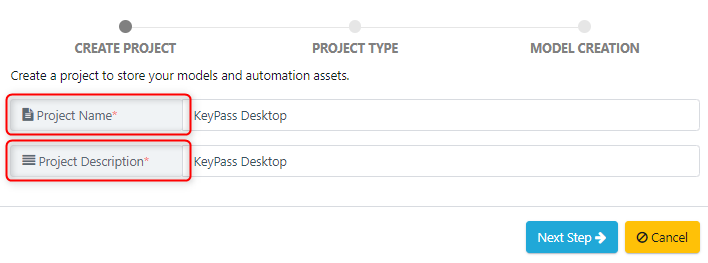
Name the Project, give it a description, and select next.
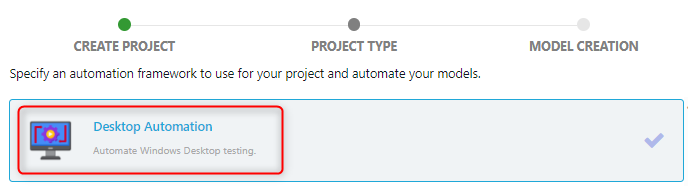
On the Next Step scroll and select the Desktop Automation Framework.
On confirming by clicking the green Create Project button the automation code with assets are built and a 'Project Type: Desktop' is started.

Now you'll see Quality Modeller spin up a ready to use Desktop Automation Project. Select the appropriate project from the context bar.

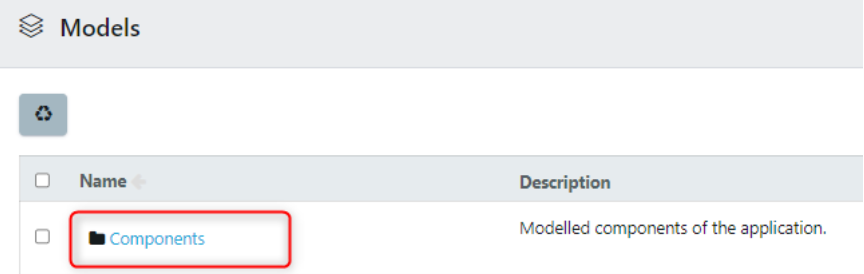
A folder labelled Components will be available which contains the Desktop automation actions.
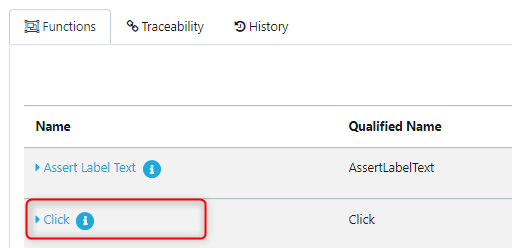
Step 2 - To see the underlying edit Functions, click on the Components folder > Actions.

Click on DesktopActions > 'Click' as an example.
The underlying Edit properties include: Page Object, Place Holder, Embed Code, Custom Code, Function Map, API Request.
.png)
Identifiers
Following on with Desktop Automation, ahead of watching the next clip, Create a Model, it’s useful to review a couple of tools - FlaUI and Accessibility Insights - we’re recommending to use alongside Quality Modeller to easily pull out the identifiers for the test automation model we create.
By way of example, we're using a typical password manager - Keypass - application to test against. So, to auto generate the test automation for a system under test - an application - we can now quickly pull-out identifiers, which are then overlaid on a test Automation Model. In our example of automating a script of an application under test, we’re modelling out how it interacts with objects, i.e. new database, save database and the like.
Create a Model
In this third clip on Desktop Automation you’ll see how to formulate an XPath, composed of a button and named database in a Model, using the Keypass application as a scenario example.
Now with nodes built out on the Quality Modeller canvas you’ll generate the automation script, basically going through and populating a whole scenario composed of sequential steps of creating a new database, through to entering a master key and hitting OK.
As a workflow check-in, to verify the automation is building correctly, outside of Quality Modeller you can review a folder called Framework. Navigate to it in the directory, and copy/paste it to your desktop. Now in a tool like Visual Studio, right click to Restore Packages, and in the Quality Modeller Scenarios panel navigate to an available test you want to run.
One tip is as you build out the model with identifiers to incrementally verify the automation is building and all running OK, rather than building a big model then needing to ferret out any bugs or missteps later on.
In practical terms, when the Desktop Automation framework is spun up in Quality Modeller, all the possible desktop actions can then be selected and dragged from the Quality Modeller Scenarios panel onto the canvas to create nodes in a model. In the example, we use an XPath identifier to trigger the Open Application action.
From there you can start to identify and pick out objects using an inspector such as FlaUI or Accessibility Insights. To understand a specific parameter to associate with a node block on the Quality Modeller canvas.
Generate and Run Tests
In this final clip on Desktop Automation, here we can download and produce the automation script source code. We’re showing a more complex Model than in the previous clip to highlight probable deviations, including the scenario Database created or Database cancelled endpoints.
In Quality Modeller, the Scenarios panel captures the automated test’s Run Results. As it goes through executing the paths and screen of the application under test, an overlay sequence of screenshots is also captured. This can be downloaded as a source file through Quality Modeller.
So, to get to that point, it requires you to drag the source code folder to the desktop, and we again open Visual Studio. Right click to Restore our Nugget Packages before going through to build the solution. You’ll see the code gets produced, including the longer chain of identifiers.
Still in Visual Studio, in the Test menu open the Test Explorer, then right-click on the test you want to run. You see the script cascading through, opening and closing the relevant sequential panels of the Keypass application. This is an example of a test automation script which pulls from Quality Modeller’s Desktop Automation framework.