A database definition can encompass multiple versions, capturing the evolution of data schemas as an application undergoes iterative development and enhancement. Versioning serves as an effective tool to record and monitor these transformations over time.
A key aspect of data analytics is the capacity to observe variations over time, such as the before-and-after state of a table or database following a change, the growth rate of data, among other metrics. This versioning functionality also facilitates comparisons between versions. To execute this, it is necessary to conduct multiple scans and amalgamate them into a single definition.
1. Select an Existing Definition
Earlier, we created a definition for the OT database, which is the “before” state.
Now we need to scan an “after” state, which has a new column called Grade. You can either follow the Scan a Database process and create a new schema for the scan, however as the “after” scan is related to the “before”, it is also possible to have multiple schema scans in the same schema.
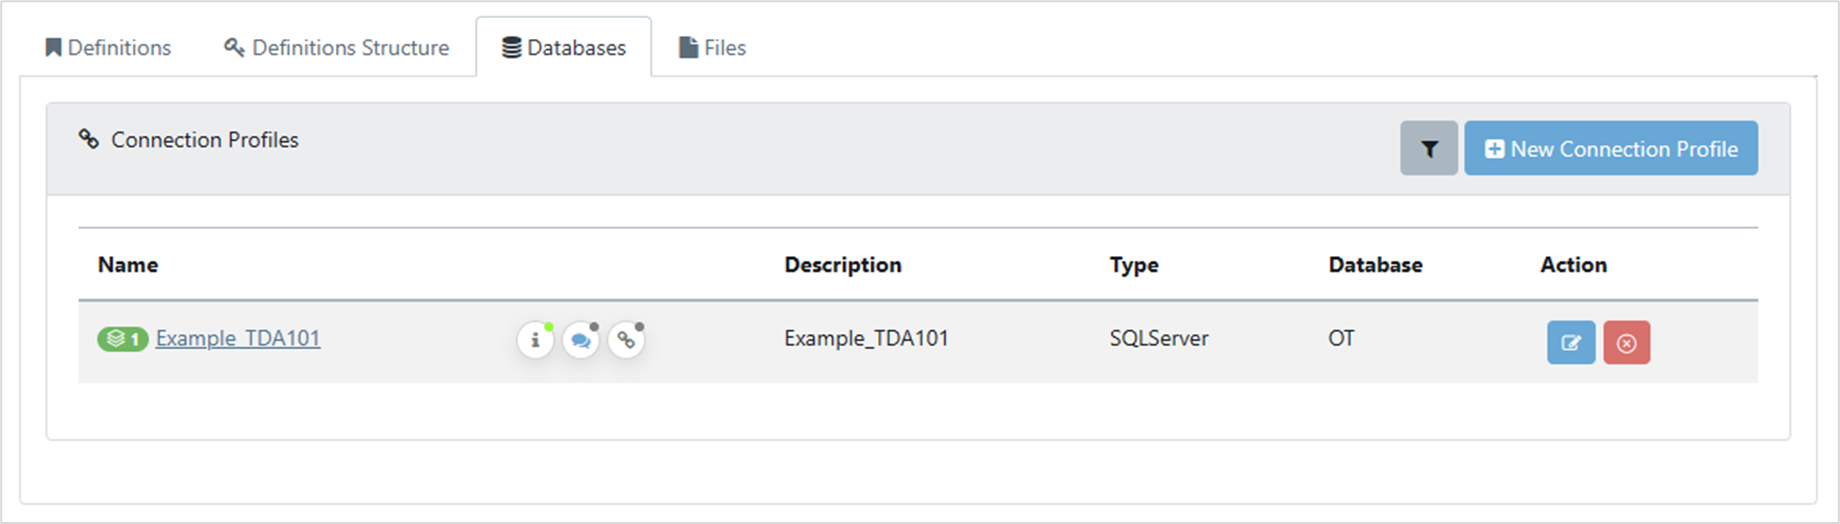
To do this, begin in the Data Dictionary, click on Databases, and select the schema you want to add to.
From this point, follow the steps in Creating a scan of the Database.
The new scan appears in the Schema scans page.

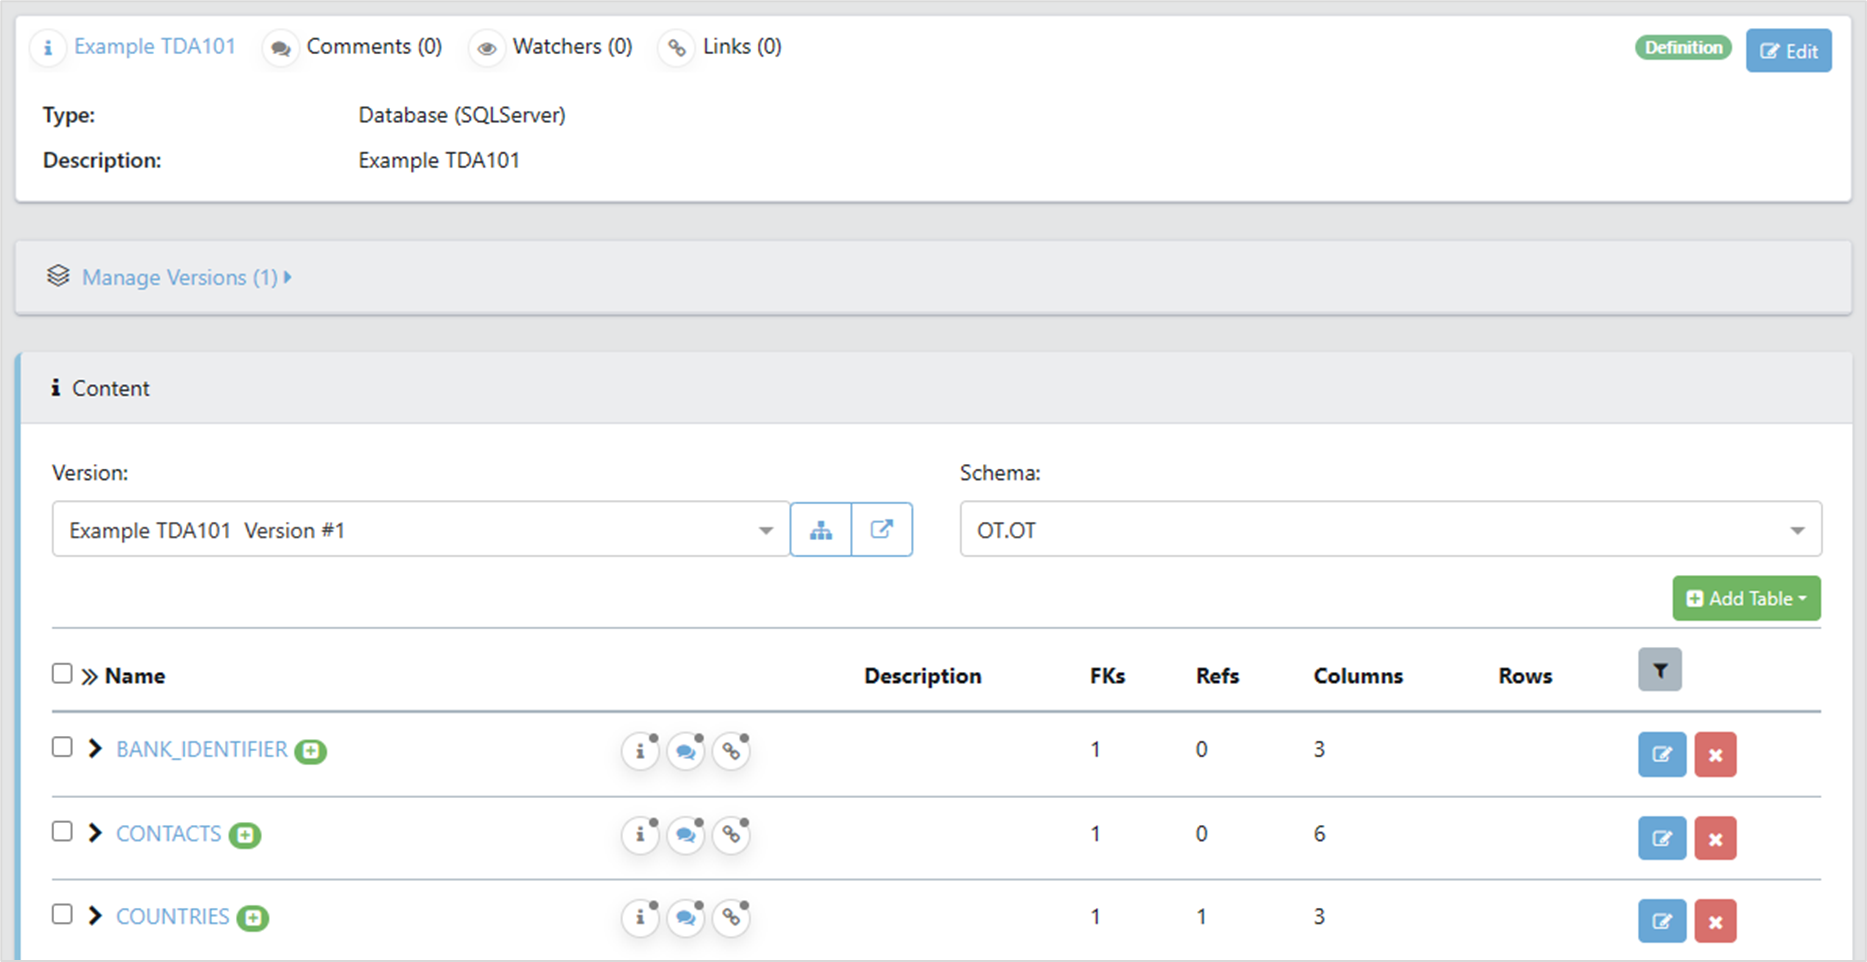
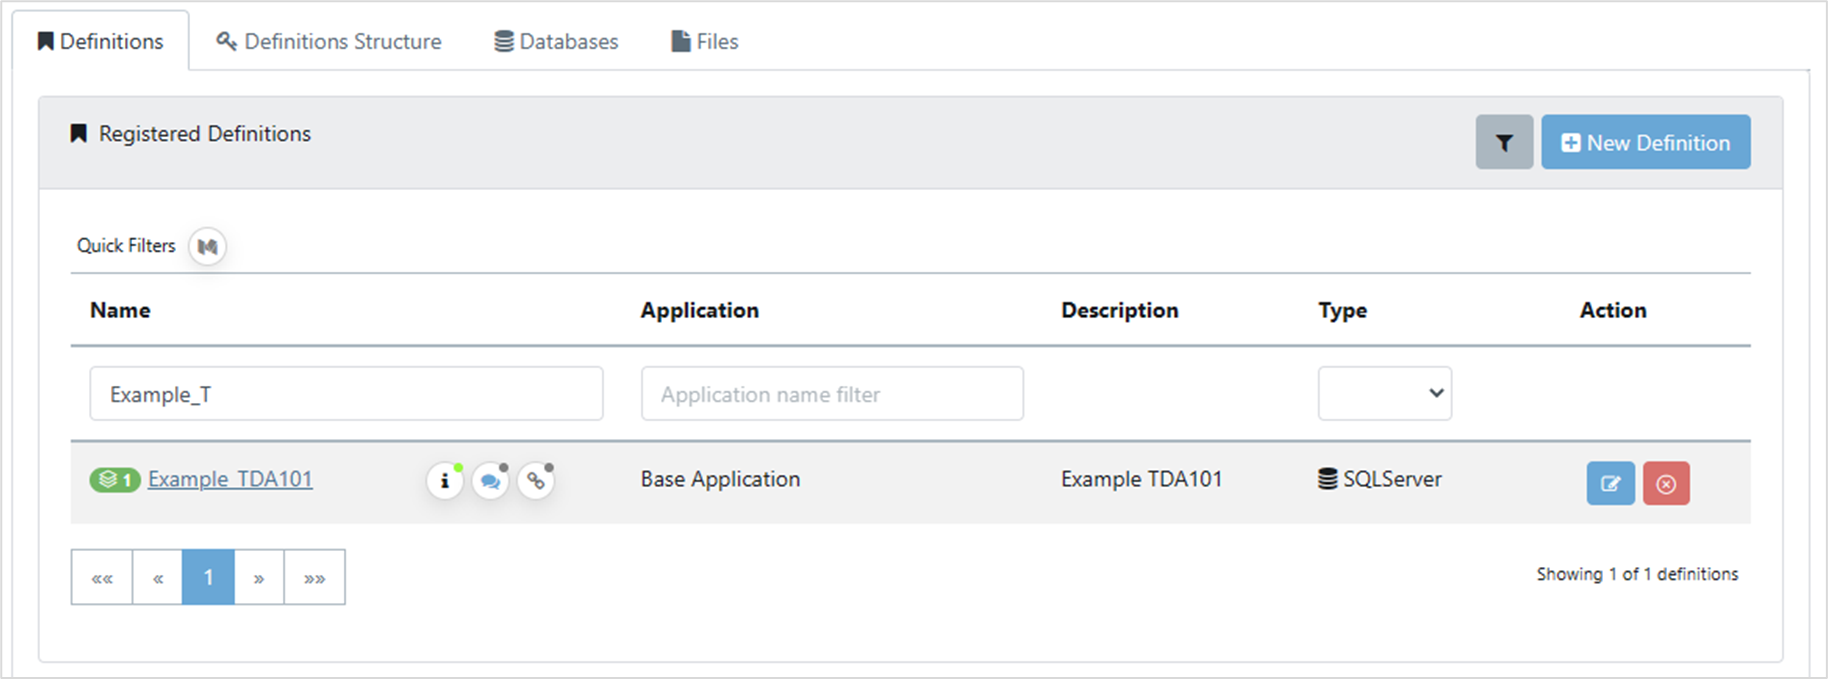
Return to the Data Dictionary pane. Definitions should be selected. Select the definition you want to update.
2. Add a Version
Expand Manage Versions and click on Add Version.

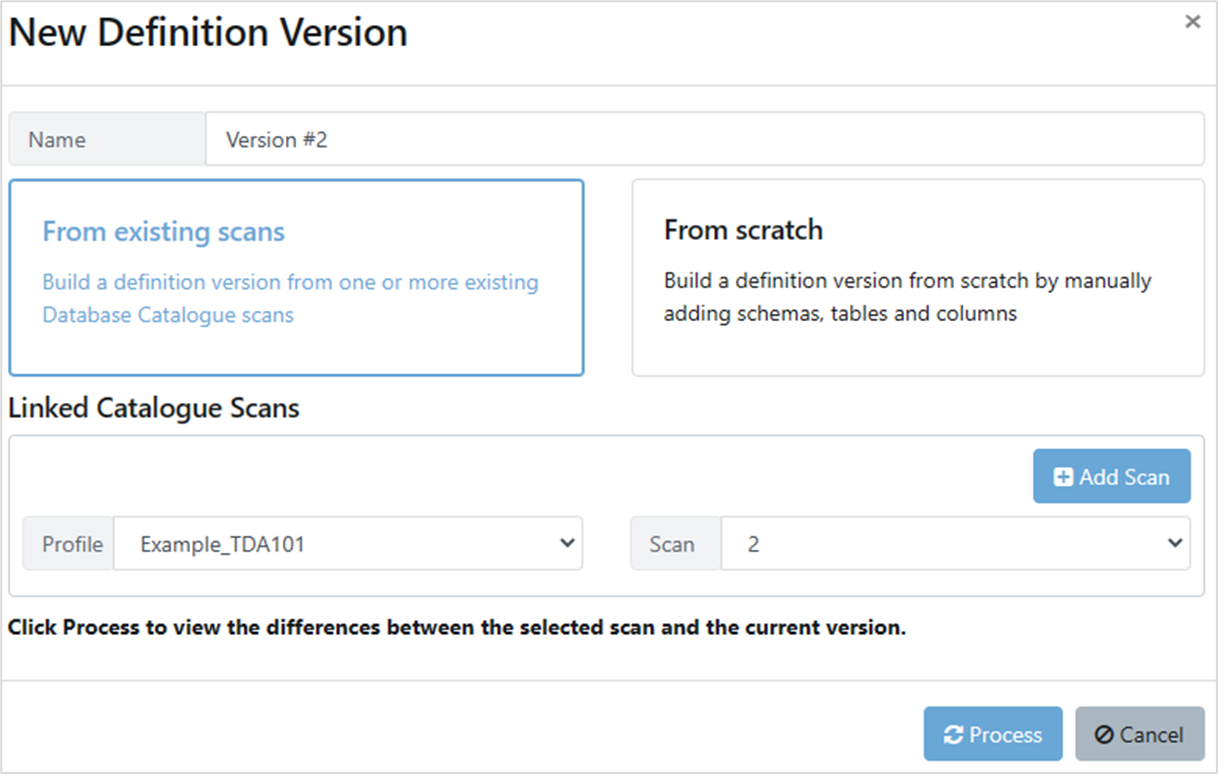
The New Definition Version box opens. The Name is auto-populated with Version #2, the File drop-down already has the scan name, and the new version of the scan is in the Scan drop-down. If you created a new schema, use the File drop-down to select the schema you want to use. Click on Process.
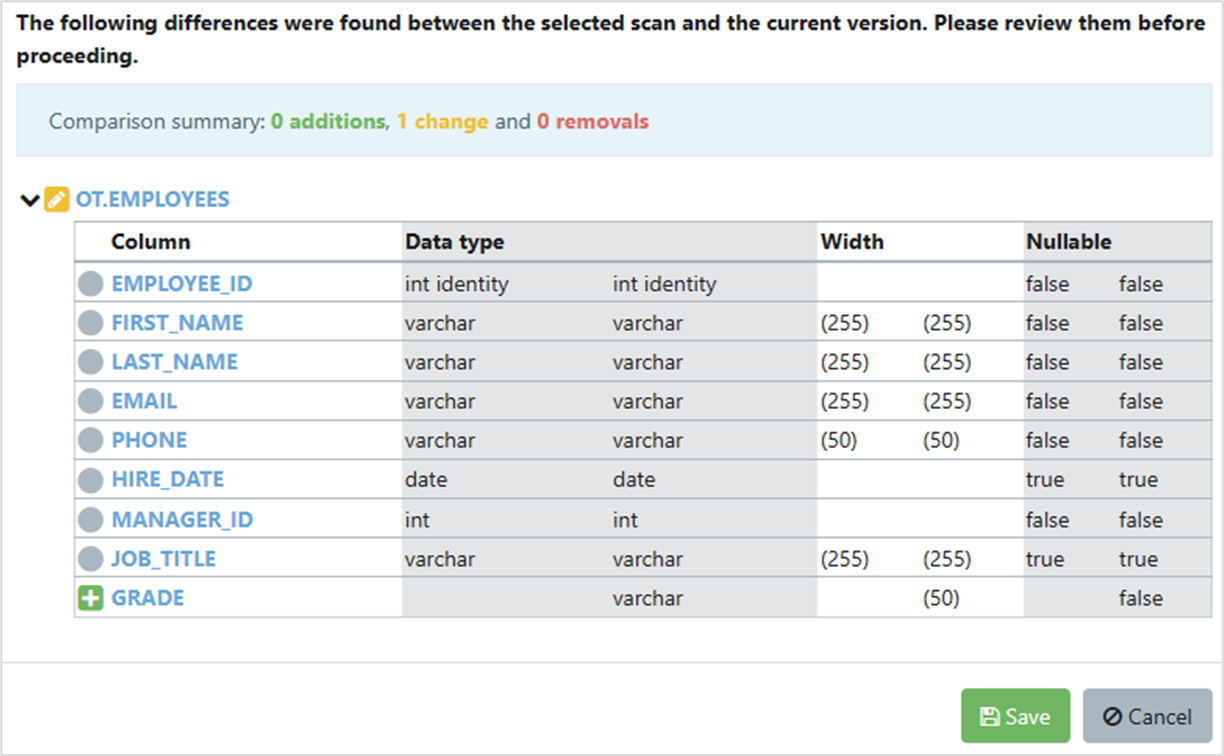
The New Definition Version box expands to show the found differences, which can be expanded to show the details of the differences. In this case, the new column has a green plus sign to show that it is new, and the Data type, Width and Nullable columns show “before” and “after” states. Check them and if you are happy, click Save.
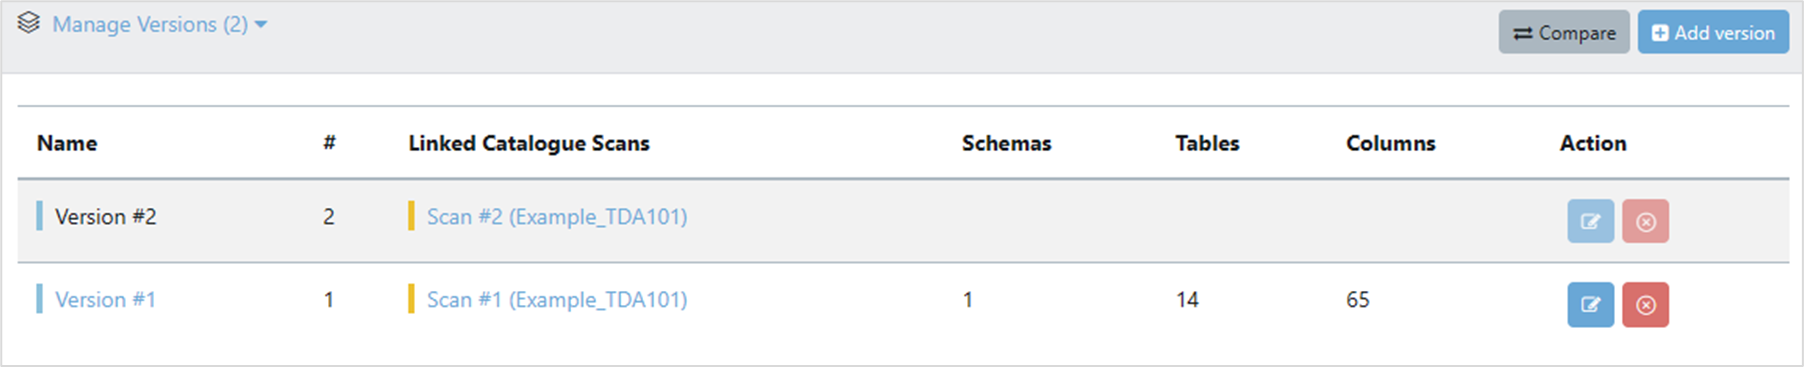
Your definition now shows the new version in the Manage Versions section, and a new Compare button has appeared. Clicking on this shows the differences found between the versions. Note that the buttons to the right of the new version are greyed out. You need to refresh or click away and back for them to be solid.
3. Compare Versions
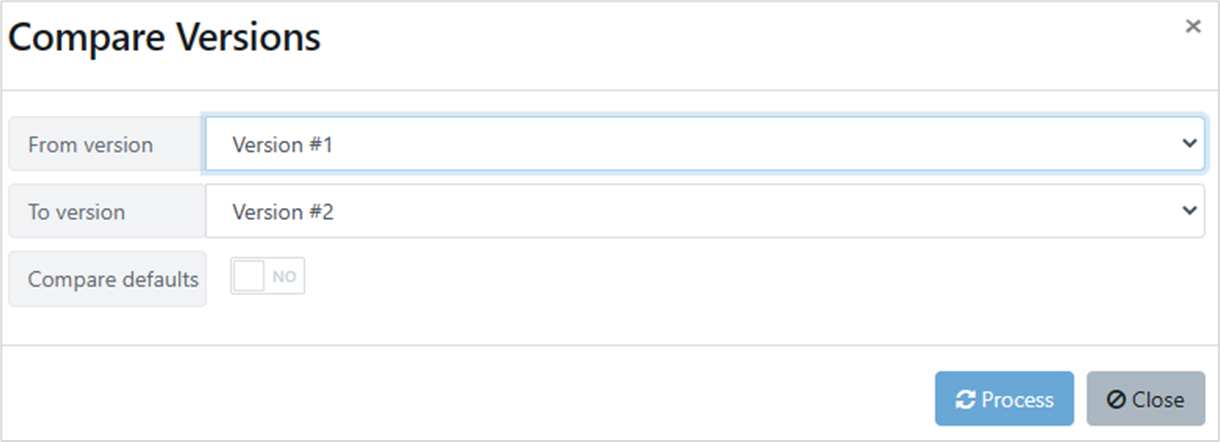
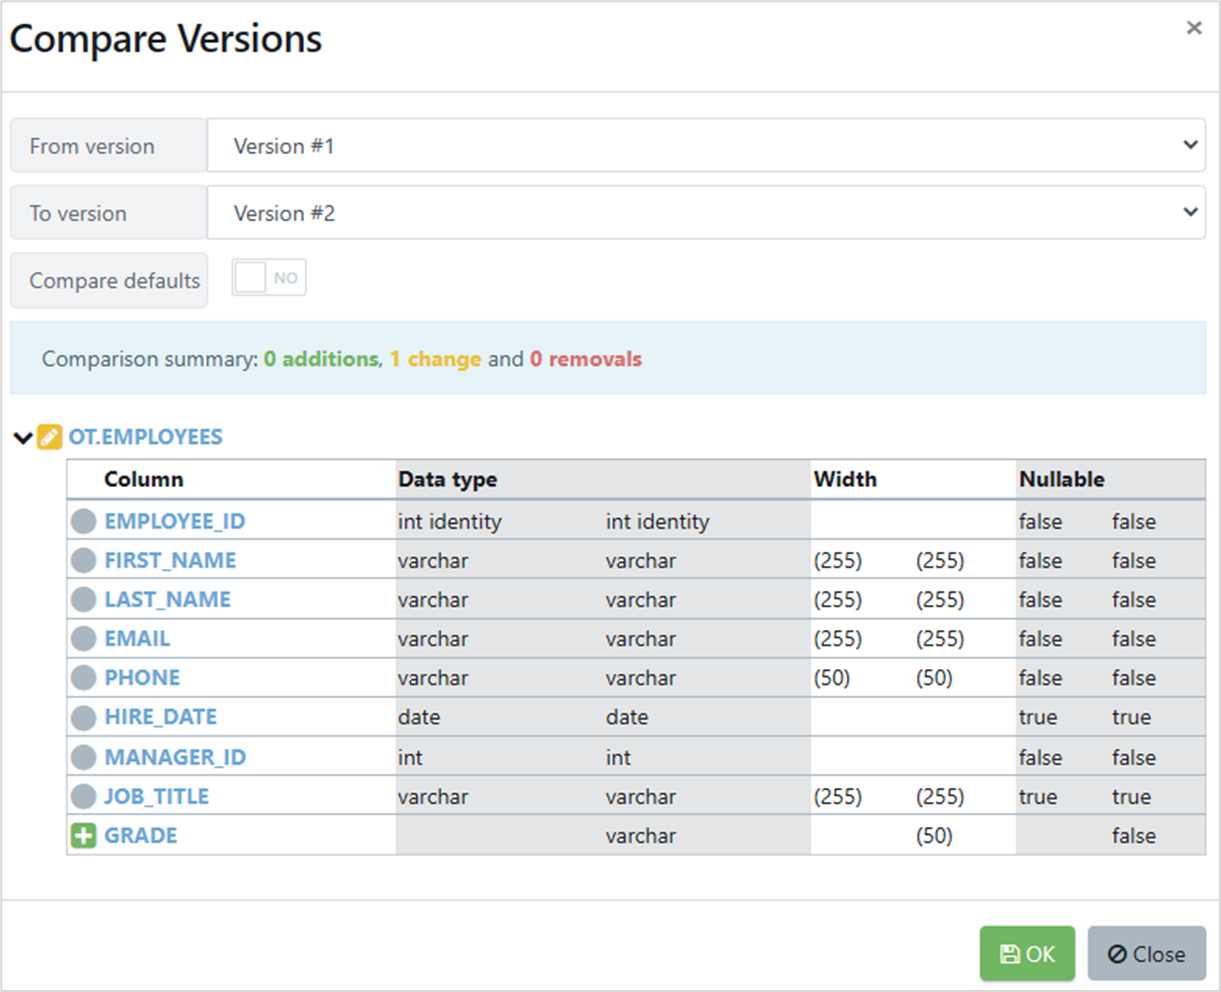
Clicking on the Compare button displays the Compare Versions box, letting you select two versions to compare. Select the ones you want, if you have more than two, then click Process.
The Compare Versions box expands to show the found differences, which can be expanded to show the details of the differences. The From and To drop-downs are still usable if you want to run another compare.
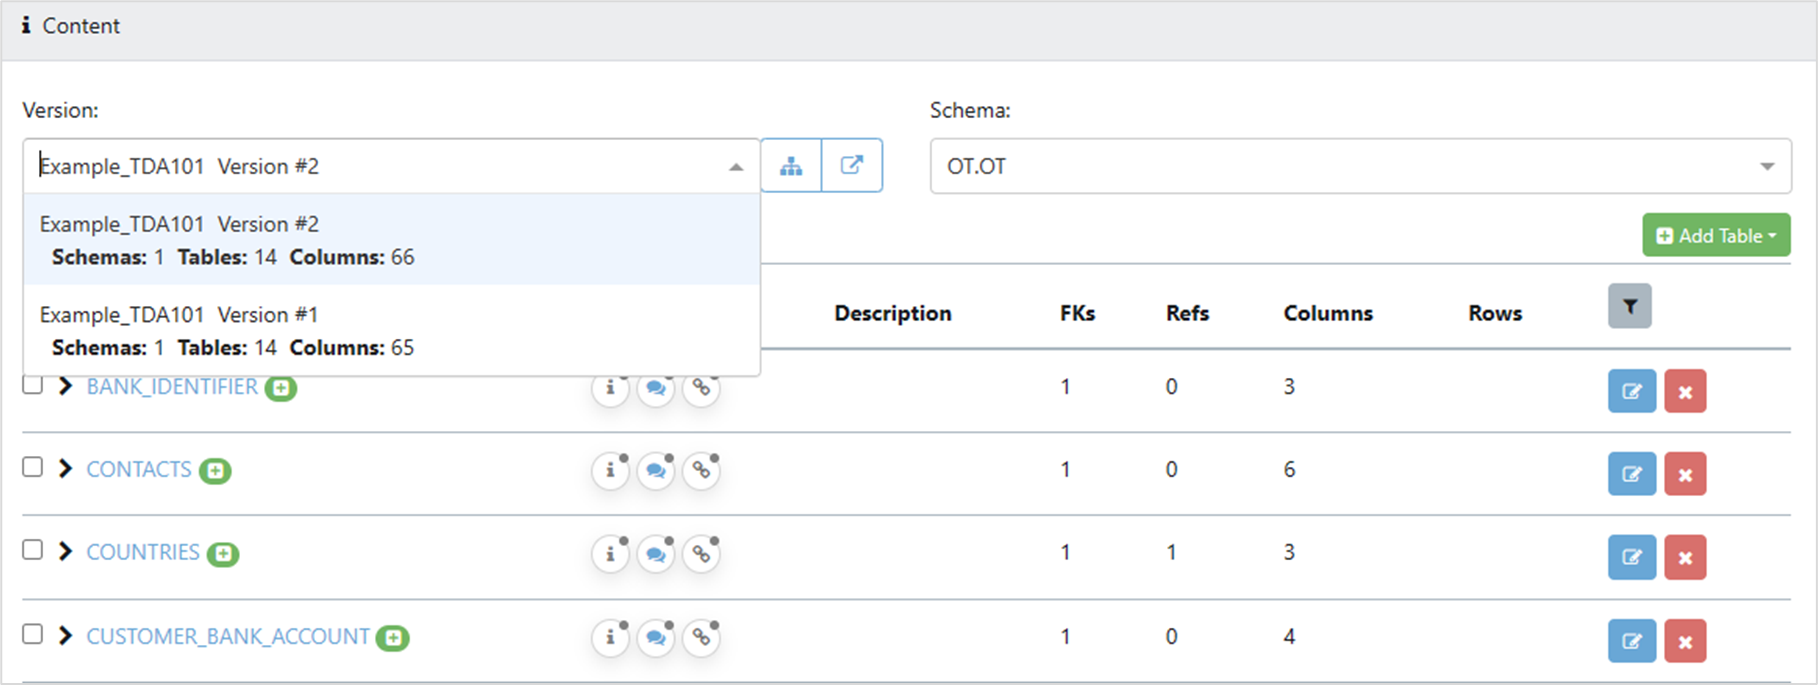
Back on the Definition Details pane, the Content section has a Version drop-down letting you select between the versions you have defined.