This article covers installing Quality Modeller on a Linux environment using Docker / Podman.
Note that this installation should be done before the Windows VIP installations
1 - Ensure Pre-Requisites are Complete
Please ensure that all the pre-requisites are complete prior to installation
1.1 System Requirements Met:
64-bit edition of Linux OS which conforms to Docker software requirements, or Podman.
64-bit Processor (i3 minimum – Intel Core i7 recommended, 4 vCPU's)
Minimum 16GB Ram (32GB Recommended)
Minimum 80GB Hard Drive FREE space
Port 9092 open for inbound communication.
Port 80 open for inbound communication if using HTTP
Port 443 open for inbound communication if using HTTPS
Please note: ARM Chip architecture is not supported.
1.2 Software Requirements Met
Docker installed on Linux machine (Instructions).
Docker Compose utility installed on Linux machine
Newer versions of Docker Desktop have Docker Compose utility bundled within them. See section 1.3 for verification instructions.
For older versions, Docker Compose utility will need to be installed separately (Instructions).
A utility for unzipping the docker installation package (e.g. unzip)
1.3 Check Software Requirement Using Environment Script
The installation package of the Quality Modeller server includes check-environment scripts. These are used to verify if the environment is ready for installation and provide warnings for any identified issues.
The script can be run on Linux as follows;
./check-environment.shAn example corresponding report can be seen below. Note this report identifies that our system has less than 16gb of RAM, and suggests we upgrade the system before continuing.

1.4 Copy File to Linux Server
A download link to a zip file with the exact version will be provided separately. Please contact support@curiosity.software for more information.
Please ensure that the provided zip file is downloaded, transferred to the Linux server and unzipped prior to an installation call.
The command to unzip is below (assuming that the version sent is 4.11.0.0):
unzip dockerDeployment_4.11.0.0.zip -d /opt/curiosity/4.11.0.0Common Blockers
We commonly see the below issues during installation:
Environment not provisioned
Insufficient disk space
Ports not open
Files not downloaded and unzipped prior to the meeting
Docker not installed
2 - Configuring The Quality Modeller Services
2.1 Basic Configuration
Open the .env file in the unzipped folder for editing.
Change the following environment variables:
Variable | Default | Replace with |
HOST_ADDRESS | localhost | The host name or IP address of the Linux machine. This will be the URL that Quality Modeller is accessed by in the browser. |
LIC_OWNER | The licence owner as provided by Curiosity. | |
LIC_KEY | The licence key as provided by Curiosity. | |
HOST_PROTOCOL | http:// | Default value is usually sufficient |
HOST_PORT | 80 | Default value is usually sufficient. |
HOST_POSTGRES_VOLUME | /data/postgres | Default value is usually sufficient. |
HOST_NEO4J_VOLUME | /data/neo4j/data | Default value is usually sufficient. |
2.2 Advanced Configuration
Please refer to the section on advanced configuration for more details, or contact your Curiosity representative.
3 - Start The Quality Modeller Service and Verify Deployment
3.1 Execute the run.sh script to load the containers and start up the services
Note: You may need to run these commands using sudo if your docker instance requires root privileges.
Note: It may take a few minutes for the application to fully start.
./run.shUse --help or -h to list the available options. Those options are also listed below.
./run.sh -hUse --config or -c with an argument, to use a configuration other than basic or custom. You would typically not need to specify this option. If you skip the --config option, it will look for a docker-compose-custom.yml file (see below for details), and if that exists, it will use it. Otherwise, the basic configuration will be used.
During the installation, there may be certain aspects of the configuration that need to be customized to the particular environment. This will typically be done with the help of the Curiosity team, and it will result in a new file called docker-compose-custom.yml which will be used by the run.sh script. The Quality Modeller package ships with several docker-compose-*.yml file templates to handle common configuration scenarios, which can be used as a basis for the docker-compose-custom.yml file to be created.
For example, if you want to use HTTPS but are unable to store the certificate and key in /nginx folder, you would copy the docker-compose-ssl.yml file into a new docker-compose-custom.yml file and change the location of the certificate. This new file will then be copied over (along with the .env file) when Quality Modeller is updated.
However, you can use the --config option to override the default behavior and use any other configuration file.
./run.sh --config basic|ssl|ad|ldaps|oidc|customBy default, basic is the only configuration that runs on HTTP - any other config, including custom, will assume the use of HTTPS. If you wish to use HTTP with any other configuration or if you wish to use a port other than the default 80 and 443, you will need to modify the .env file to add the following two lines:
HOST_PROTOCOL=http://
HOST_PORT=80
Use --detached or -d to run docker-compose in detached mode
./run.sh -d3.2 Navigate to Machine Host
Enter host URL into a browser - this is the value used in the .env file.
This should bring up Quality Modeller.

3.3 Verify You Can Sign in
Enter the following login credentials for the default administrator user:
Username: admin@testmodeller.io
Password: Admin01!
We recommend you change the password once logged in.
4 - Validating the Installation
We highly advise validating the functionality of the installation before granting access to any team members. In this section, we outline the steps to identify and ensure the proper functioning of the installation.
4.1 Validating Network Connectivity
The installation package includes two scripts, namely 'check-environment.ps1' and 'check-environment.sh', designed to validate the accessibility of Quality Modeller services from Windows and Linux environments, respectively. These scripts should be executed outside the installation machine to assess the network connectivity to the installed web services.
.\check-environment.ps1 -environment "external" -machine_url "http://machineinstance.com"Here is an example response which indicates the services are available over port 80 and 9092, but not over 443. Since we are not using HTTPs this is not an issue.

./check-environment.sh -e external -u "http:/machineinstance.com"Here is an example response which indicates the services are available over port 80 and 9092, but not over 443. Since we are not using HTTPs this is not an issue.

4.2 Validating through the Web User Interface
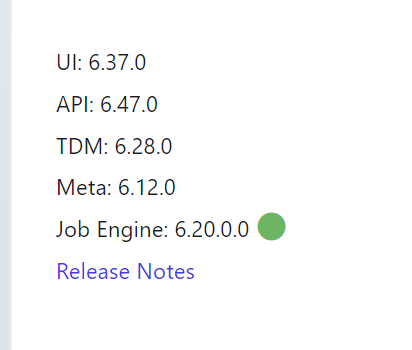
Check all the services are operational with the appropriate versions displayed.

We recommend you open a model in the UI and run the path generation to ensure that connectivity is working between all the services, and the ability to create / execute jobs in the portal.