In this tutorial, we'll cover configuring the Jira Cloud Connector.
Step 1 - Add Jira Connector
- Navigate to Management → Connectors.
- Click Add Connection and select one of the following options based on your needs:
- JIRA Cloud - Tests (for test-related imports/exports)
- JIRA Cloud - Requirements (for requirement-related imports/exports)
Step 2 - Configure Jira Connector Credentials
Once the connector is added, navigate to the Connection tab and enter the following details:
- URL: The URL of your Jira instance.
- Example:
https://curiositydemo.atlassian.net/
- Example:
- Username: Your Jira account username.
- API Key: The API key associated with your Jira workspace.
- Refer to Atlassian’s documentation for instructions on generating an API key.
- Project Key: This field populates automatically after entering your credentials. Select the Jira project you want to import from or export to.
- Issue Type: This field also populates automatically after entering your credentials. Select the Jira issue type you want to import from or export to.
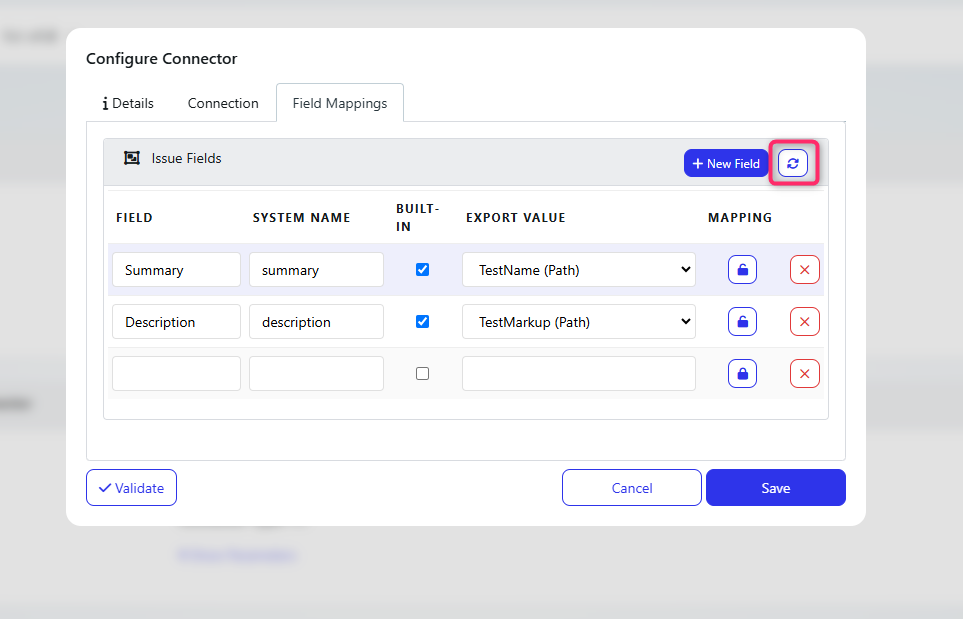
Step 3: Configure Field Mappings
- Open the Field Mappings tab.
- Select the Export Type. Available Jira issue types include:
- Master Story
- Sub-Tasks
- Separate Tickets
Once an issue type is selected, the following fields can be mapped:
- Attribute: The name of the Jira attribute.
- Internal Name: The internal Jira object name.
- Built-In: Indicates whether the value is predefined.
- Mapped Value: The corresponding mapped value for the attribute.
Synchronizing Fields
A Synchronize button is available on the right-hand side. Clicking this button retrieves all issue fields from the selected Jira project and issue type, automatically updating the connector with the latest field data.
There is also a Synchronize button on the right hand side that allows users to pull all issue fields from the specific Jira project and issue type into the connector.