Create a Requirements Model from a User Story or from Scratch
Create a Requirements Model from a User Story or from Scratch
Article summary
Did you find this summary helpful?
Thank you for your feedback
In this documentation article, learn how to create a Requirements Model from a user story or from scratch in Quality Modeller.
In the Explorer tab of the menu, click on New Model:

Give the new Model a name and click on Next step:

Select the Requirement model type and click on Next step:

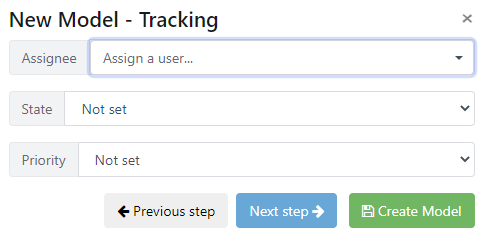
On the New Model - Tracking dialogue, you can set an assignee, an Agile/Kanban state and a priority. Click on Next Step:
On the New Model - Import Requirement dialogue, you can enter an Agile User Story or Gherkin script. Click Create Model:
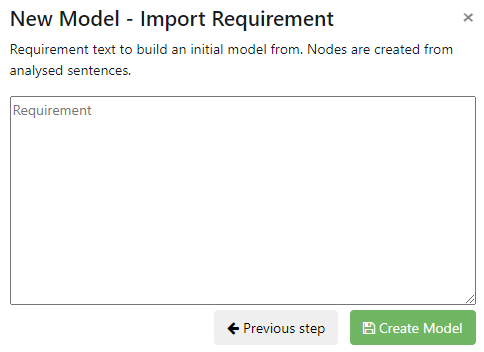
If you leave the Requirement dialogue blank, the following will occur:
1. Quality Modeller creates the model and marks it as a Requirements type. Click on it to open it.

2. Modeller automatically creates an Agile User Story flow for you to complete.

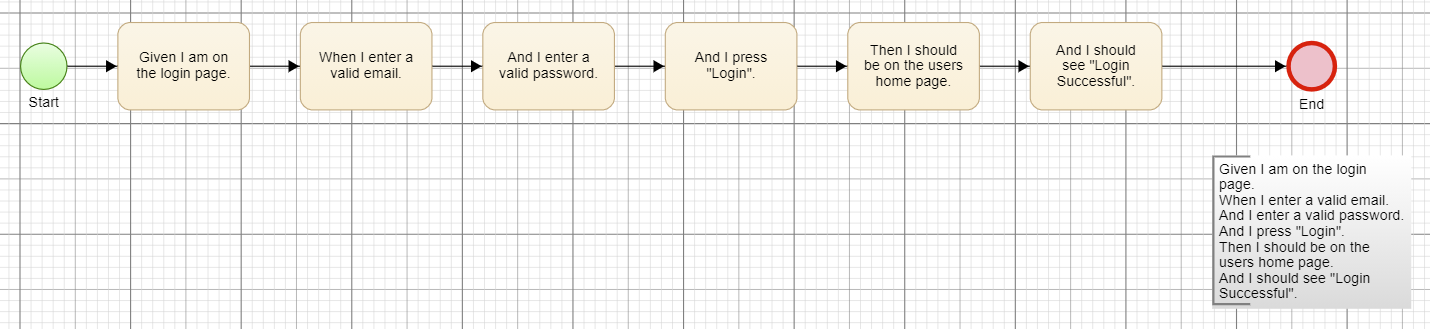
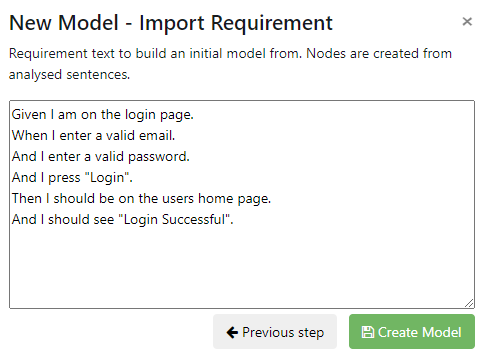
If you fill in the Requirement dialogue as below (note the full stops at the end of each line):
When you create and open the model, Quality Modeller will create a flow based on your requirements: